One of the best ways to show off your photos and relive memories is with a slideshow. By adding subtle photo effects and background music you can create a meaningful and memorable show.
Using the Apple Photos app, you can put together a photo slideshow in just minutes. Then, watch, save, or share it with friends and family. If you’re ready to do something unique with your pictures, here’s how to create a slideshow on Mac.
Select Your Photos
To get started, open the Photos app on Mac and start selecting your pictures. Don’t worry, you can always add more later if you miss one or two. You can choose photos from your library, an album, or a shared album.
- For nonadjacent photos, choose the first one and hold Command as you select the rest.
- For adjacent photos, choose the first photo, hold Shift, and then select the last photo in the range.
- For all photos in an album, press Command + A.
The group of photos you pick will be highlighted.
Create the Slideshow
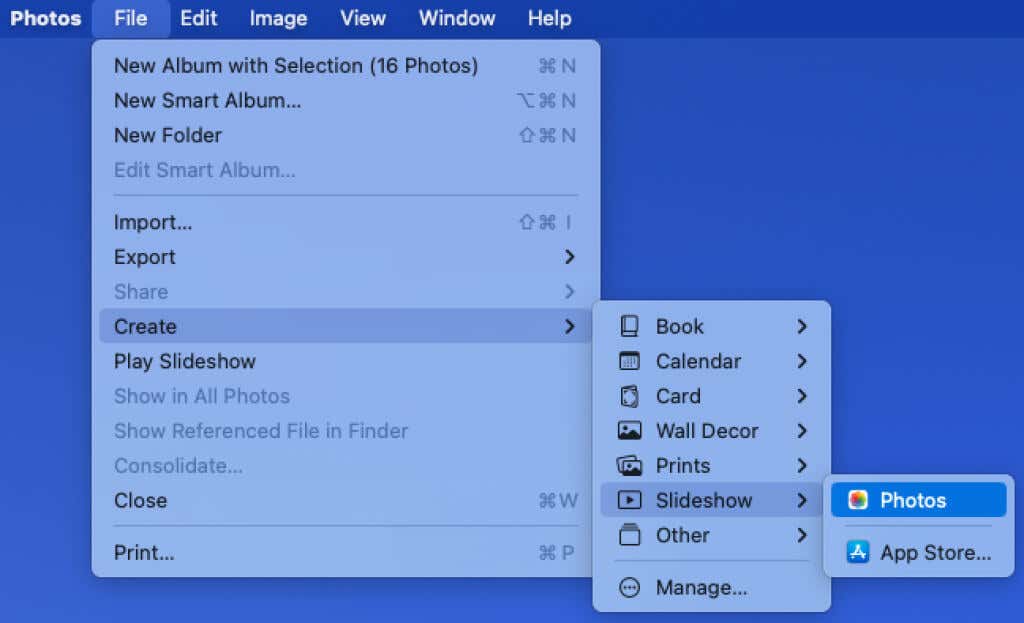
Go to the menu bar and open the File menu. Move to Create > Slideshow and pick Photos in the final pop-out menu.
Choose New Slideshow in the drop-down list, give your slideshow a name, and select OK.
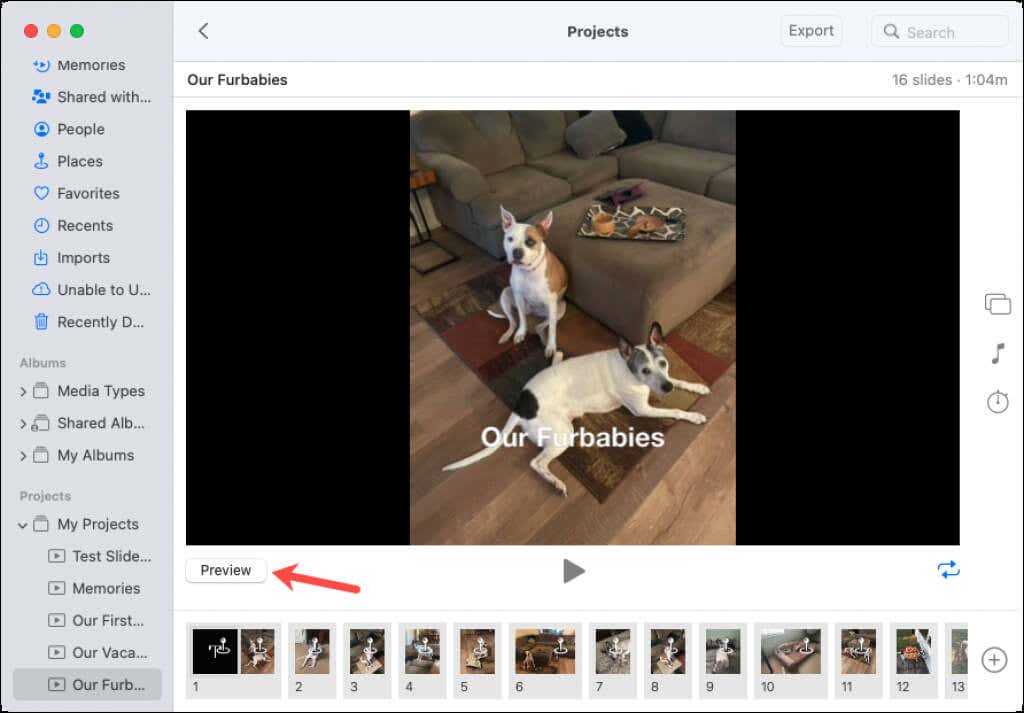
You’ll then see your slideshow in a workspace in the Photos app. Select the Preview button to see a preview of the show in the app’s window.
To see the slideshow in full screen mode, press the Play button.
Customize the Slideshow
You can add or remove photos, apply a theme, insert text, include music, and more to make a one-of-a-kind video slideshow.
Add, Remove, or Rearrange Photos
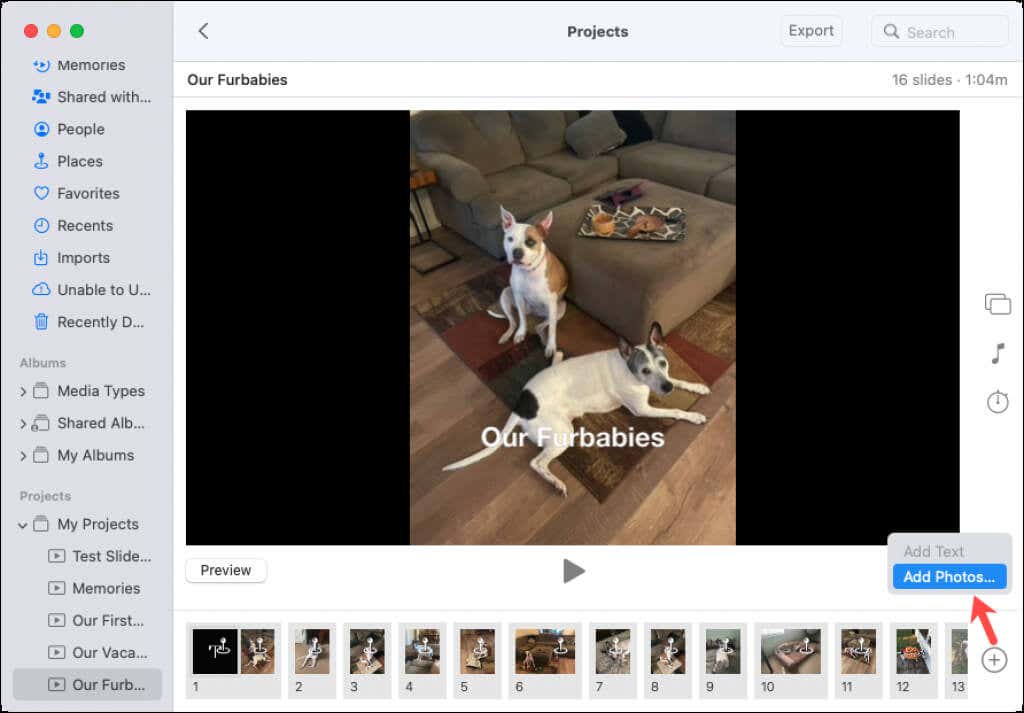
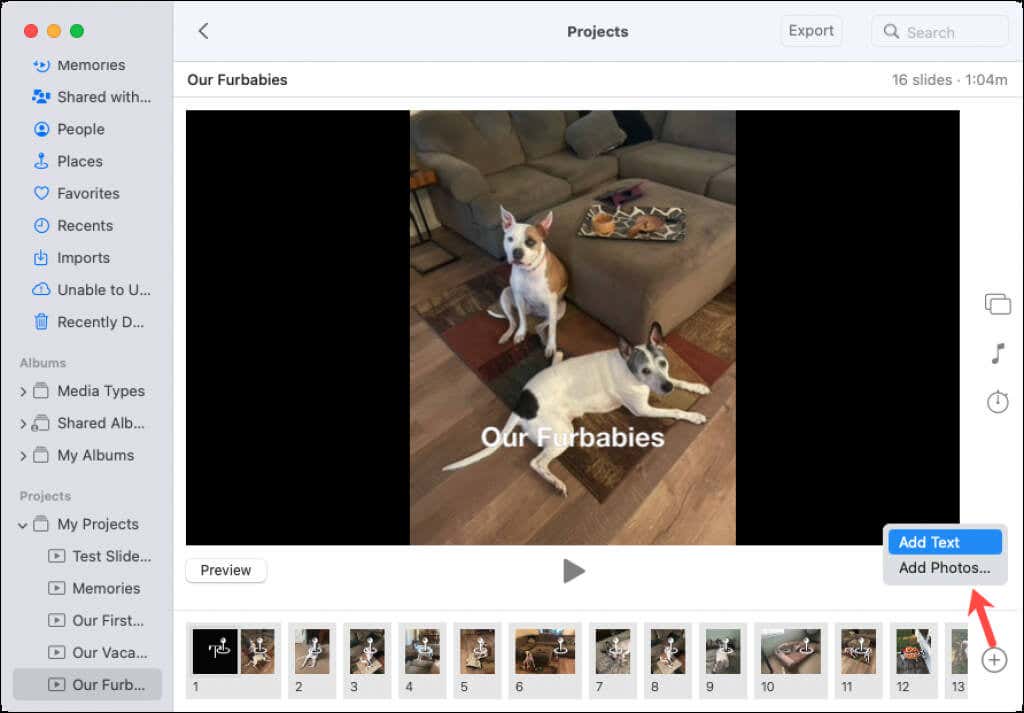
At the bottom, you’ll see thumbnails of the pictures you’ve selected. To add more, select the plus sign on the right and choose Add Photos.
To remove a picture, right-click it or hold Control and click. Then, pick Delete Slide from the shortcut menu.
If you want to reorder the photos (slides), simply select and drag them to the spots you want.
Apply a Theme
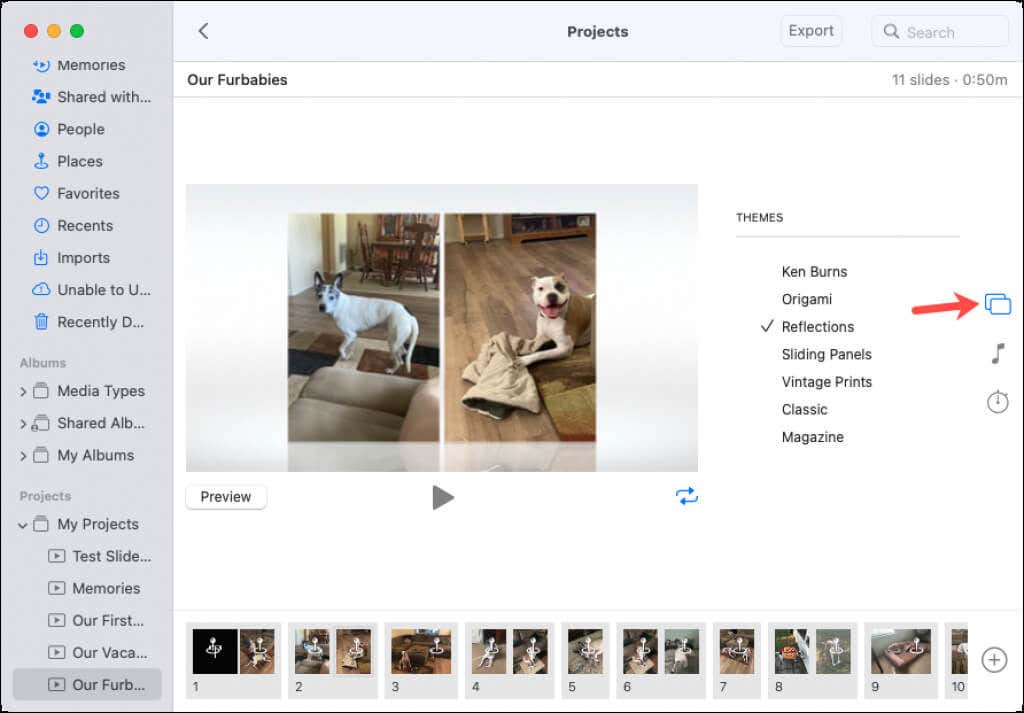
You can pick from several themes for your show like Ken Burns, Reflections, and Vintage Prints. This gives you transitions for displaying the photos and includes music.
Note: You can choose different music if you like, which we’ll explain below.
Select the Theme Picker icon on the right. Pick a theme and then press Preview to see the theme’s effects and hear its music.
You can choose each theme to see and hear the preview. When you land on the one you want, be sure you select it, and you’ll see a checkmark next to it.
Choose Different Music
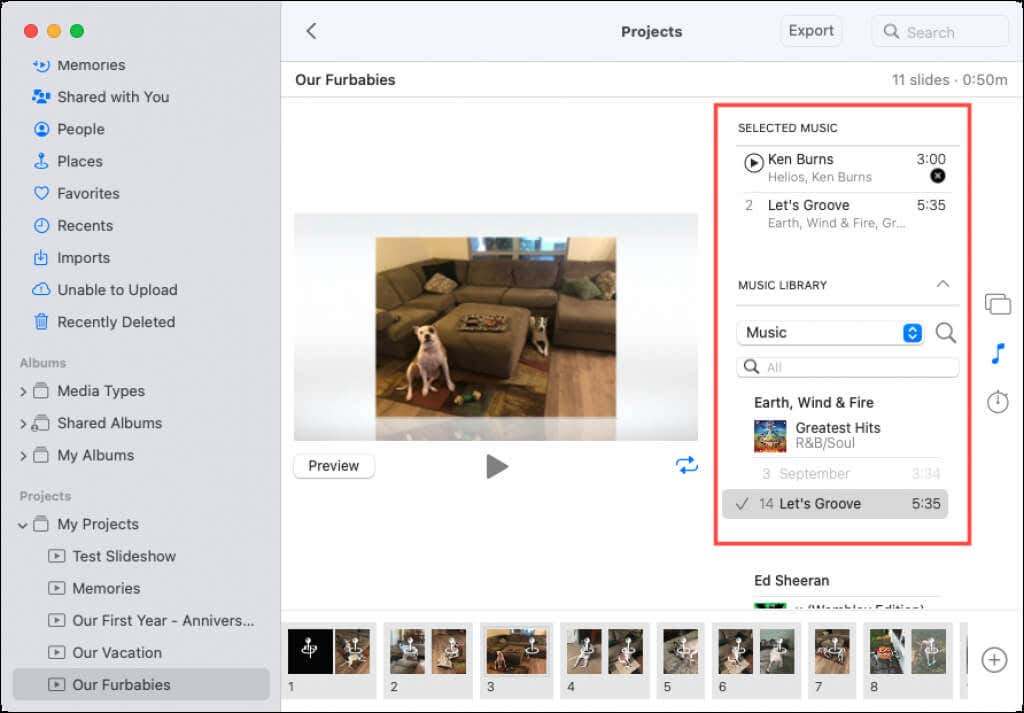
If you prefer to use music of your own rather than what the theme gives you, select the Music icon on the right.
You’ll see the theme’s song at the top below Selected Music. To remove the song, hover your cursor over it and select the X to the right. Then to use your own, expand Music Library.
Browse for a song from your Apple Music library or use the Search field to find a specific one. When you find the song you want, select it. It then appears at the top below Selected Music.
You can add several songs if you have a lengthy slideshow or just one. It’s all up to you.
Select the Slideshow Duration
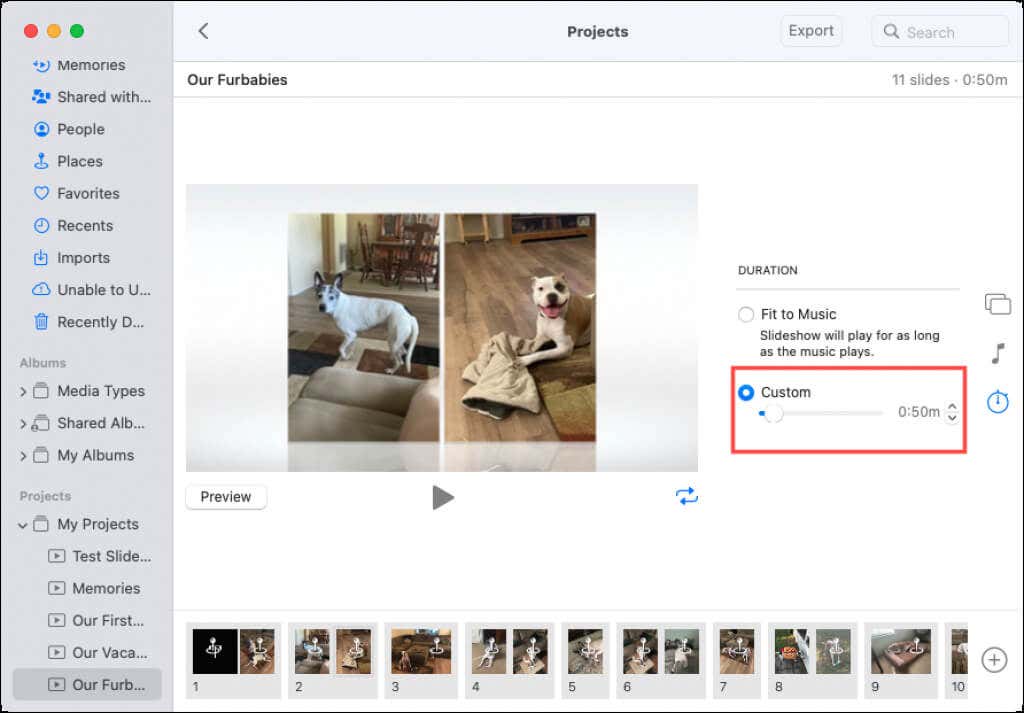
If you want your slideshow to only play as long as the music you choose, you can pick that option next. But you can also choose how long you want the show to be regardless of the music.
Select the Duration Settings icon on the right. You can pick Fit to Music to have the duration of the show match the music.
Alternatively, pick Custom and use the slider or box to choose an exact duration. You can see the current duration based on the number of photos you have here as well as at the top of the window.
No matter which type of duration you choose, all of your photos are included in the show. The Photos app displays each one for the appropriate amount of time depending on how long the show is and how many photos it includes.
Add a Text Slide
You can insert slides that contain text and place them in your slideshow where you like. This is a good way to break up the show into sections, explain the upcoming photos, or simply add something fun or meaningful.
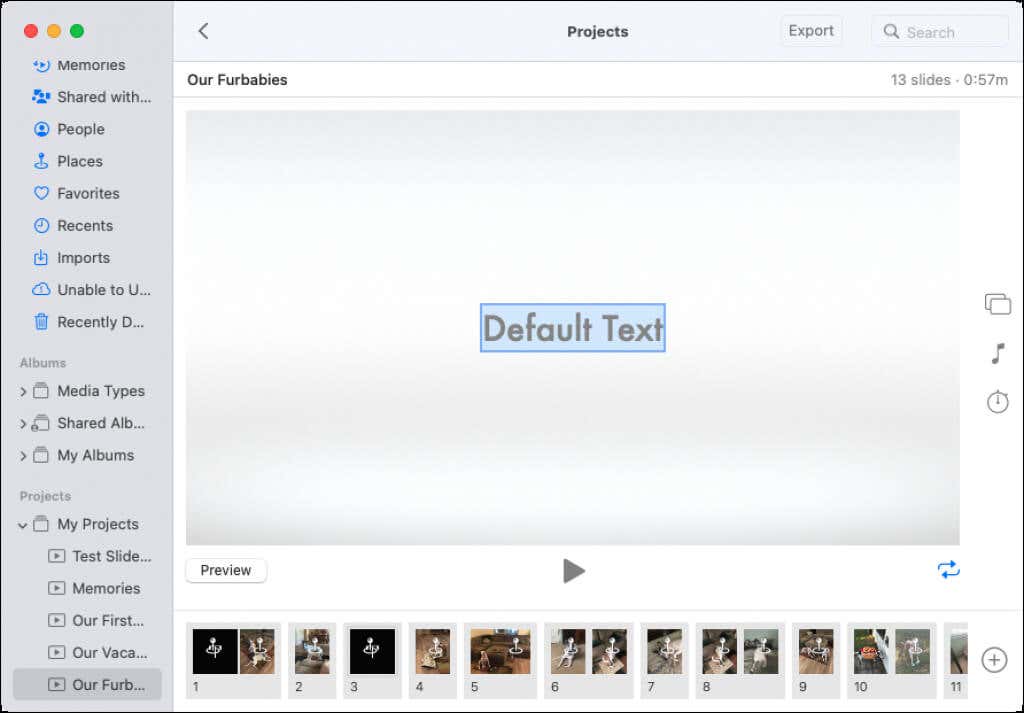
Use the plus sign on the bottom right to pick Add Text. You’ll see a text slide inserted into your show.
Select the text box that displays on the slide in the preview and enter the text you want.
You can move a text slide at the bottom just like rearranging the photos. Simply drag the slide to the spot you want.
Loop the Slideshow
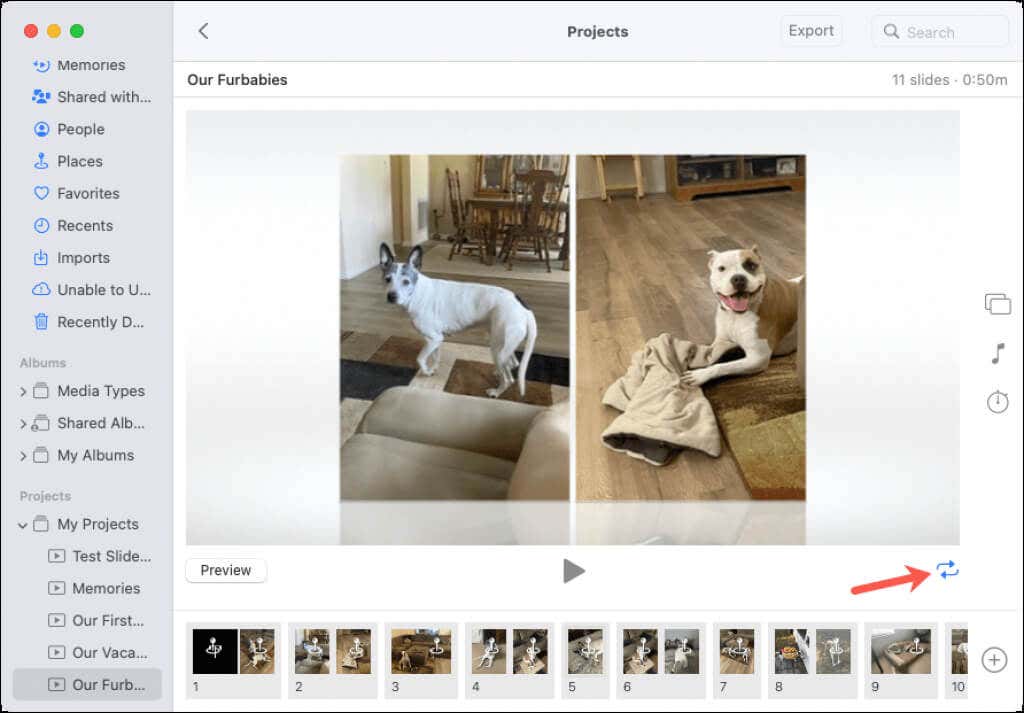
One final setting you can use for your slideshow is the loop. If you want to loop your slideshow so that it starts at the beginning automatically when it ends, select the Loop Slideshow icon on the bottom right of the preview.
Access and Play the Slideshow
Once you create your slideshow, you’ll see its name in the left-hand sidebar in the Projects section.
Select the slideshow and then press the Play button below the preview to display the show in full screen mode.
As the show plays, you can control it using the floating toolbar. The toolbar hides as the slideshow plays. To unhide it, simply move your mouse or trackpad. You can then control the volume, move forward or back, or pause the slideshow.
To stop playing your slideshow, select the X on the right side of the toolbar.
Export the Slideshow
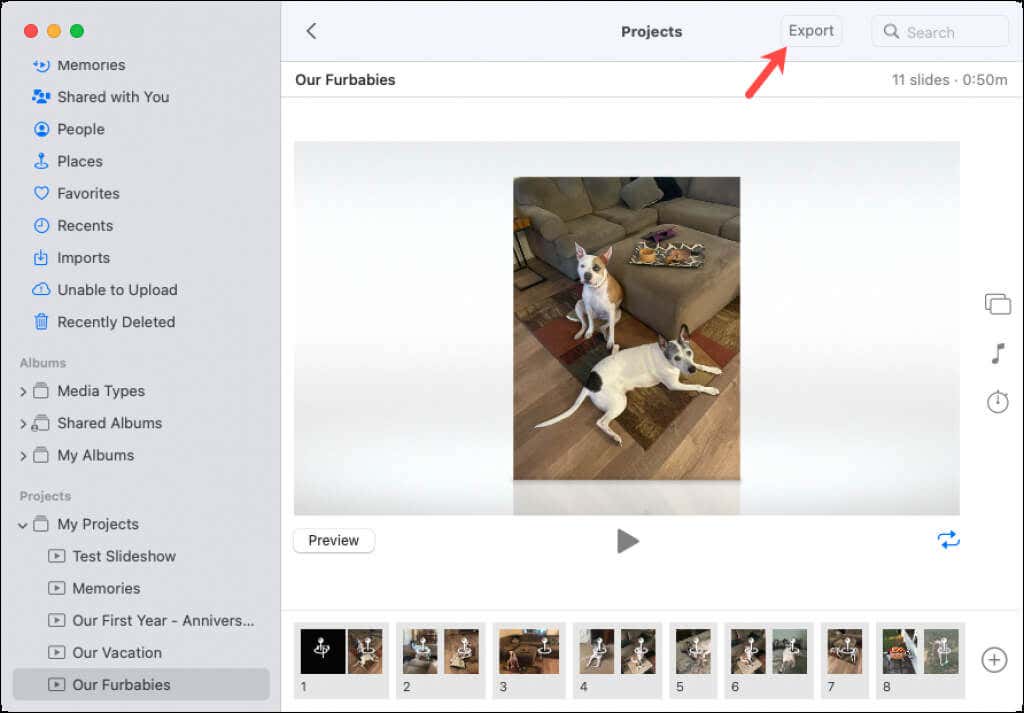
To share your show or create a backup of it, you can export it. Open the slideshow and select the Export button at the top of the Photos app window.
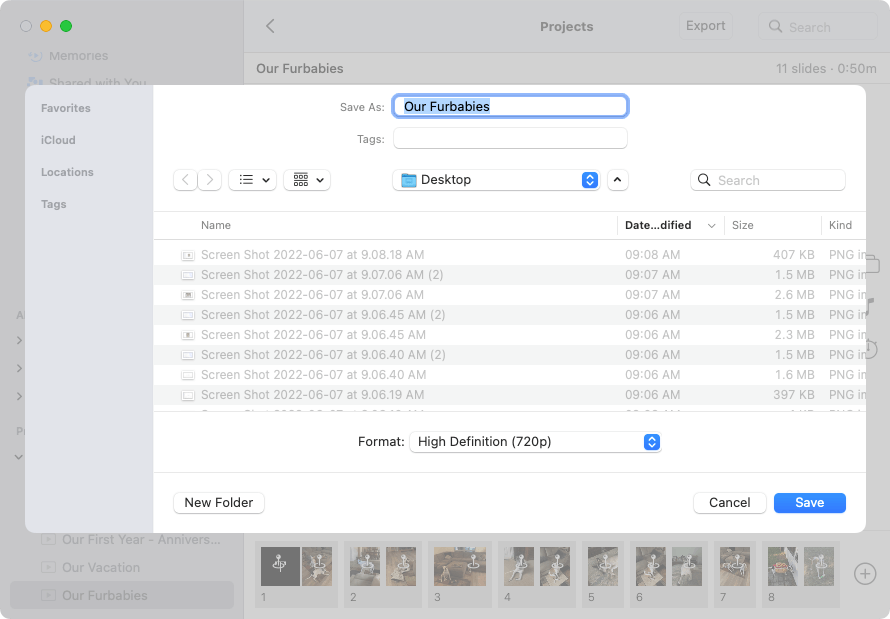
Choose a location to save the slideshow and give it a new name if you like. Select Save and the slideshow file appears in the location you pick as an M4V file.
Now that you know how to create a slideshow on Mac with the Photos app, take advantage of this terrific built-in feature and make a show of your own!
[related_posts_by_tax posts_per_page="5"]
