There are many situations when you might need to share files on your Mac with other users. One sure way to exchange files between computers is to set up a shared folder that another Mac user or a Windows user will be able to access.
Aside from being able to share files and folders with others, you can edit file sharing permissions to only give read access to some users and read and write access to others. Learn how to create a shared folder on macOS to easily share your files with others.

How to Enable File Sharing on macOS
Before you can create and use a shared folder, you need to turn on file sharing on your Mac. To do that, follow the steps below.
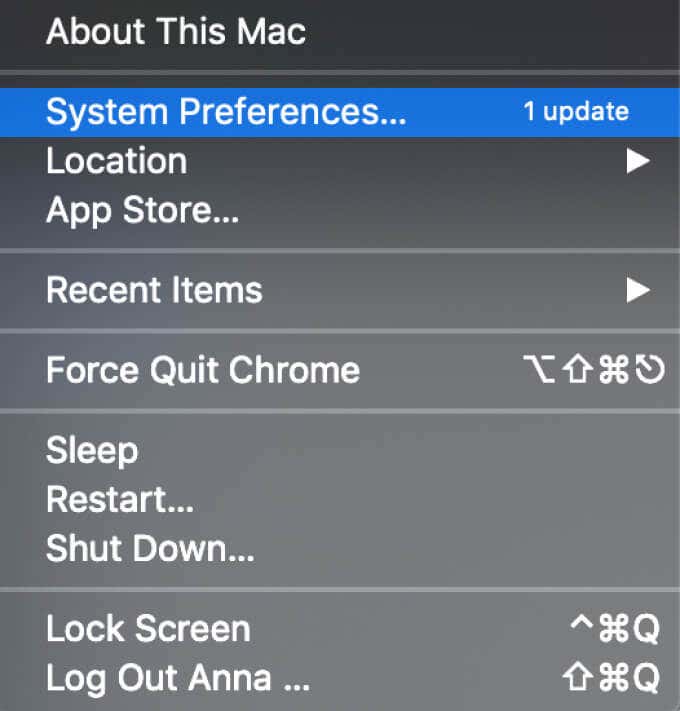
- Open the Apple menu on your Mac.
- From the drop-down menu, select System Preferences.
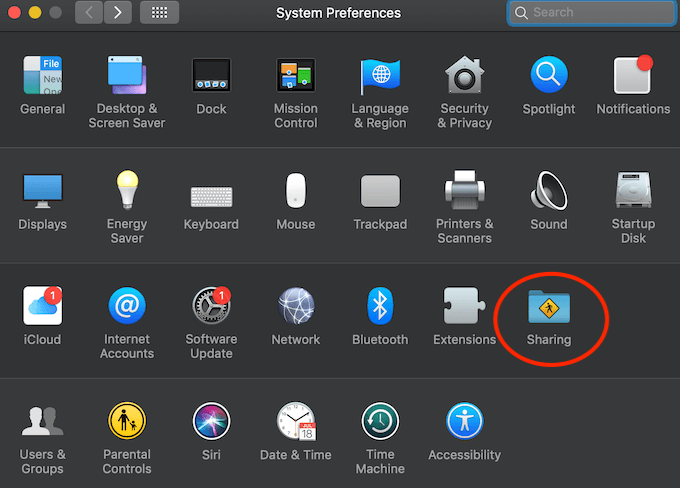
- Select Sharing.
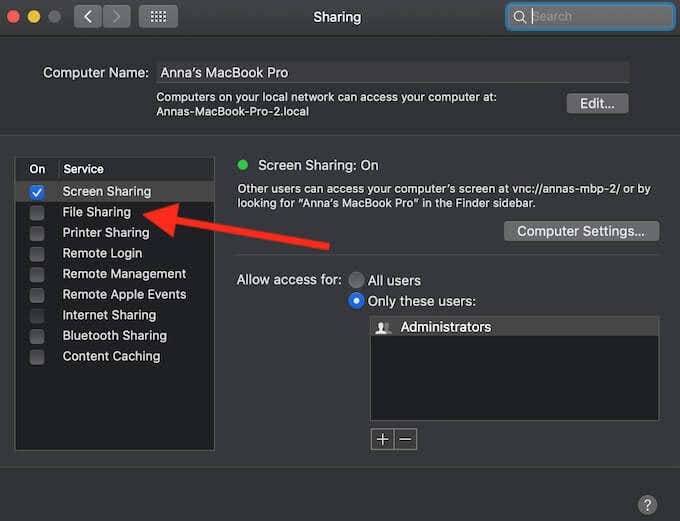
- In the Sharing dialog box, under Service, select the File Sharing checkbox.
You’ll see a message File Sharing: On appear in the dialog box, meaning the file-sharing is now enabled on your Mac. Right next to it you’ll find the network address of your computer. That’s very useful information that you or other users will need when accessing a shared folder.
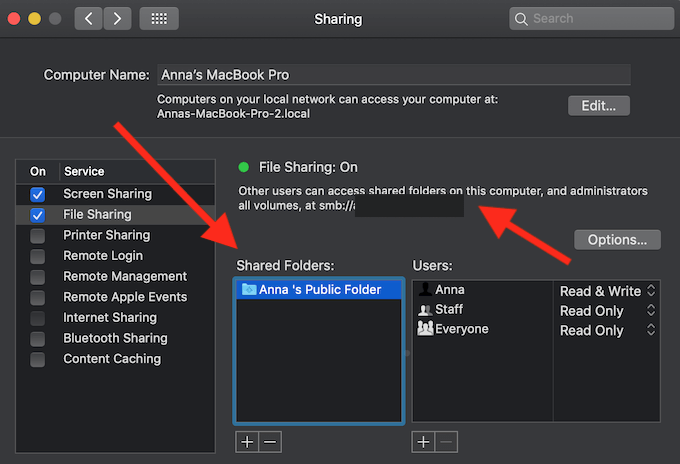
Under the message, you’ll also see a Public Folder with your username that’s automatically shared on your Mac. If you don’t want to share it with others, select it under Shared Folders and select the – icon to remove it from the list. You can then close the Sharing dialog box, as well as the System Preferences window.
How to Create a Shared Folder on macOS
Once you enable file sharing on your computer, you can create a shared folder for other users to access. Make sure you’re logged in on your Mac as an administrator for this. To create a shared folder on macOS, follow the steps below.
- Open Finder, right-click and select New Folder to create a folder you’d like to share with other users. It’s recommended to avoid spaces and any punctuation symbols in the folder’s name.
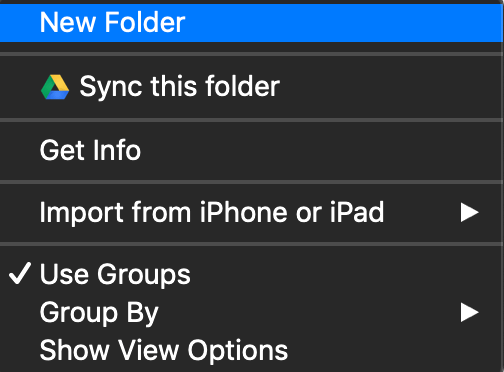
- In Finder, right-click the folder you just created and select Get Info.
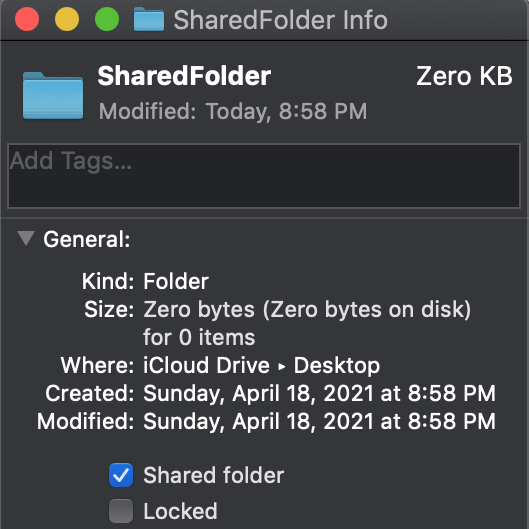
- Under General, select the Shared folder checkbox.
Now, if you go back to the Sharing dialog box in your computer’s System Preferences, you’ll find your folder in the Shared Folders list. Now you and other users can access your shared folder from both Windows PC and Mac. You can add or remove files from the shared folder at any time.
How to Set Up File Permissions
You can use the shared folder method to give another user access to your files, exchange files with other users, or receive files from others. Depending on your goals, you might want to specify the amount of access that you want to give another user when sharing your files with them. To set up file permissions, follow the steps below.
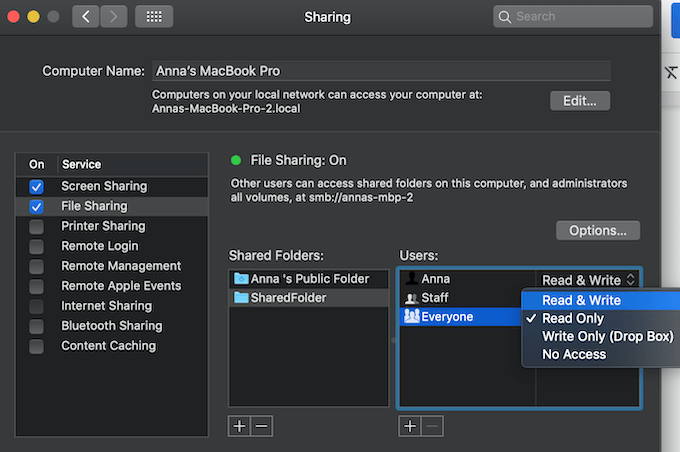
- Open the Sharing dialog box by following the path Apple menu > System Preferences > Sharing.
- Under Users, select the user from the list that you want to edit file permissions for.
- Next to the username, you can select one of the following options:
- Read & Write: The selected user can both open and copy files to and from the shared folder.
- Read Only: The user can only view and open the contents of the shared folder but can’t copy files to and from the folder.
- Write Only (Drop Box): The user can only copy the files to and from the folder but can’t open them.
- No access: The user can’t view or copy files to or from the shared folder.
Your choice will be automatically saved. Once you’re happy with the set permissions, you can close the Sharing dialog box.
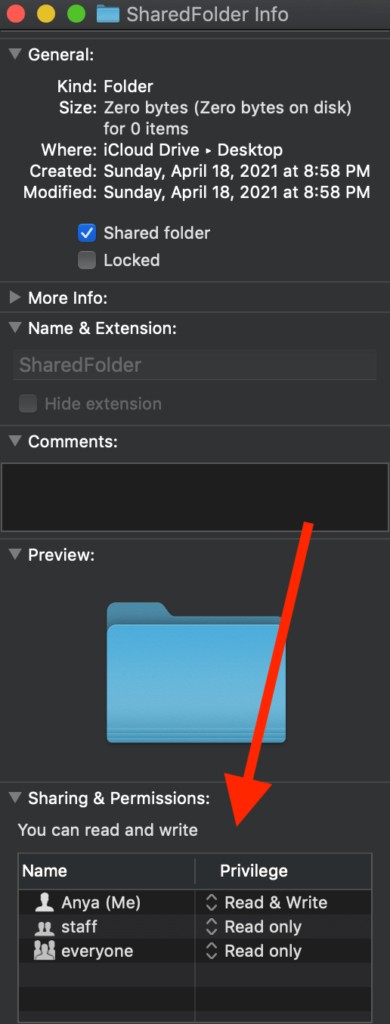
You can also change the file permissions of your shared folder in the Info section. To do that, follow the path shared folder > Get Info > Sharing & Permissions.
Use a Shared Folder to Exchange Files with Others
Using a shared folder is a convenient way to exchange or transfer files from one computer (or user) to another. This method works when you need to create and connect to a shared folder on macOS. If your shared folder is located on a Windows computer instead, there’s a way to connect to it from macOS as well.
Have you tried creating a shared folder before? What did you use it for? Share your experience with exchanging files via shared folders in the comments section below.
[related_posts_by_tax posts_per_page="5"]