Time-consuming but not too difficult
If your Mac’s recovery partition is damaged or you want to install macOS on an additional volume, a bootable USB drive can be handy. Luckily, setting up a flash stick to boot into macOS Recovery is not difficult, so long as you know how.
In this tutorial, we’ll walk you through what you must do to download macOS and use that to create a bootable installer. We’ll also teach you how to boot a Mac computer with a flash drive.
Download a macOS Installer File
To create a bootable USB installer drive for your MacBook, iMac, or Mac mini, you need a full installer file for macOS, which you can get through the Mac App Store. However, the version you’re downloading depends on what you’re attempting to accomplish.
For example, to have a bootable USB in case something goes wrong with the operating system, download the version that matches what you already have installed on your Mac. To clean install an earlier iteration of the system software or troubleshoot macOS on another Mac, download the installer for that specific version.
Note: Modern macOS installers typically weigh around 10-15GB, so ensure you have adequate space on your Mac’s hard drive or SSD before you begin.
Downloading the macOS installer for the same operating system version you’re currently running is relatively straightforward. Just:
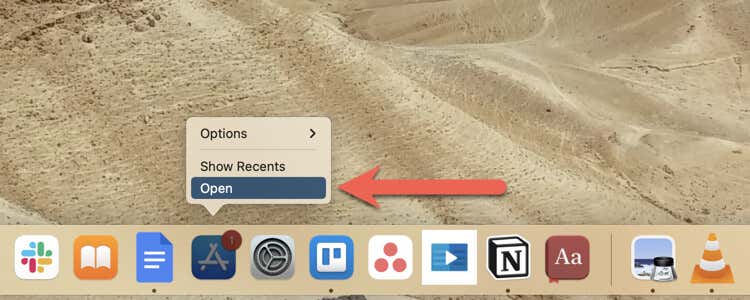
- Open the Mac App Store.
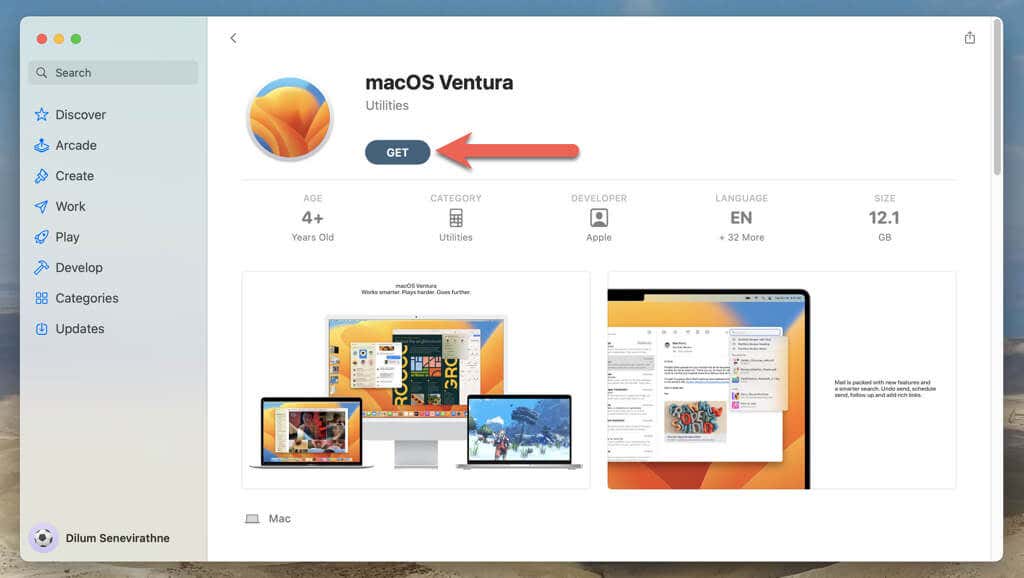
- Search for the macOS version, e.g., Ventura, and select Get.
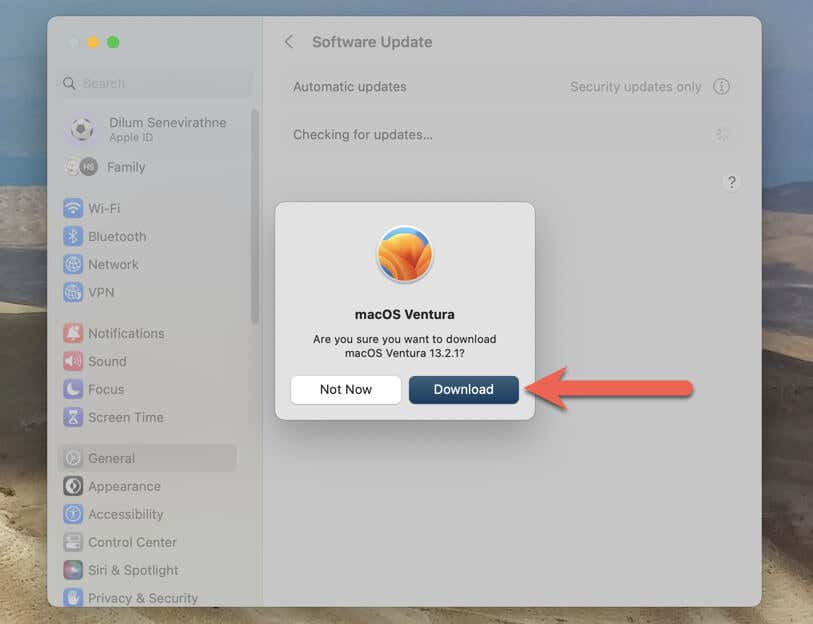
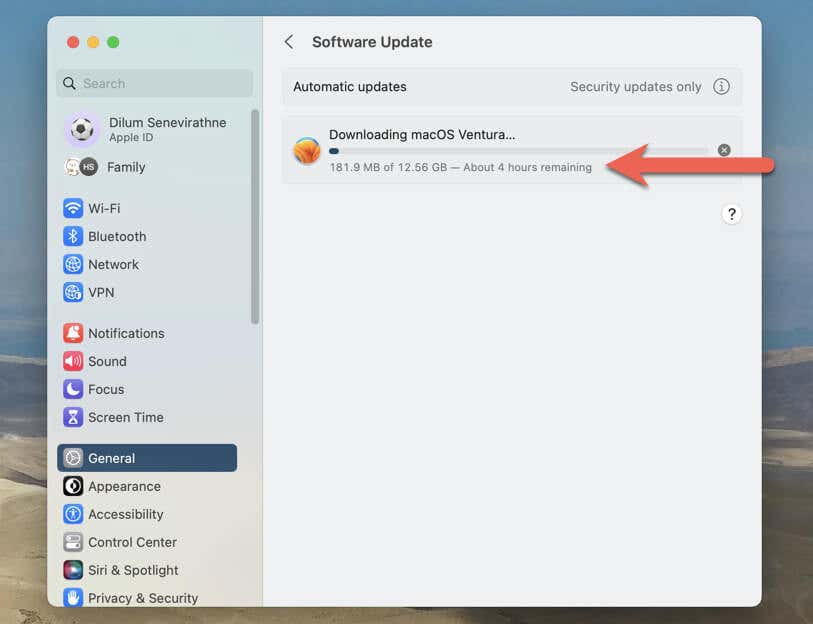
- The Software Update pane should automatically appear—select Download.
Note: If there are any pending updates for your Mac, expect Software Update to install them first. You must then repeat the steps above to re-download the macOS installer.
- Wait until Software Update downloads the macOS installer to your Mac’s Applications folder. The time remaining depends on the speed of your internet connection.
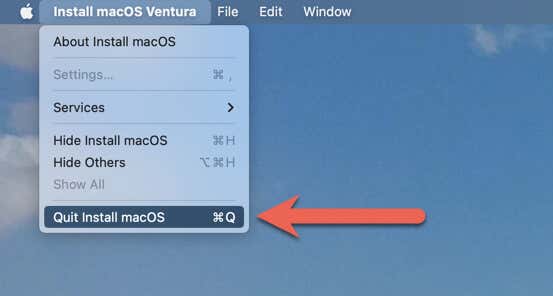
- The installer will automatically launch—select Install macOS Monterey > Quit Install macOS on the menu bar to quit it.
If you want to download the installer for an older macOS version, searching for it on the Mac App Store won’t work. Instead:
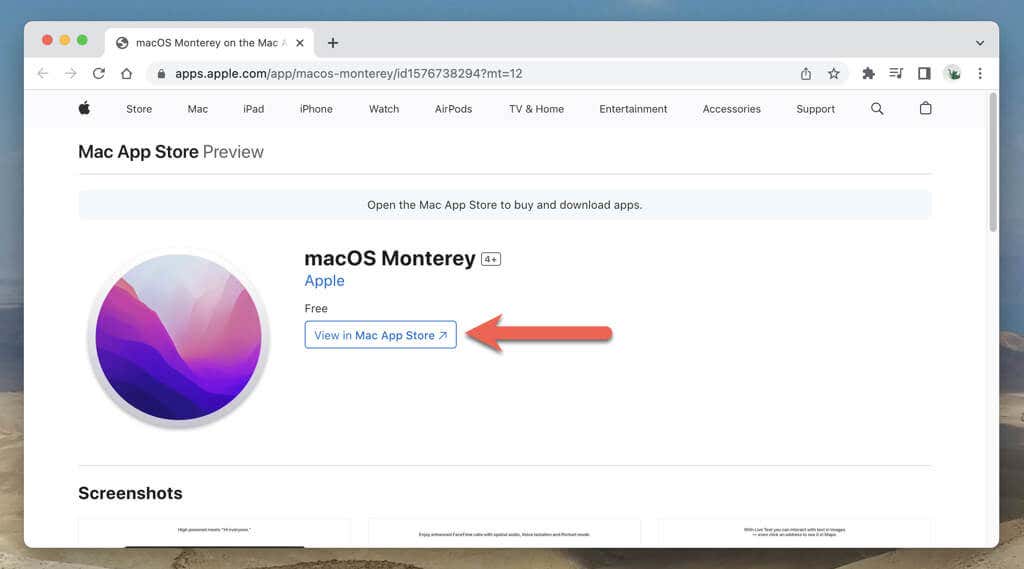
- Select the download link below for the macOS version you want to download.
- On the Mac App Store Preview page in your web browser, select View in Mac App Store.
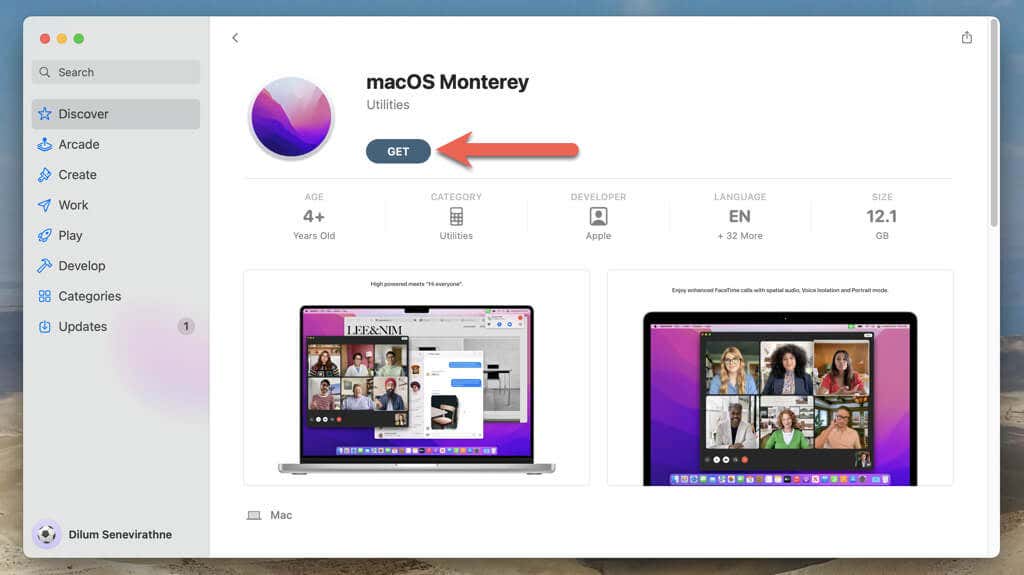
- Select Get > Download to download the macOS installer to your Mac’s Applications folder.
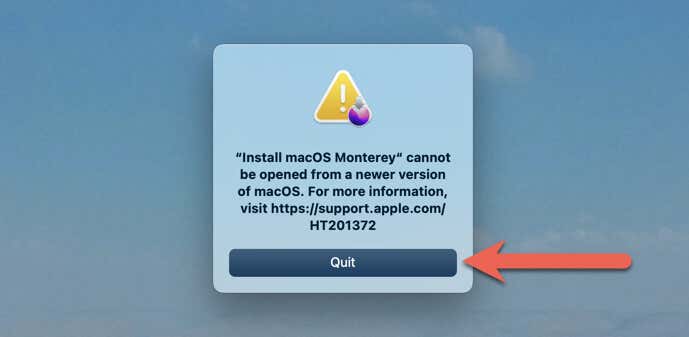
- After the Software Update tool finishes downloading, you’ll encounter a compatibility error—select Quit.
Create macOS Bootable USB Installer
Now that you have the macOS installer on your Mac’s Applications folder, creating the bootable USB drive is just a matter of running a Terminal command. However, the flash drive should have a storage capacity of at least 16 gigabytes; anything below that won’t work.
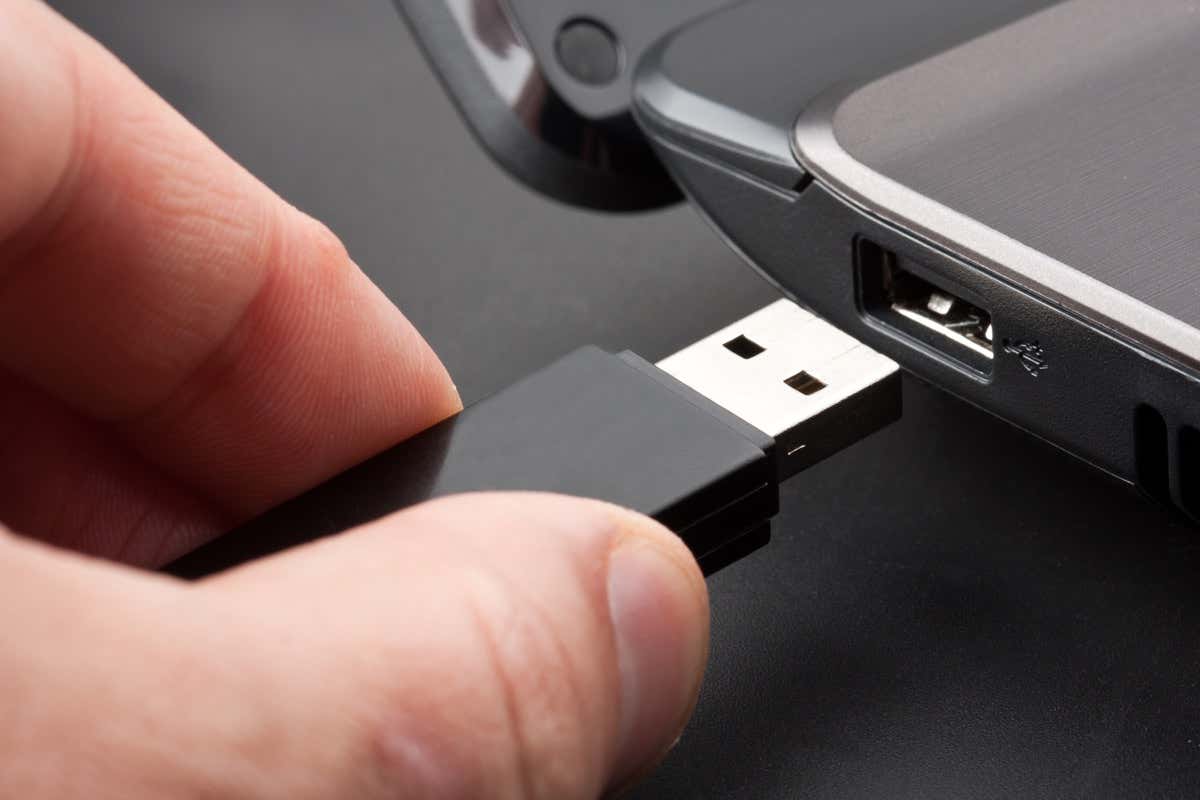
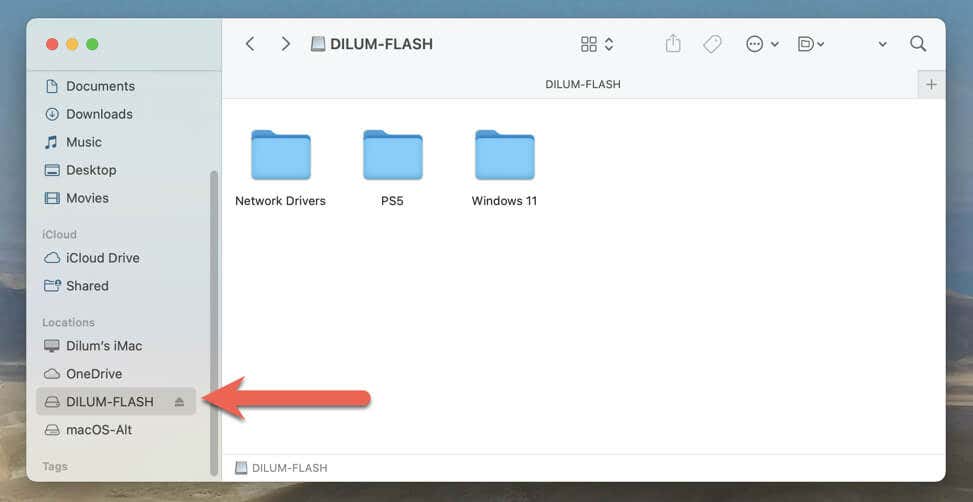
- Plug the USB stick into your Mac, open Finder, and note down the drive’s name on the sidebar.
Important: The bootable USB creation procedure erases the data inside the drive, so back up anything important before moving on to the next step.
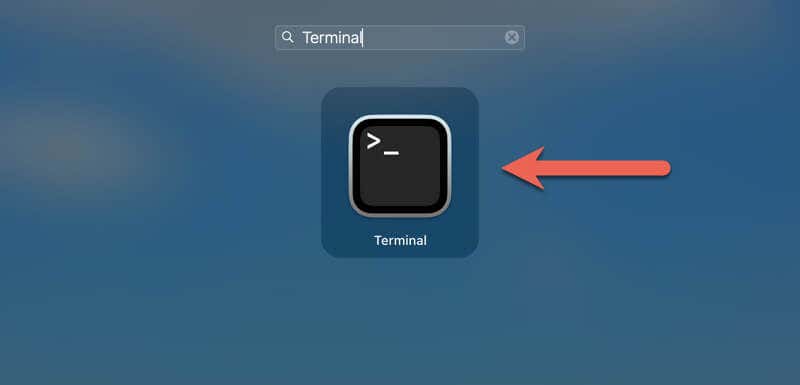
- Open the Launchpad and select Other > Terminal to open Mac’s command-line interface.
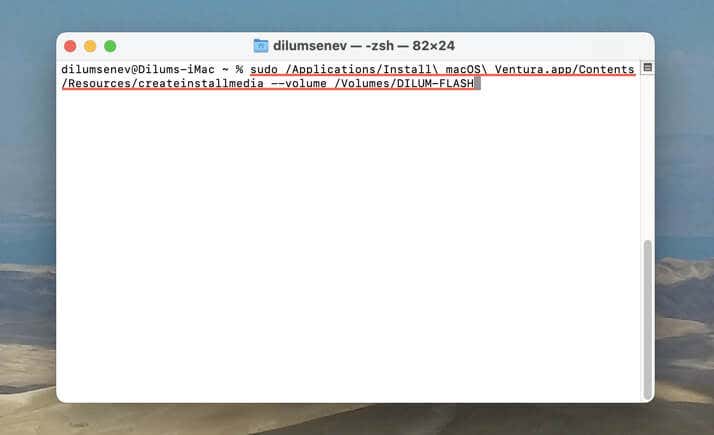
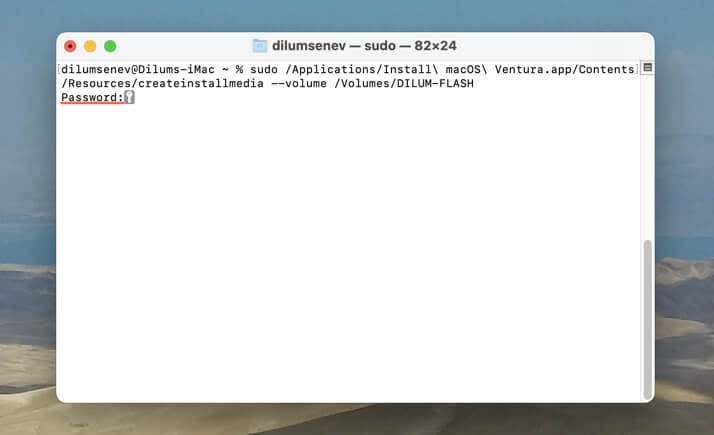
- Execute the command from the list below that matches the macOS installer file you downloaded, replacing MyVolume at the end with the name of your USB drive:
- Ventura: sudo /Applications/Install macOS Ventura.app/Contents/Resources/createinstallmedia –volume /Volumes/MyVolume
- Monterey: sudo /Applications/Install macOS Monterey.app/Contents/Resources/createinstallmedia –volume /Volumes/MyVolume
- Big Sur: sudo /Applications/Install macOS Big Sur.app/Contents/Resources/createinstallmedia –volume /Volumes/MyVolume
- Catalina: sudo /Applications/Install macOS Catalina.app/Contents/Resources/createinstallmedia –volume /Volumes/MyVolume
- Mojave: sudo /Applications/Install macOS Mojave.app/Contents/Resources/createinstallmedia –volume /Volumes/MyVolume
- High Sierra: sudo /Applications/Install macOS High Sierra.app/Contents/Resources/createinstallmedia –volume /Volumes/MyVolume
- Sierra: sudo /Applications/Install macOS Sierra.app/Contents/Resources/createinstallmedia –volume /Volumes/MyVolume –applicationpath /Applications/Install macOS Sierra.app
- El Capitan: sudo /Applications/Install OS X El Capitan.app/Contents/Resources/createinstallmedia –volume /Volumes/MyVolume –applicationpath /Applications/Install OS X El Capitan.app
- Yosemite: sudo /Applications/Install OS X Yosemite.app/Contents/Resources/createinstallmedia –volume /Volumes/MyVolume –applicationpath /Applications/Install OS X Yosemite.app
- Enter your Mac administrator password and press Return.
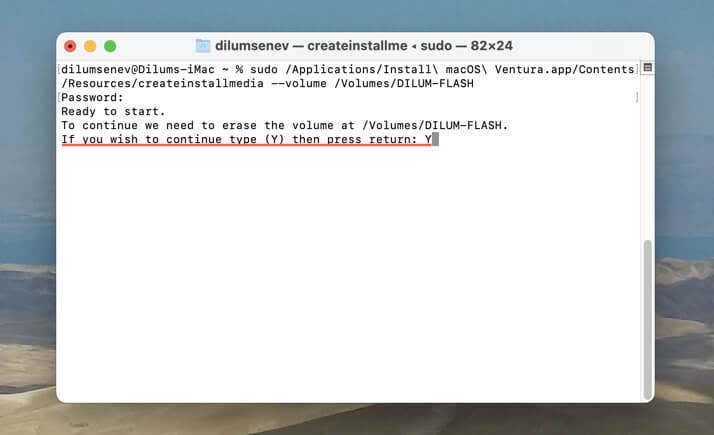
- Press Y and select Return.
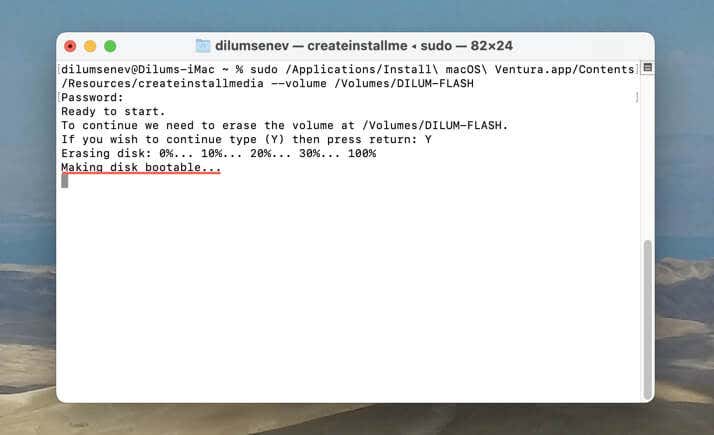
- Wait until the Terminal creates the USB drive.
- Exit the Terminal, open Finder, and eject the USB flash drive.
Use the Bootable macOS USB Installer
You can immediately begin using the USB installer on your Mac or another macOS device (assuming the system software version is compatible with the device). The process differs between Intel and Apple silicon CPUs.
Boot Intel Mac via USB
- Restart your Mac.
- Hold down the Option key at startup.
- Select the bootable USB on the startup disk selection screen.
Boot Apple Silicon Mac via USB
- Shut down your Mac.
- Turn on the device while holding the Power button.
- Select the bootable USB on the startup options screen.
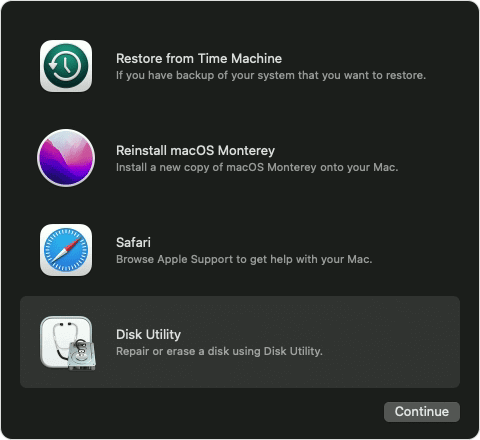
After booting in through the USB drive, enter your Mac administrator password to enter macOS Recovery. You should then have access to the following recovery tools.
Restore from Time Machine: Restore the data on your Mac with a Time Machine backup.
Install macOS [Version Name]: Reinstall, upgrade, or clean-install the operating system.
Safari: Access the internet using Safari.
Disk Utility: Open the Disk Utility app to manage and repair your Mac’s internal storage drive.
Additionally, you can open the Mac’s Terminal and Startup Security Utility through the Utilities menu bar option. For example, you can use Terminal to disable System Integrity Protection and the Startup Security Utility to manage your Secure Boot settings. For more information, check our complete guide to using macOS Recovery.
Time-Consuming But Not Difficult
Whether upgrading your Mac’s operating system or troubleshooting severe issues in macOS, creating a bootable USB installer is a valuable skill. With the steps outlined in this guide, you should be able to do that fairly easily and handle pretty much anything that macOS throws your way.

