If you lose one or both of your AirPods, you can get a replacement from Apple and use the earbuds with your old charging case. However, you can only play audio through them if you re-pair them with your Apple devices.
In this tutorial, you’ll learn how to connect replacement AirPods to an iPhone, iPad, or Mac so you can continue enjoying your music, podcasts, and more.
Forget the Old AirPods
You must begin by deleting the original AirPods from the Bluetooth settings on your iPhone, iPad, or Mac. You do not have to repeat the following across your Apple products because the connection status syncs over iCloud.
Forget the Old AirPods on iPhone & iPad
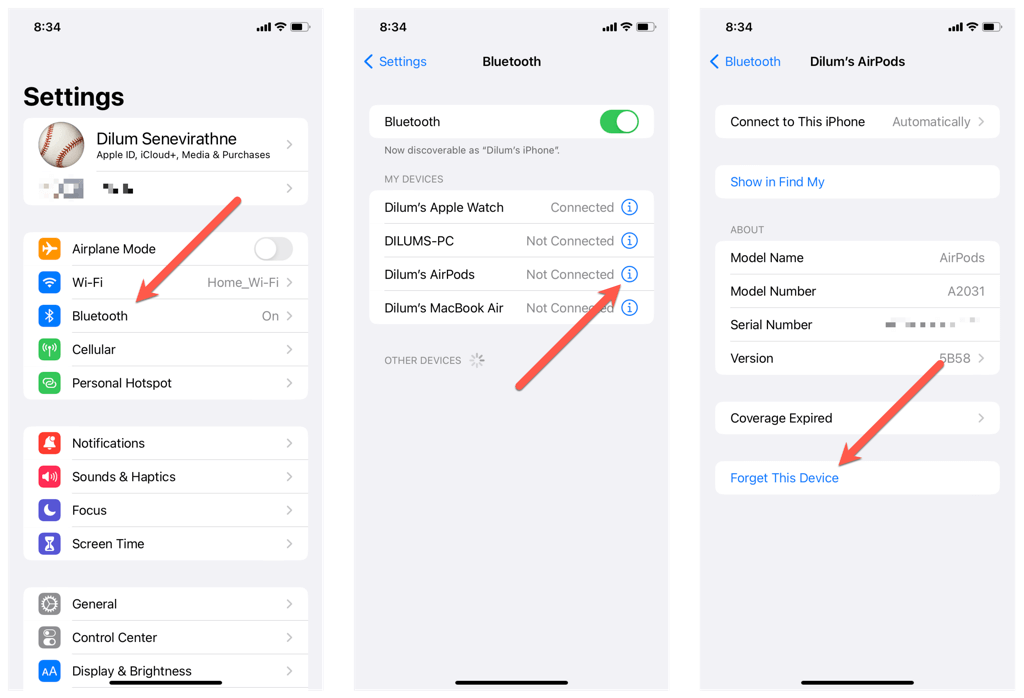
- Open the Settings app on your iOS device and tap Bluetooth.
- Tap the Info icon next to your AirPods.
- Tap Forget This Device.
- Tap Forget Device as confirmation.
- Exit the Settings app.
Forget the Old AirPods on Mac
- Open the Apple menu and select System Settings.
- Go to Bluetooth and select the Info icon next to your AirPods.
- Select Forget This Device, and then Forget Device again as confirmation.
Reset Your AirPods to Their Default Settings
The next action involves resetting your AirPods to their default settings. To do that:
- Place the new AirPods inside the old Charging Case. If you only got a replacement for a single AirPod, put the old AirPod in as well.
- Close the case lid, wait up to 10 seconds, and re-open it.
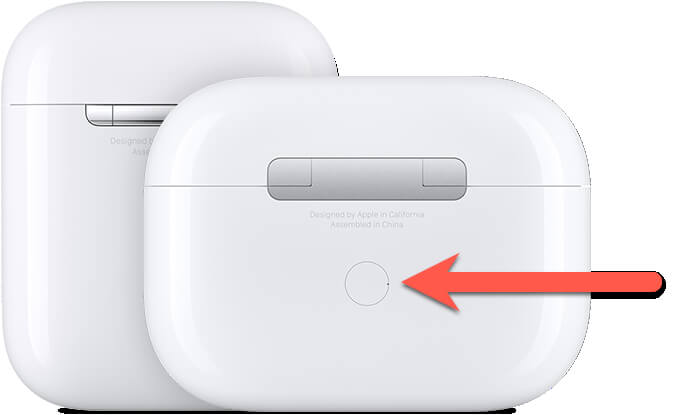
- Press and hold the Setup button until the status light flashes amber, then white.
Reconnect Airpods to Your Apple Device
You can now reconnect the AirPods to your iPhone, iPad, or Mac. Again, you do not have to repeat the action on all your devices since the AirPods pairing syncs over iCloud.
Reconnect AirPods to iPhone & iPad
- Open the AirPods charging case and hold it next to your iPhone.
- Unlock your iPhone and visit the Home Screen.
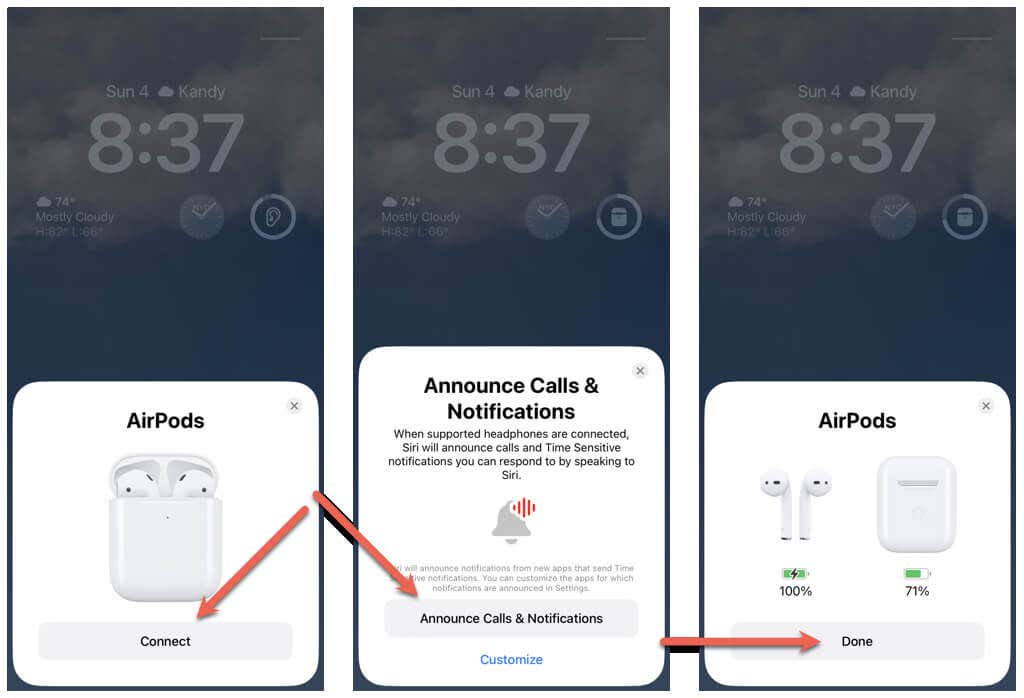
- Tap Connect on the setup animation.
- Tap Announce Calls & Notifications to let Siri announce calls and Time Sensitive notifications. Or, tap Customize to determine what apps can announce notifications over your AirPods.
- Tap Done.
Reconnect AirPods to Mac
- Go to System Settings > Bluetooth.
- Open the AirPods Charging Case and hold down the Setup button.
- Select Connect.
That’s it! You’ve finished connecting your replacement AirPods. You should now be able to use them seamlessly on each Apple device you own.
Remember to customize your Apple AirPods or Apple AirPods Pro to get the most out of them. Also, update the AirPods firmware to receive new features and improve connectivity, performance, and stability.
Can’t Connect Your AirPods? Try These Quick Fixes
If you can’t connect your replacement AirPods to your iPhone, iPad, or Mac, work through the following fixes to resolve the problem.
Restart Your Device
Restarting your iPhone or Mac can help clear any temporary issues preventing proper connectivity with the replacement AirPods.
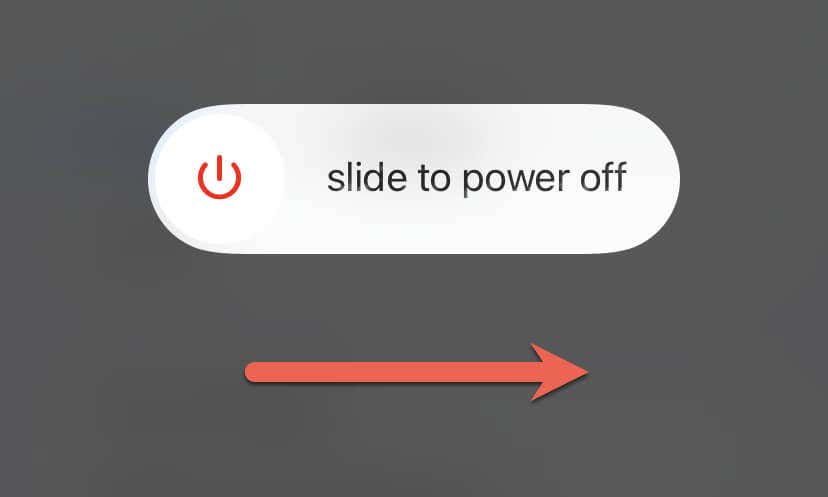
To restart an iPhone or iPad, open the Settings app, select General > Shutdown, and drag the Power icon to the right. Once the screen darkens, wait 30 seconds and hold the Side button until the Apple logo appears.
To restart a Mac, open the Apple menu and select Restart. For best results, uncheck the box next to Reopen windows when logging back in before selecting Restart again.
Charge Your AirPods
Low AirPods battery life can cause connectivity issues. If the status indicator on the Charging Case, Wireless Charging Case, or Magsafe Charging Case isn’t lit or displays amber, that’s likely the reason why.
Place the left and right AirPods inside the case, connect them to a charger, and wait at least 15 minutes before retrying.
Reset the AirPods Properly
Another reason you have trouble connecting your replacement AirPods is that you need to reset them properly. Try repeating the reset instructions above again. If you need additional help with the procedure, check our guide to resetting Apple’s AirPods for more details.
Update the System Software
Updating the system software on your iPhone or Mac fixes compatibility issues between the device and the AirPods, increasing the chances that they connect and work smoothly.
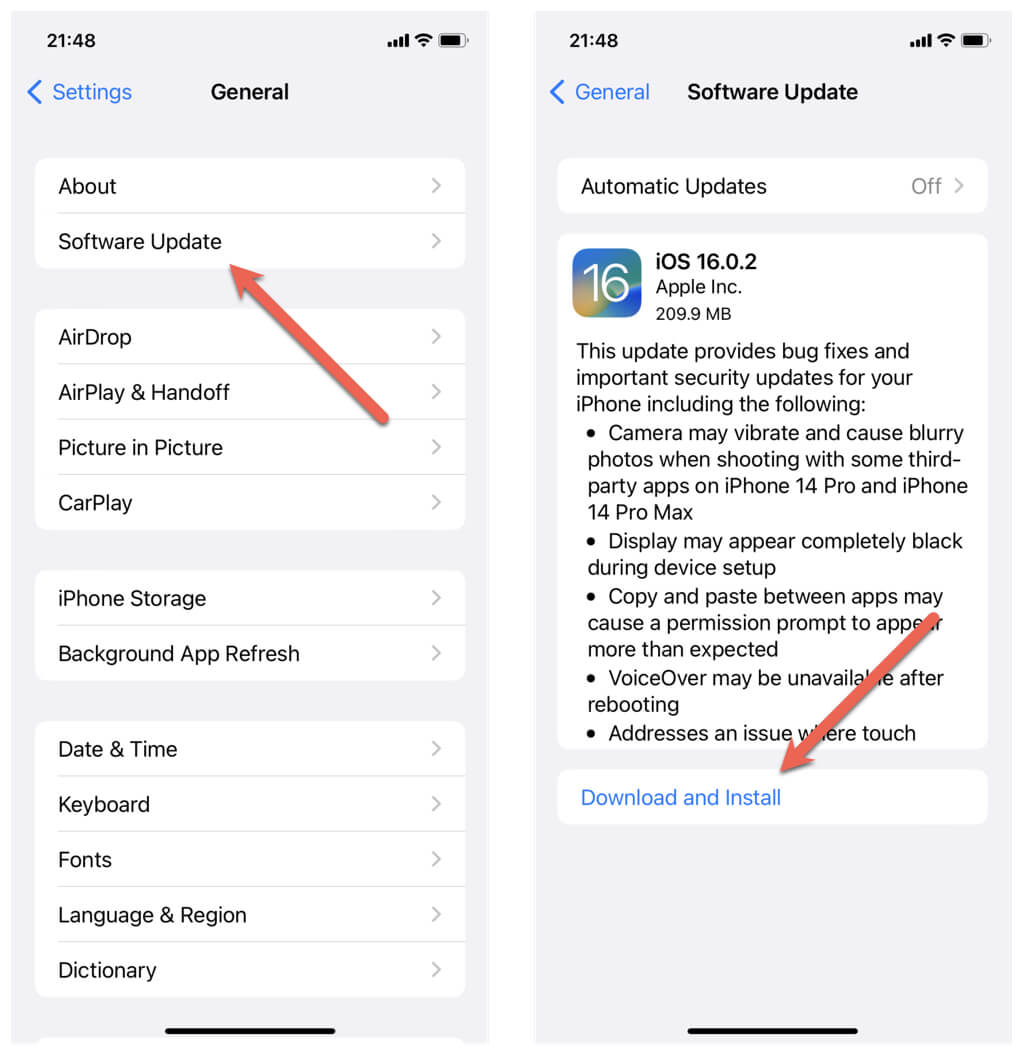
Open the Settings app on an iPhone or iPad and go to General > Software Update to update the system software.
If the problem occurs with a macOS device, open the System Settings app and select General > Software Update to install the latest operating system updates.
Reset the Settings
Resetting the settings on the iPhone can clear out any corrupted or misconfigured settings that might be preventing the AirPods from reconnecting.
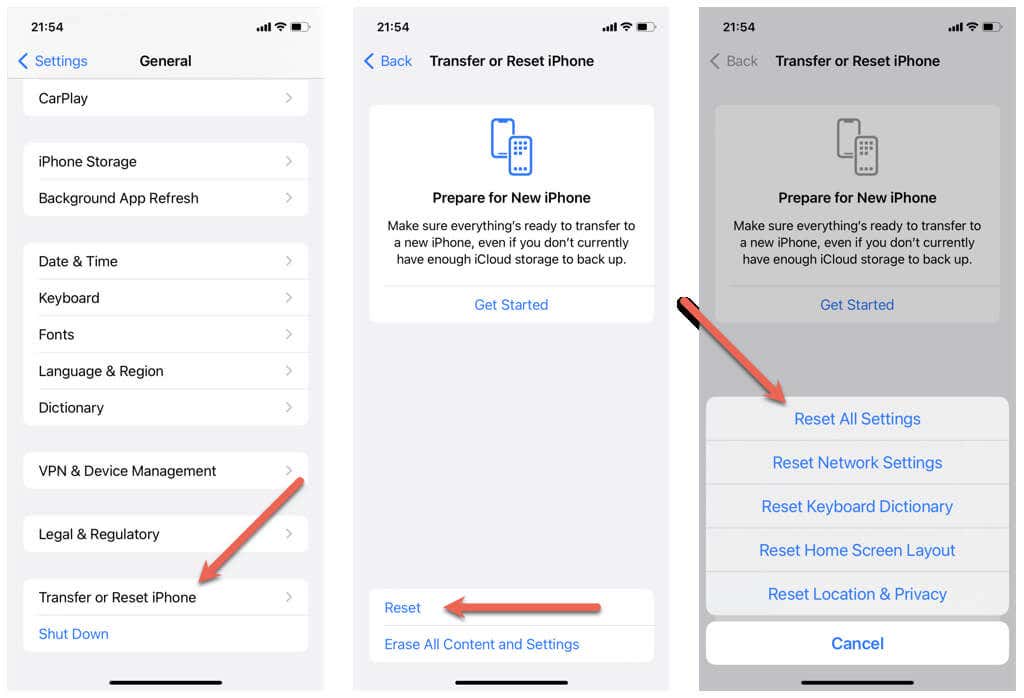
To do that, open the Settings app, go to General > Transfer or Reset iPhone/iPad > Reset, and choose Reset All Settings.
Take It to an Apple Store
If all other troubleshooting steps fail, take the replacement AirPods to an Apple Store and let a technician diagnose and fix the problem. Contact Apple Support if you need professional support right now.
Start Using Your AirPods Again
By following these simple steps, you can quickly connect your replacement AirPods to your devices and enjoy the same high-quality audio experience as before. Whether you’re listening to music, taking phone calls, or using Siri, your AirPods will continue to enhance your everyday activities on your iPhone, iPad, or Mac.
