Not too hard and great for movies and games
If you need to connect your MacBook to a television, you have several options. Most of them are quick and easy, although in some cases, you may have to do a little extra legwork.
It does depend on the type of MacBook you have, the television, and sometimes devices connected to the TV. We’ll walk you through the key things you need to know and the most effective methods to get your MacBook on the big screen.
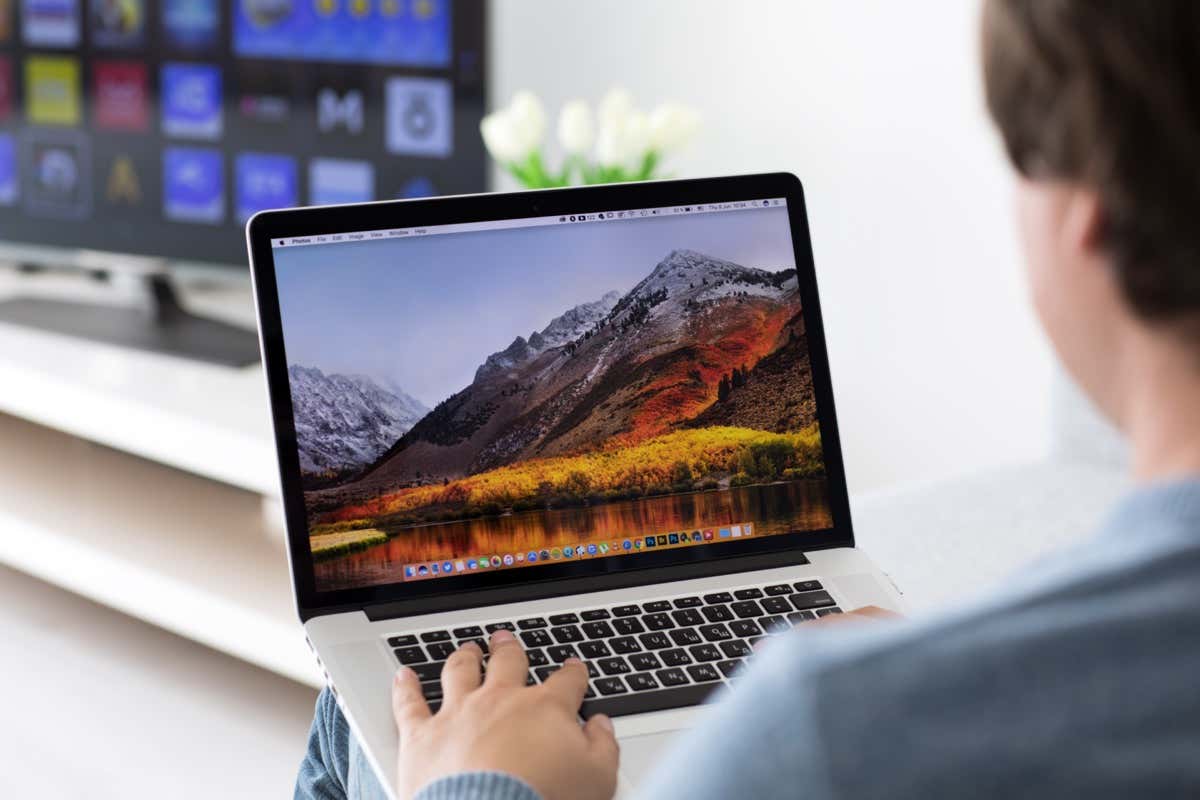
Which MacBook Do You Have?
Apple has made a habit of radically changing the available ports on their MacBook computers. If you have an older MacBook from before 2016, you’ll find a variety of ports on the machine. That includes a standard HDMI port.
If you have a MacBook Pro 14 or 16 from 2021 or newer, you’ll also find an HDMI port on your computer. If you own a MacBook made between those years or even a 2021 MacBook Pro 13 of Air, you’ll only find two or four Thunderbolt-enabled USB-C ports. Thunderbolt ports are versatile, but they can’t connect to an HDMI directly.
The MacBook Pro and MacBook Air models between 2008 and 2010 featured a mini DisplayPort video output. You’ll need a mini DisplayPort to HDMI adapter if you want to connect to most TVs using this port.
If you have a MacBook model without an HDMI port, you’ll have to look for a different solution when connecting to an external display. For most people, that means buying dongles.
Get an HDMI or DisplayPort Adapter
If you’re in the Thunderbolt 3-only MacBook boat, you will have to invest in an adapter to give your MacBook either an HDMI or DisplayPort connection. In most cases, HDMI is the right way to go since all flat-panel TVs support HDMI. DisplayPort is mainly found on computer monitors, although some large format displays have them.
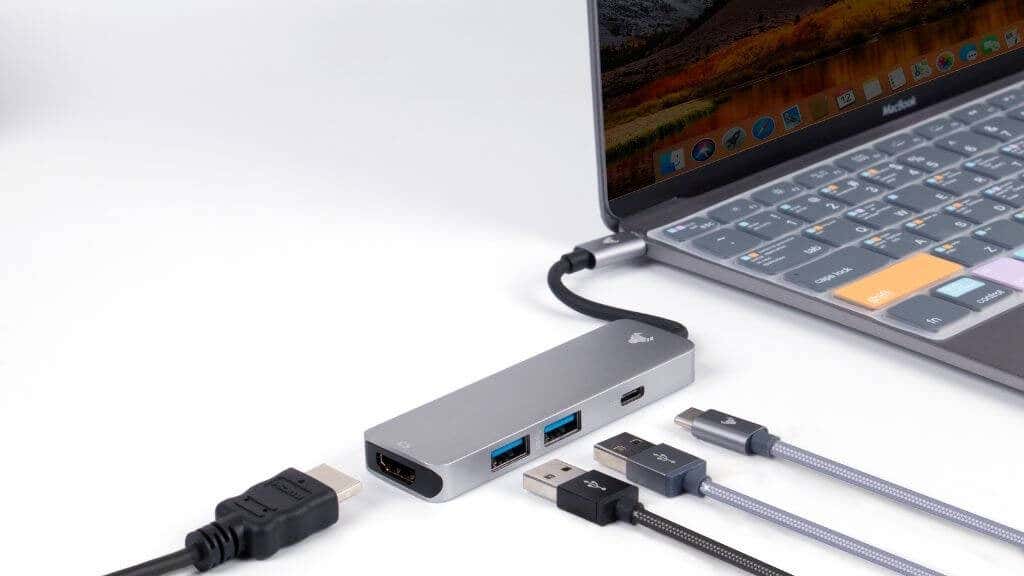
You can buy an HDMI adapter that only adds HDMI, or you can get the feature as part of a multifunction dock. While a dock is much more expensive than a simple HDMI adapter, it’s a better purchase in the long run since it gives you access to a variety of connections that you’re bound to need eventually.
Pay special attention to the resolution and refresh rate supported by a given HDMI adapter. This is particularly important when connecting to a 4K TV since many adapters only support 24Hz or 30Hz at those resolutions. While that’s probably fine for a slideshow or playing most video content, it’s very choppy for desktop use.
Get the Right Cable
Now that your MacBook has the proper connection to interface with a TV, we need a cable to bridge the gap. If you’ve bought an HDMI adapter, use an HDMI cable.
While you may hear plenty of advice about which HDMI cable is the “right” one to buy, the truth is that any HDMI cable will work just fine. However, to use a 4K display at 60hz, you need an HDMI 2.0 cable or newer. If you’re using an older HDMI 1.4b cable, you’ll be limited to 30Hz at 4K.
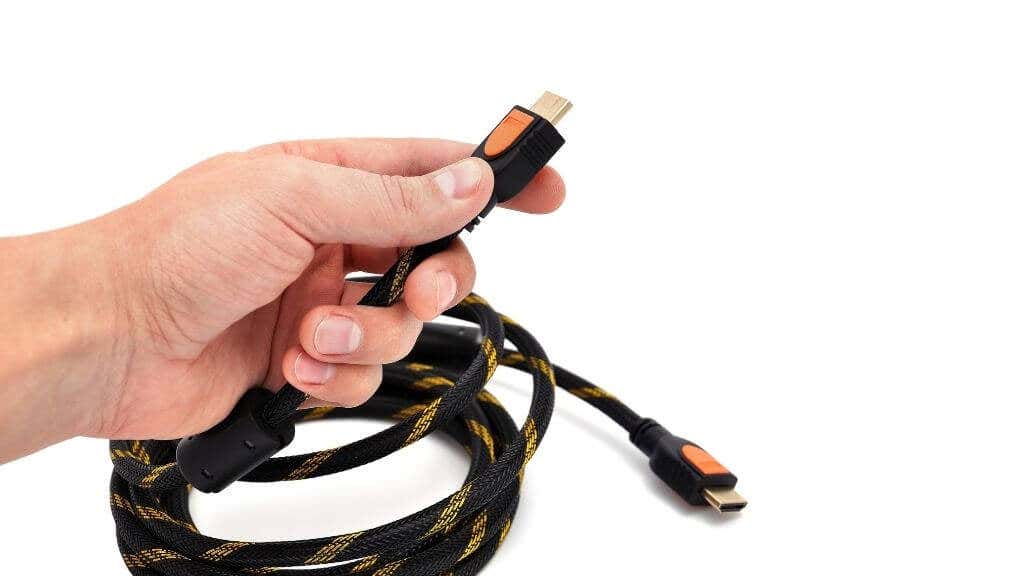
If you need to connect your MacBook to a TV that’s far away, why not consider buying a long HDMI cable? HDMI cables can go up to 65 feet (20m) in length before needing a powered signal repeater. If you’re doing a presentation or otherwise need to connect to a TV far away, one of these cables is far less complicated than a wireless connection. Not to mention much more reliable!
Consider investing in a roll of gaffer tape from online stores like Amazon to secure the cable if it’s a temporary setup. If it’s a permanent need, installing the cable professionally is a good idea.
Check Your TV’s Inputs
Now that we’ve provided your MacBook with a way to connect to the TV and have a cable sorted, how do we connect it to the TV?
On the back of your television, you should see a set of HDMI ports. If there’s an open port, all you have to do is plug one end of your HDMI cable into a free video input. If all the ports are used up, you can unplug one, but you may not want to do that in some cases.
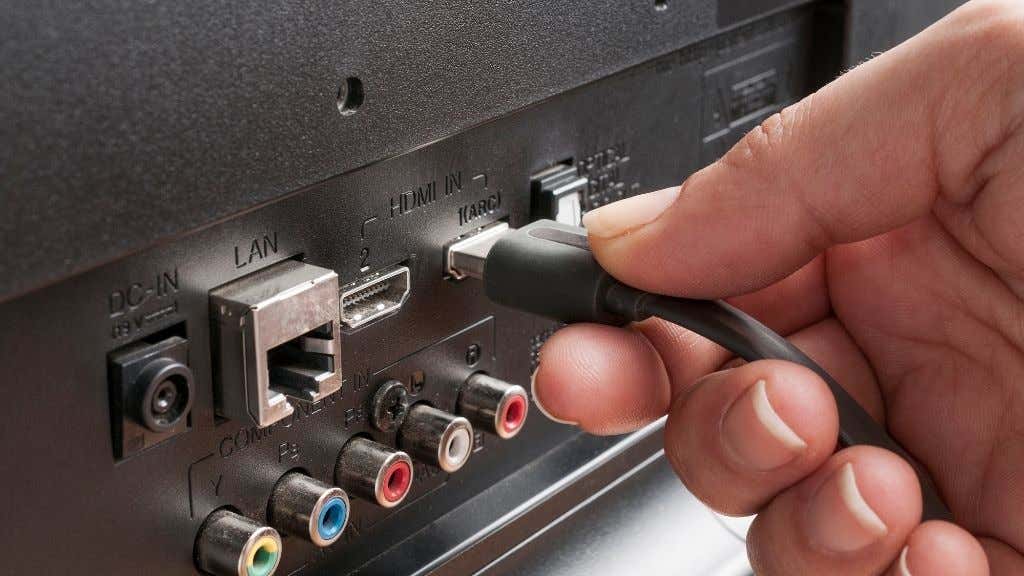
If the TV doesn’t have enough HDMI ports, you could use an HDMI switch. This is a device with multiple HDMI inputs and a single HDMI output. You can use them to expand the number of HDMI ports a TV has.
You may also note VGA or DVI connections on some TV models. We don’t recommend that you use these connections unless you already happen to have the right cables and adapters and can’t use HDMI for some reason.
If using a wired connection isn’t an option, then your only other choice is to use a wireless connection.
Use Airplay
AirPlay is Apple’s in-house wireless streaming technology. You can stream your macOS desktop (and iPhone or iPad) to any device that supports acting as an AirPlay receiver. For TVs, that means streaming to an Apple TV device connected to a TV via HDMI.
Since Apple doesn’t make a TV set (yet), this is a rather limited option. Of course, you could carry an Apple TV around with you if you wanted to mirror your screen wirelessly to any HDMI-enabled TV, but it’s not the most practical solution. If you’re going to use Airplay in your own home, investing in an Apple TV may be worth considering.
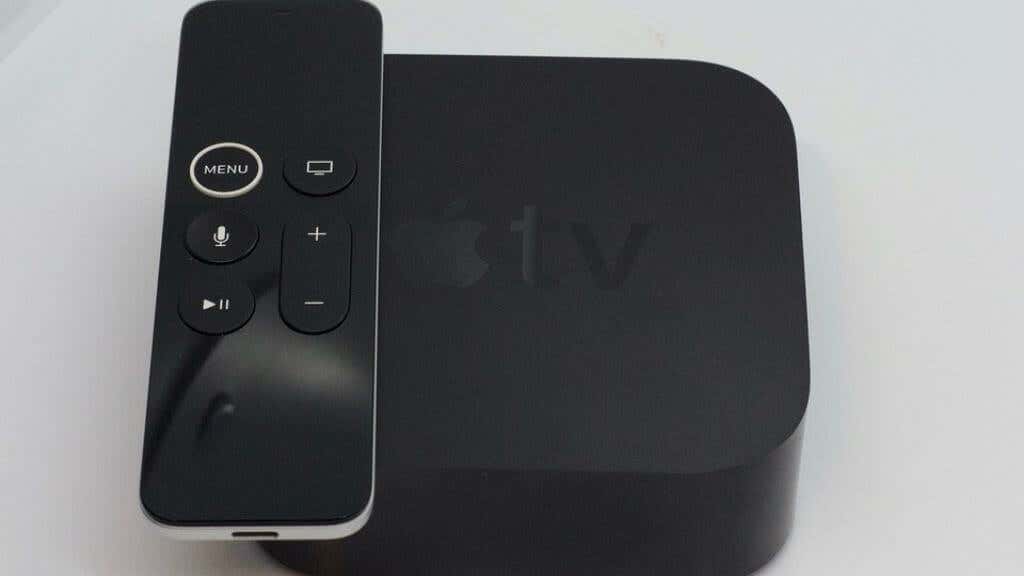
The good news is that some Smart TVs (e.g., Samsung and Sony) now have support for Apple Airplay 2, the latest version of the technology at the time of writing. Select models of Roku devices also support AirPlay. You’ll have to look up whether your specific model of TV or Roku supports Airplay or not. Another issue with using AirPlay on the road is that both devices have to be on the same Wi-Fi network.
AirPlay First-Time Setup
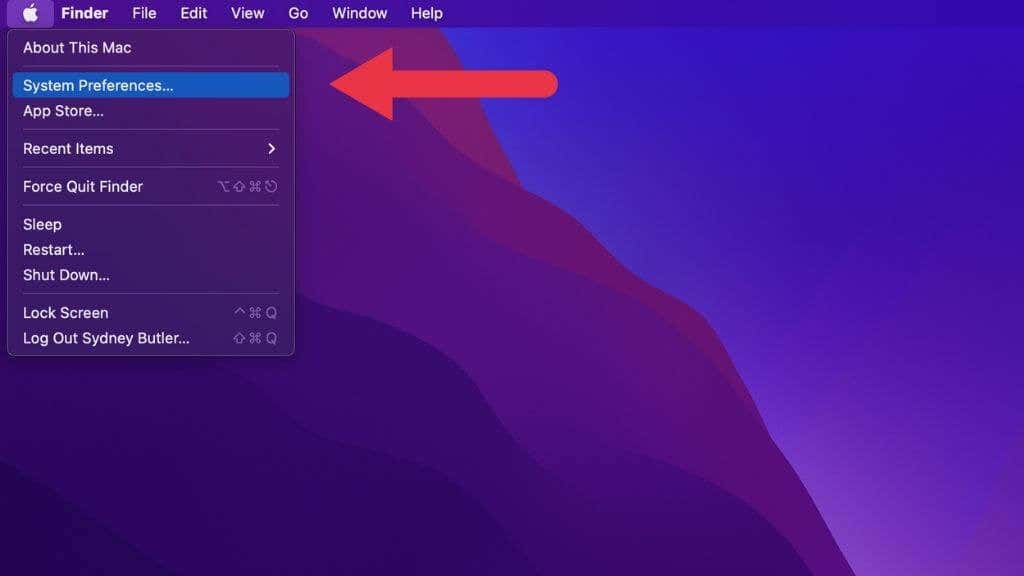
Before you can use AirPlay for the first time, you must check that the feature is enabled. Select the Apple Menu icon at the top-left of the macOS desktop.
Then go to System Preferences > Displays.
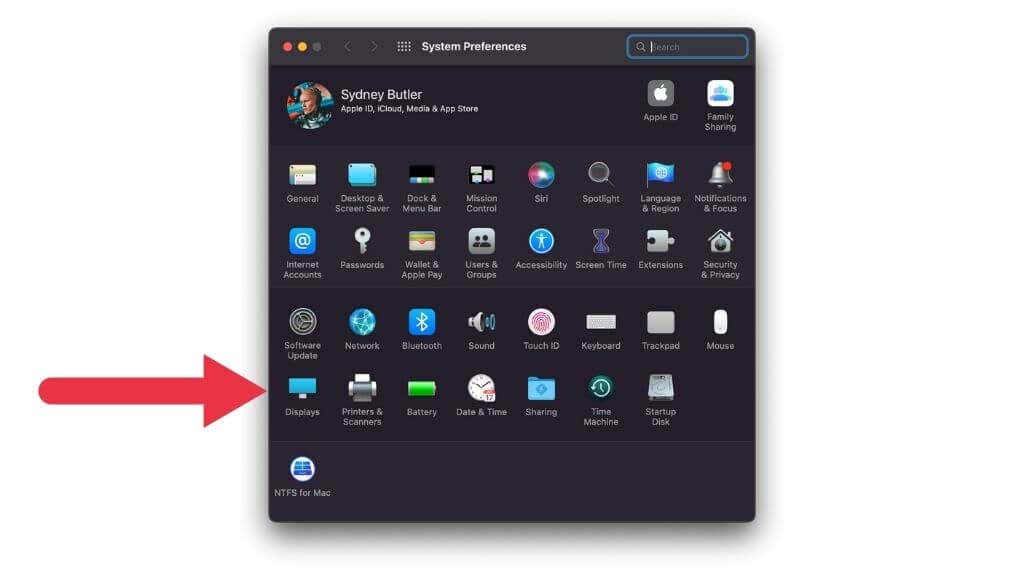
Under the Add Display drop-down menu, you should see the Apple TV or other AirPlay device listed.
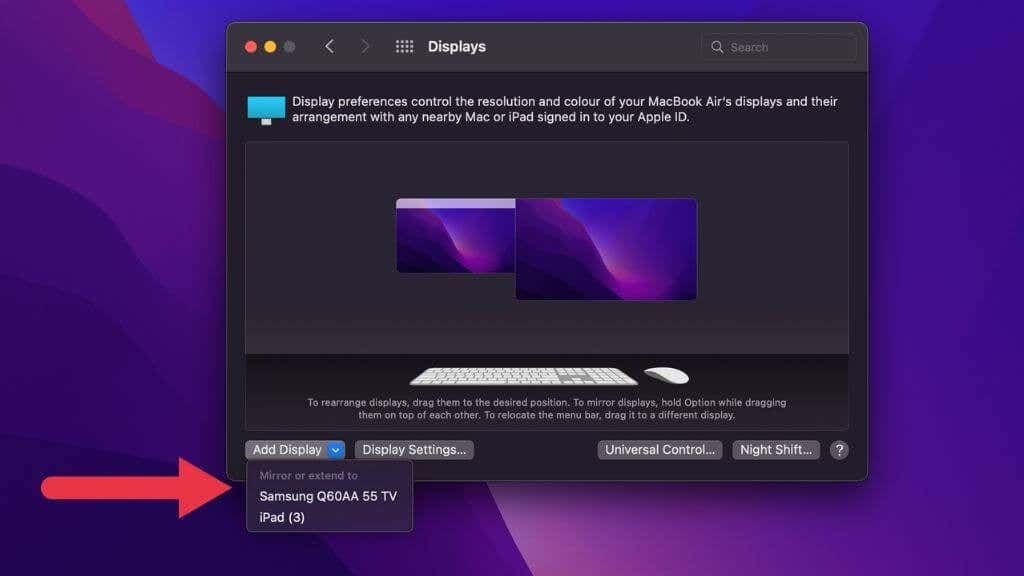
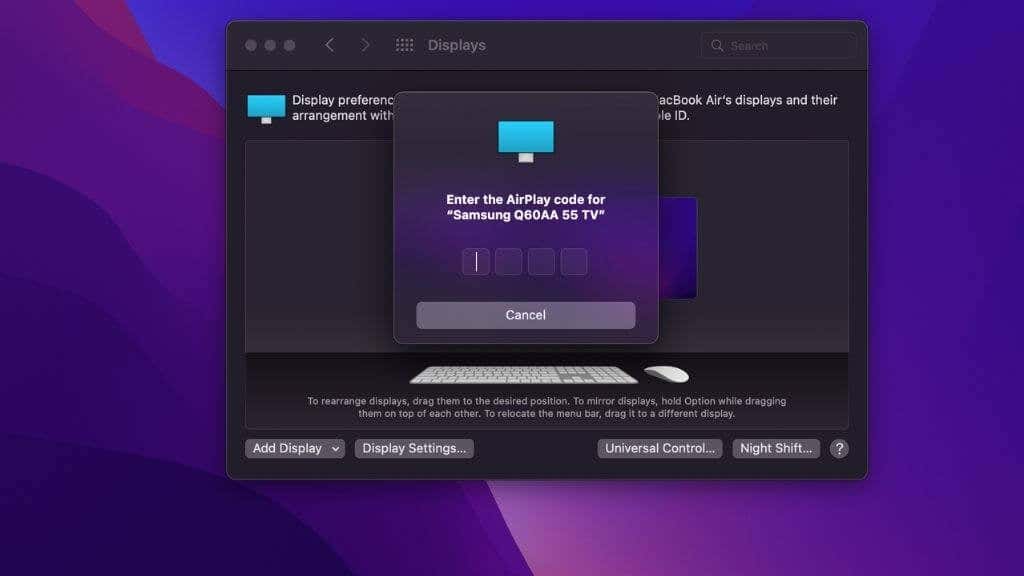
The first time you add an AirPlay display, you may have to enter a code that will be shown on the TV to authenticate.
On older versions of macOS, you may also see the AirPlay icon in the menu bar. If so, you can click on that directly to turn an AirPlay display on or off.
Cast Content to a Chromecast
Since there are so few AirPlay devices out in the wild, you might be considering a Google Chromecast instead. Many smart TVs and Android TVs have Chromecast built into them. The only problem is that Apple MacBooks don’t natively support mirroring their screens to Chromecast devices.
You can cast content from Google services like YouTube to a Chromecast from a Mac, but that’s not the same as mirroring your Mac screen using AirPlay.
The only recourse here is to use third-party apps such as AirBeam TV. There are plenty of different options in the Mac App Store at different price points, so take your time and pick the one that suits your needs.
Mirrored or Extended Display?
When connecting an external display such as a TV to your MacBook, you can use it as either a mirrored or extended display. With screen mirroring, your MacBook display and TV screen show precisely the same image.
This is useful when the TV isn’t going to be visible to you while you’re presenting, but there are some caveats here. Modern TVs have a 16×9 aspect ratio and MacBooks have a 16×10 ratio. They also have different resolutions. If the TV is mirroring your Mac display, it will be scaled to fit, which won’t look great to your audience. You should make the TV your main display and have the MacBook screen mirror it instead. Now the MacBook’s image will be less than ideal, but you’re the only one that can see it.
If you’re using the external display as an extended display (which should be by default), it will have a separate desktop. You can move windows onto it and use it as a separate screen.
Adjusting the Resolution and Refresh Rate
Usually, macOS will correctly detect your TV’s resolution and refresh rate, so you don’t need to do anything. Unfortunately, it gets it wrong sometimes, in which case you’ll have to correct the setting manually.
First, select the Apple Menu icon at the top-left of the macOS desktop. Then select System Preferences > Displays > Display Settings.


Choose the TV from the left hand list of connected displays. Then under Resolution, select Scaled to see a list of resolutions.
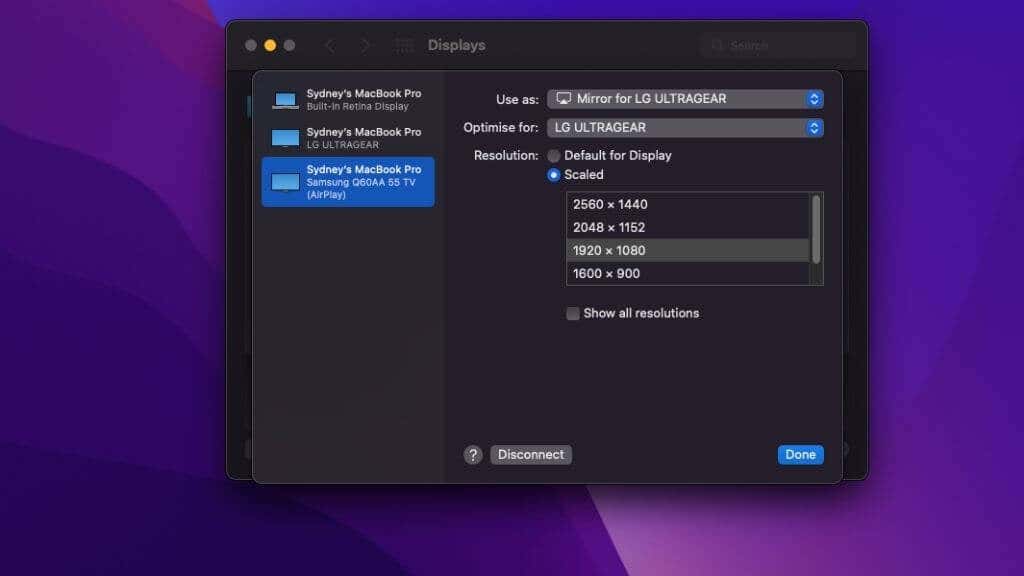
Choose the correct one for your TV. If it’s a 4k TV, the proper resolution is 3840×2160. If it’s a Full HD TV, the correct number is 1920×1080.
Under Refresh Rate, choose the correct number for your display. For the vast majority of displays, 60hz is the best choice. However, your adapters, cable, and even older MacBooks may only support 30Hz at 4K resolutions. You can safely use a 4K TV at 1920×1080 and raise the refresh rate. This will make the image a little fuzzier but improve the smoothness of motion.
Tweaking Your TV Settings
We’ve mostly been talking about changing settings on your MacBook to get the best picture on your TV, but there are some things you may want to change on the TV too.
Some TVs have an overscan feature where a part of the frame isn’t visible. When connected to a computer, that’s not something you want, so consult your TV manual. There should be a setting to fit the image on the screen without any overscan.
Your TV may also have a PC mode or something similar that removes post-processing effects that affect sharpness, input delay, and motion smoothing. These can detract from the experience of using your MacBook with a TV, so it’s best to disable unnecessary effects.
Sending Audio to Your TV
Even if you’re connected to an external display such as a TV, you can still get audio from your MacBook’s internal speakers. You’re also free to use speakers or headphones plugged into the headphone jack. The same goes for Bluetooth audio, whether using a wireless speaker or headphones like the AirPods Max.
However, if you’re connected to a TV via HDMI, you can easily send audio to the TV and get sound from the display. You have to choose the TV as the sound output device.
With the HDMI connection plugged in and your image correctly working on-screen, simply select the Control Center button at the top right of the macOS desktop. Then, select the right-facing arrow next to Sound.
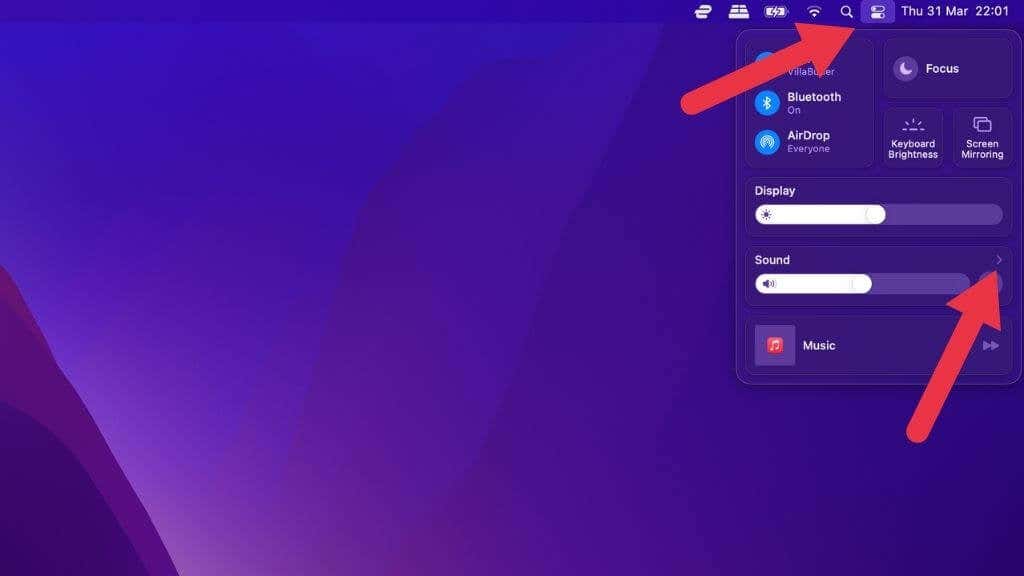
Now simply select the HDMI audio device from the menu.
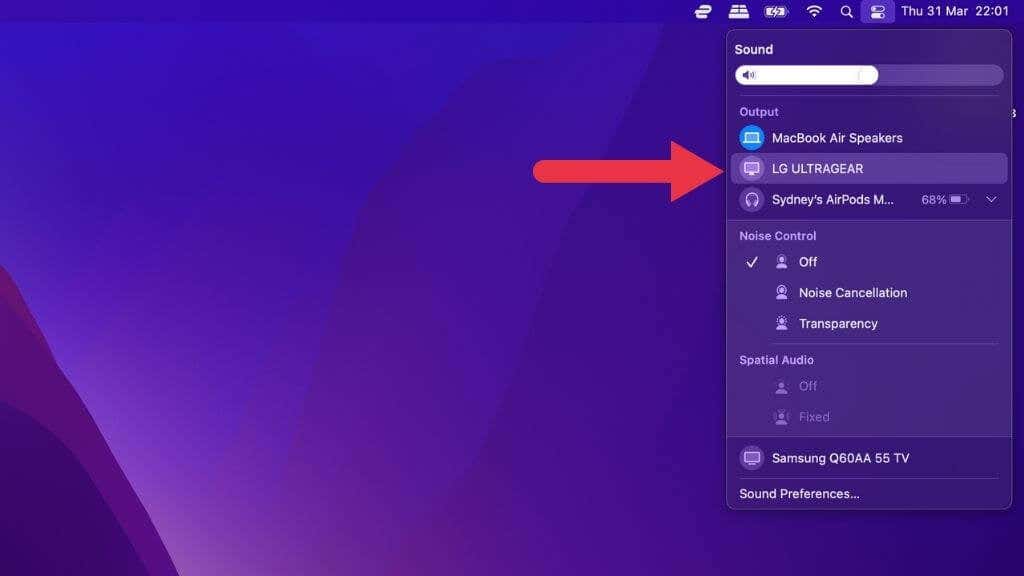
Sound should now switch to the TV speakers.
Using the TV With the Lid Closed
In some cases, you may not want to have the MacBook screen visible while connecting your Mac computer to a TV. For example, you may want to slide it underneath the TV and use the large display as your main display.

The good news is that you don’t have to do anything special to enable this feature. As long as you have an external mouse and keyboard connected, along with the TV itself, you can close the lid, and the MacBook will switch over to the external display as the only main display.
Hey! I’m on TV!
As we’ve seen, connecting your MacBook to a TV is generally no different from connecting it to an external PC monitor. While a TV usually doesn’t make for an excellent desktop display, they are perfect for watching movies or doing presentations. If you’re a Mac gamer, it can also be nice to boot up Apple Arcade, connect a controller, and spend some time just relaxing instead of working. Not that this guide is done, that’s exactly what we’re going to do.


