If you don’t use VirtualBox on your Mac anymore, you’re probably looking to uninstall it to reduce clutter and free up disk space. Or, you might be looking to remove it as part of routine troubleshooting.
However, Oracle’s open-source virtualization program stores support files in multiple locations, so a standard Mac app uninstallation results in many files left behind.
Instead, use the techniques below to completely uninstall VirtualBox on a MacBook, Mac mini, or iMac.
Note: The following methods won’t remove your virtual machine disk images. The only way to delete those is to manually delete the relevant folders from your Mac (more on that further below).
How to Uninstall VirtualBox on Mac Using the VirtualBox Uninstall Tool
The quickest, safest, and most convenient way to uninstall VirtualBox from your Mac is to use the VirtualBox Uninstall Tool that comes bundled with the VirtualBox installer package for macOS.
It’s a command-line utility that deletes all VirtualBox related-files on your Mac, such as cached data, drivers, and kexts (kernel extensions).
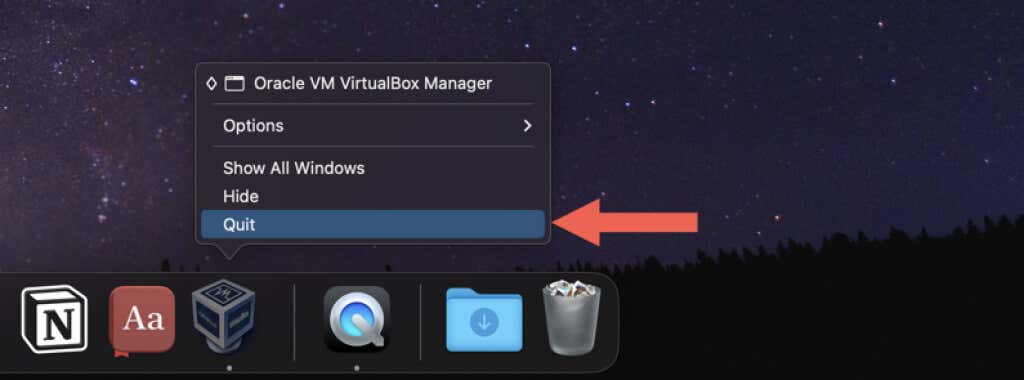
- Exit VirtualBox if it’s open; Control-click or right-click the Oracle VM VirtualBox Manager icon on the Dock and select Quit. If you have trouble quitting the program, Option+Control-click the icon and select Force-Quit.
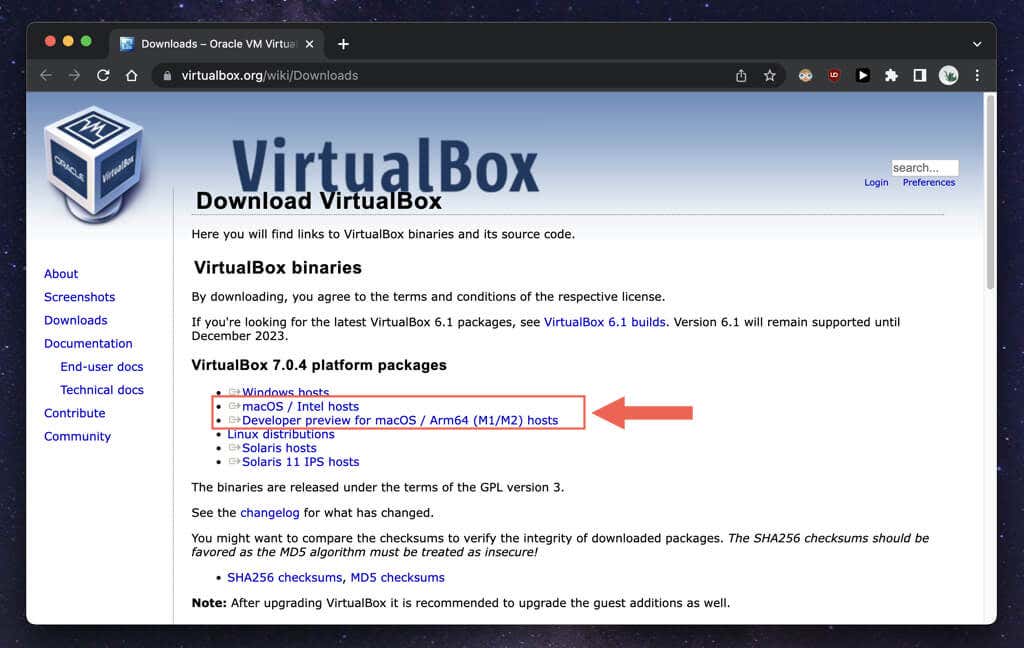
- Get the latest version of the VirtualBox installer for macOS from VirtualBox.org’s Downloads page. If you’re using the Apple Silicon version of the application, make sure to download the matching platform package.
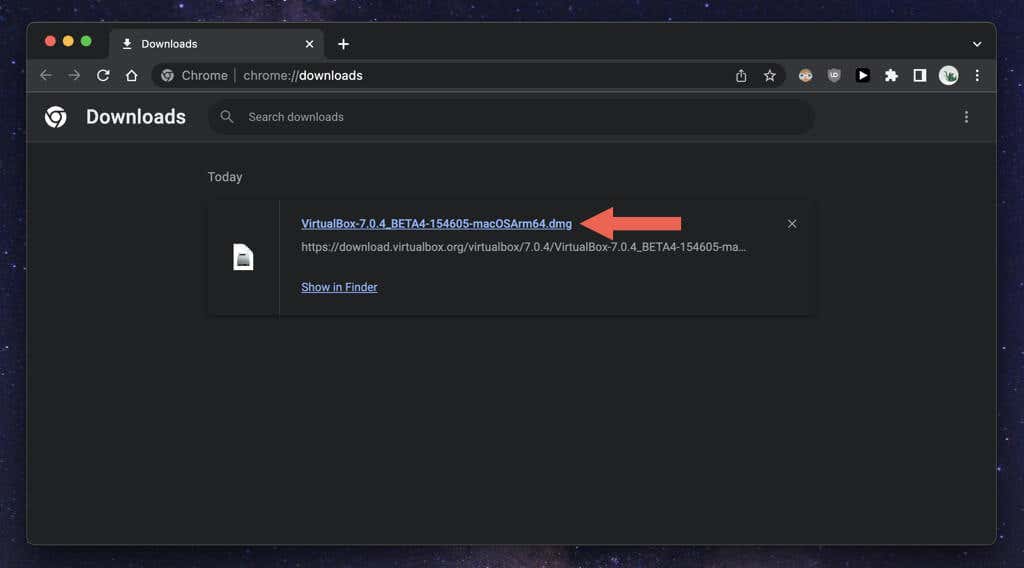
- Visit your browser’s Downloads manager and select the VirtualBox DMG file.
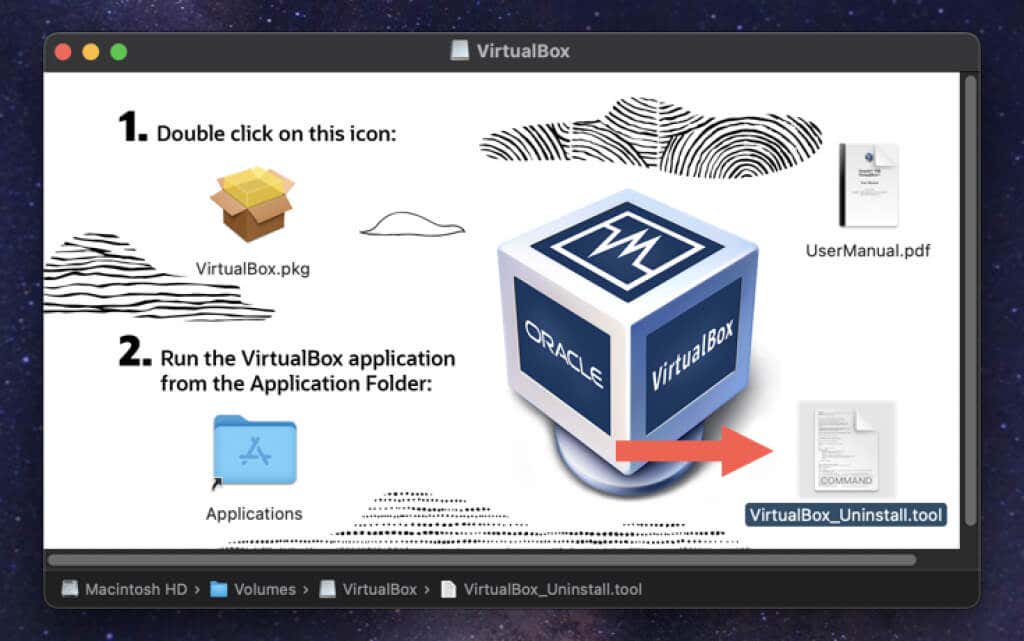
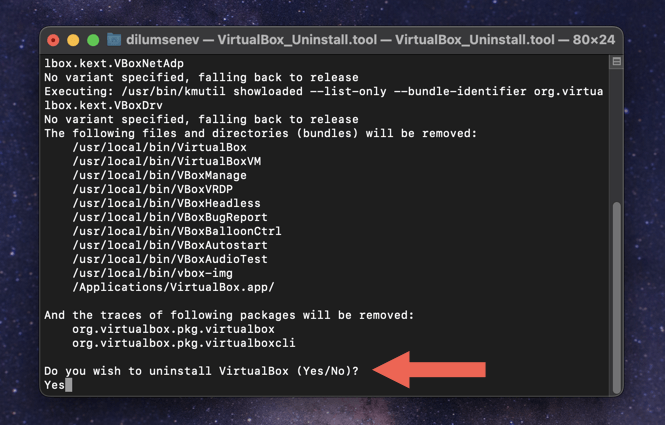
- Double-click the VirtualBox_Uninstall.tool icon on the VirtualBox pop-up that shows up. A Terminal window should open and load the contents of the command-line tool.
Note: If you see a “VirtualBox_Uninstall.tool cannot be opened because it is from an unidentified developer” error, Control-click the VirtualBox_Uninstall.tool icon and select Open With > Terminal > Allow.
- Type Yes and press Return to confirm you want to uninstall VirtualBox.
- Wait until the VirtualBox_Uninstall.tool removes VirtualBox and associated files and folders from your Mac. You’ll see the “Process Completed” Terminal output upon completion.
How to Uninstall VirtualBox on Mac Using a Dedicated App Removal Utility
If you have trouble using the VirtualBox Uninstall Tool, an alternative way to fully delete VirtualBox is to use a dedicated app removal utility for the Mac. As an example, here’s how to use AppCleaner to uninstall VirtualBox on macOS.
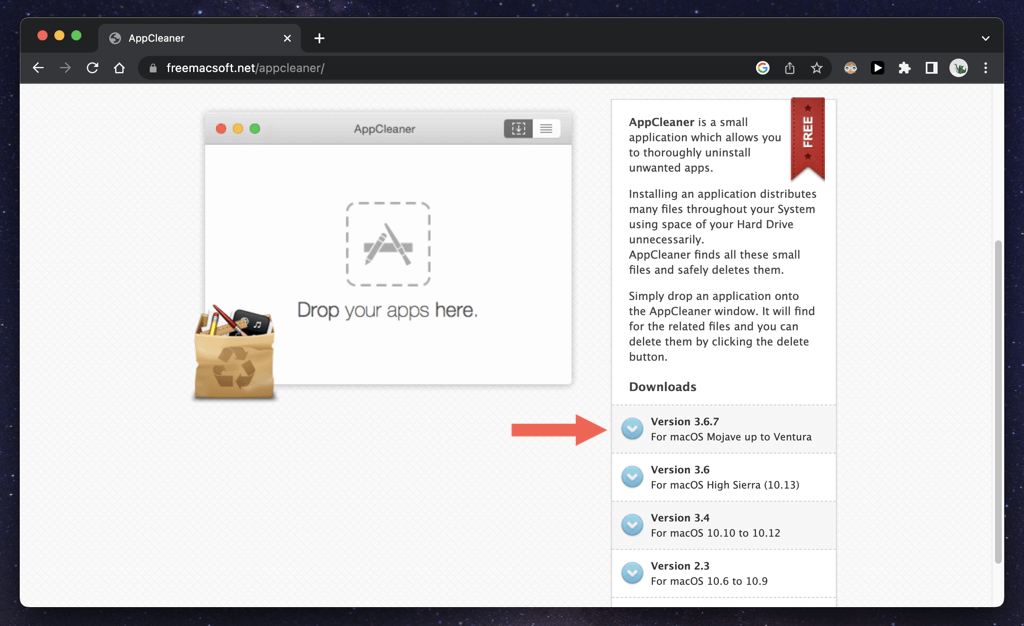
- Download and open AppCleaner. It’s available as a free download at FreeMacSoft.net.
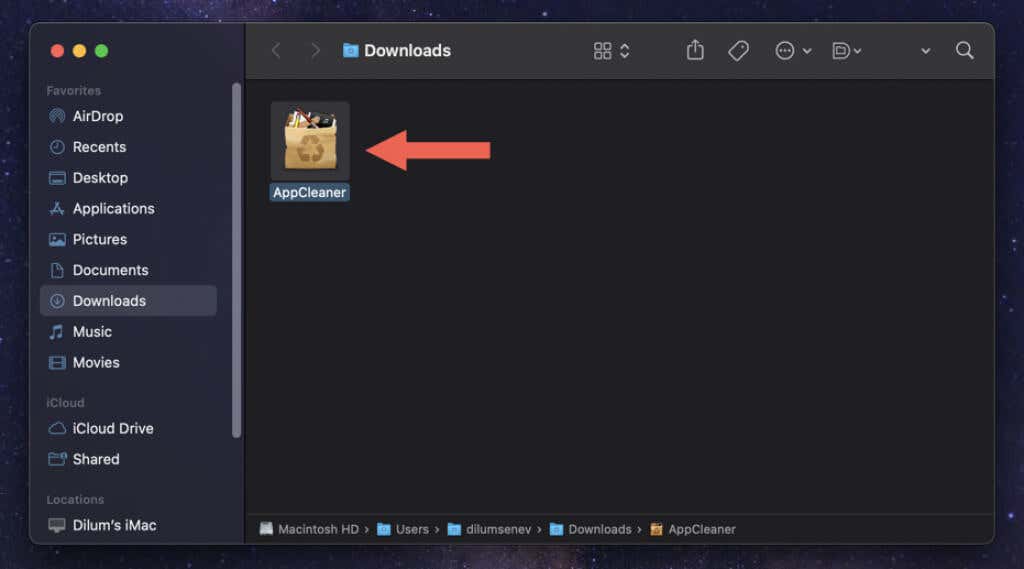
- AppCleaner comes as a ZIP file that your Mac automatically unzips after it downloads; visit your computer’s Downloads folder and double-click the program icon to open it; you don’t have to install it.
Note: If your Mac blocks you from opening AppCleaner, open the System Settings app, choose Privacy & Security, and select Open Anyway to bypass the security restriction.
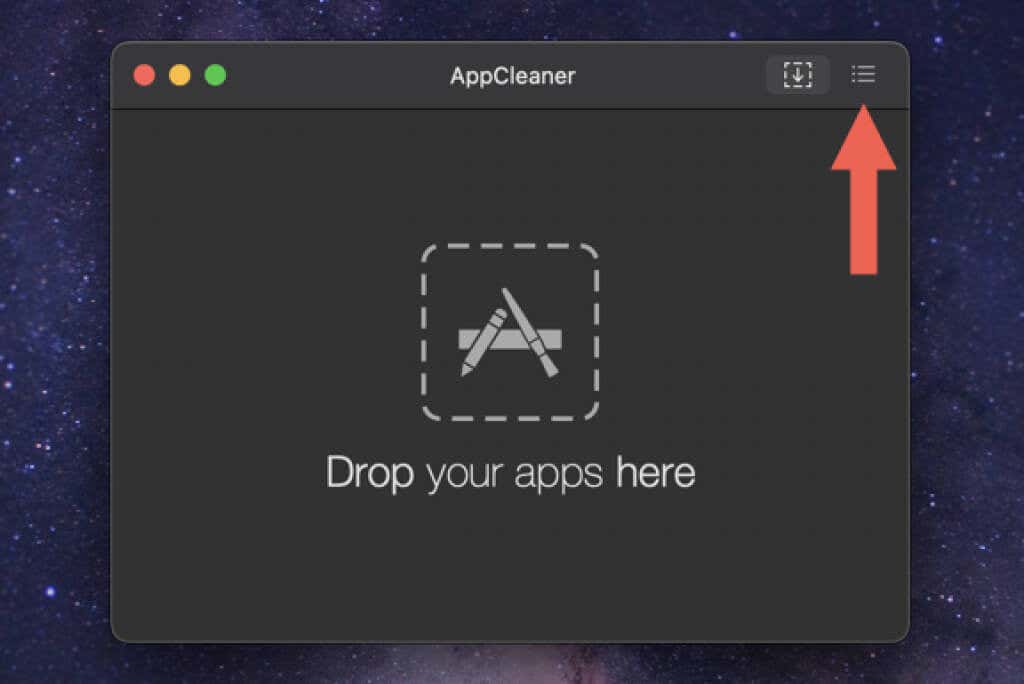
- Select the Applications List icon on the top-right of the AppCleaner window.
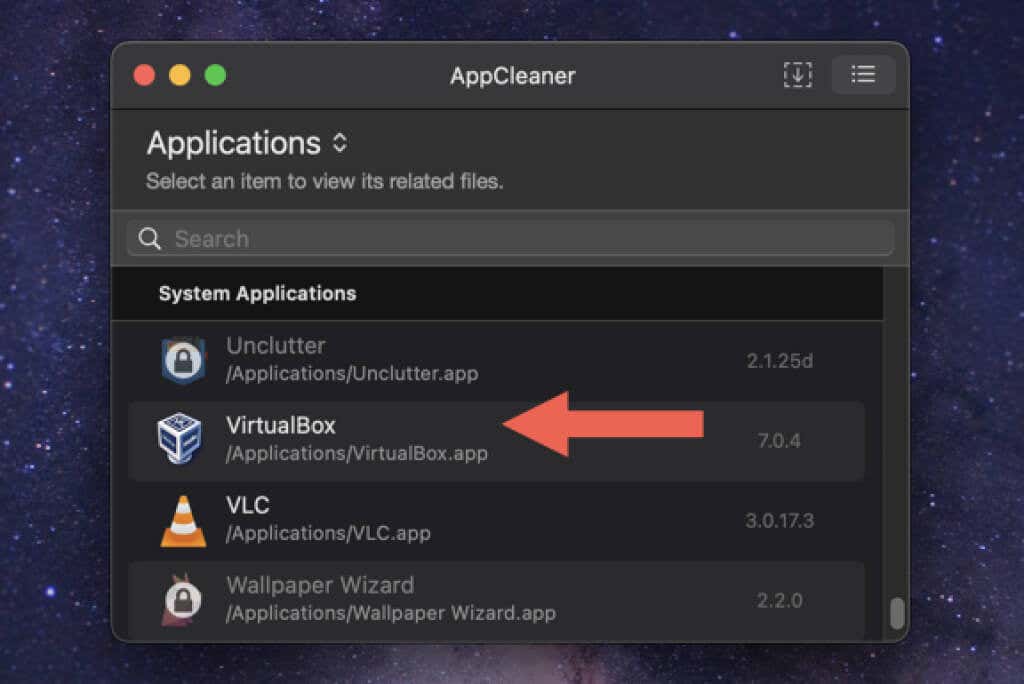
- Scroll down the list, select VirtualBox, and wait until AppCleaner produces a list of files related to the program.
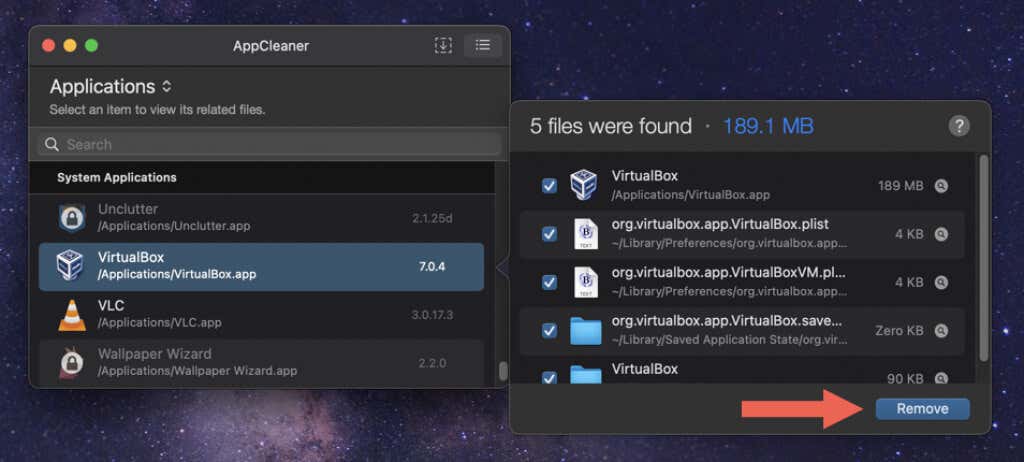
- Choose Remove to delete all VirtualBox installation files.
Alternatively, drag and drop the VirtualBox app from the Applications folder on your Mac into the AppCleaner window and choose Remove.
After the VirtualBox uninstall process, you can choose to keep or delete AppCleaner from your Mac. If you opt for the latter, just drag and drop the program from the Downloads folder to the Trash.
How to Manually Uninstall the VirtualBox Application on Mac Using Finder
If you prefer a hands-on approach to removing VirtualBox, you can move the program to the Trash and follow by deleting leftover items manually via Finder.
Even if you use the methods above, you should check the following locations for VirtualBox leftovers.
Note: To protect against accidentally deleting files critical to macOS, consider creating a Time Machine backup before you begin.
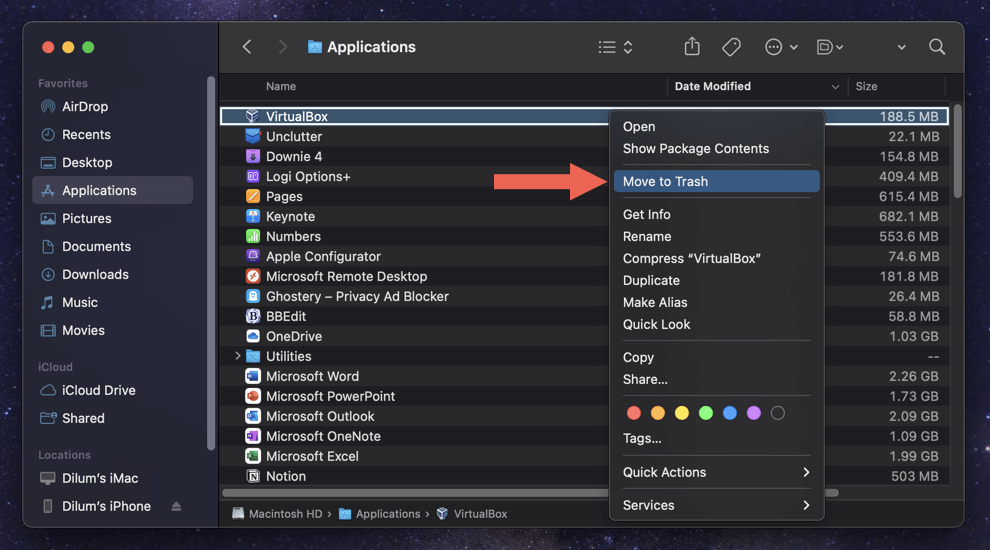
- Open Finder, select Applications on the sidebar, and move VirtualBox into your Mac’s Trash.
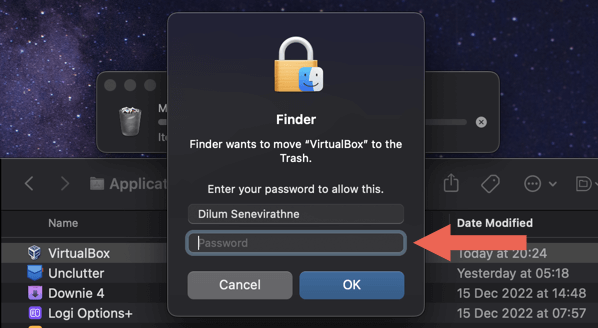
- Enter your Mac user account password and select OK.
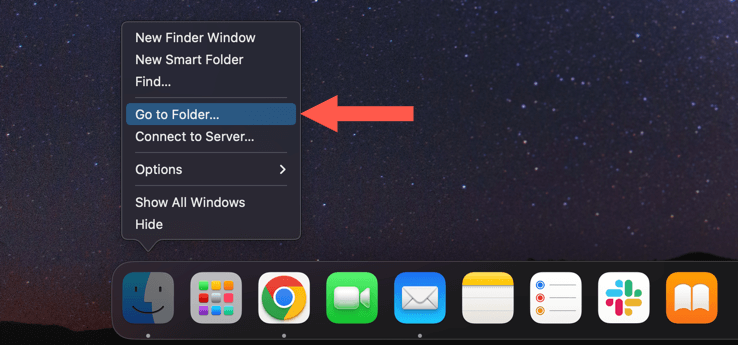
- Control-click the Finder icon on the Dock and select Go to Folder.
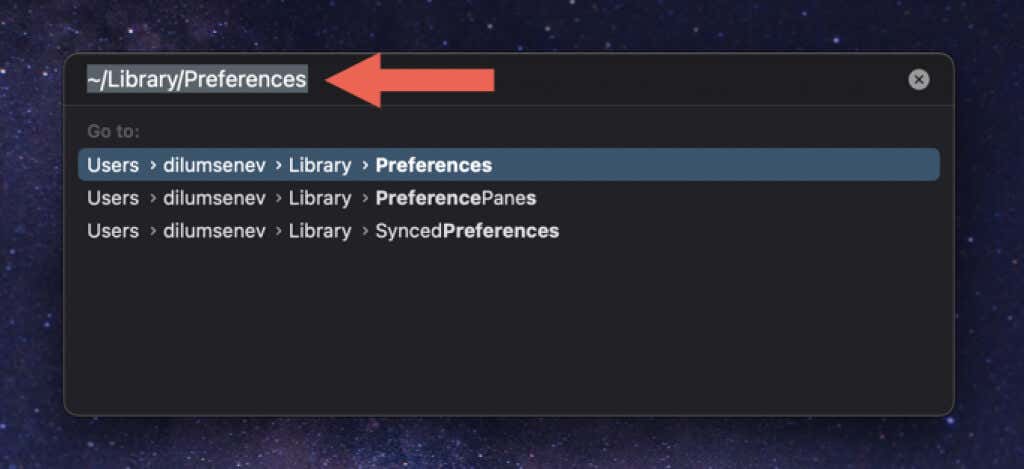
- Paste the following path and press Return:
~/Library/Preferences
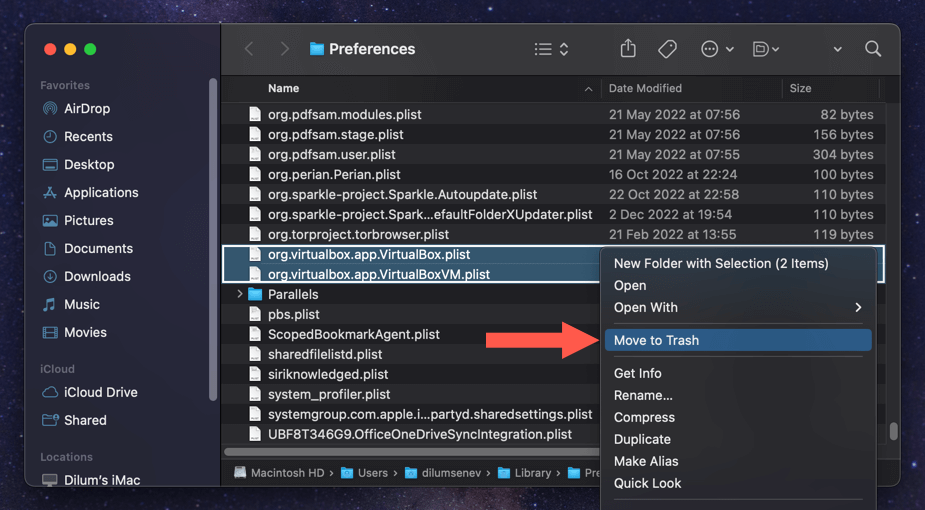
- Drag the following files into the Trash.
- org.virtualbox.app.VirtualBox.plist
- org.virtualbox.app.VirtualBoxVM.plist
- Use the Go to Folder box repeatedly to remove VirtualBox leftovers from the following directories:
- ~/Library/Saved Application State — org.virtualbox.app.VirtualBox.savedState
- ~/Library — VirtualBox
- /Library/Logs/DiagnosticReport — VirtualBoxVM_(Date-Mac-Name].wakeups_resource.diag
- /usr/local/bin — VirtualBox
- /usr/local/bin — VirtualBoxVM
- /usr/local/bin — VBoxManage
- /usr/local/bin — VBoxVRDP
- /usr/local/bin — VBoxHeadless
- /usr/local/bin — VBoxBugReport
- /usr/local/bin — VBoxBalloonCtrl
- /usr/local/bin — VBoxAutostart
- /usr/local/bin — VBoxAudioTest
- /usr/local/bin — vbox-img
- /usr/local/bin — vboximg-mount
- /Library/LaunchAgents — org.virtualbox.vboxwebsrv.plist
- /Library/LaunchDaemons — org.virtualbox.startup.plist
- /Library/Application Support — VirtualBox
- Restart your Mac. If everything works normally, you can choose to empty the Trash.
Optional: How to Remove the VirtualBox VMs Folder
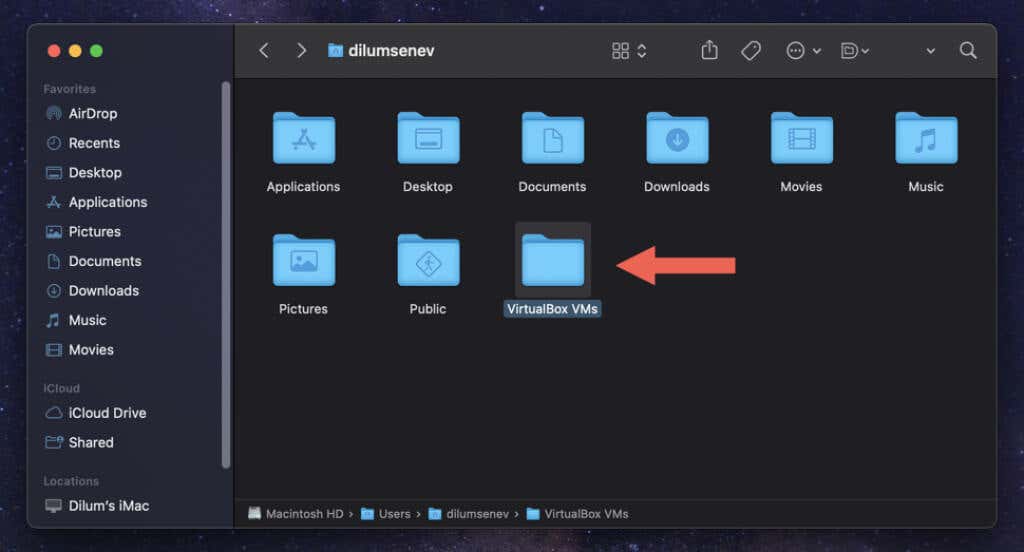
If you want to free up additional storage from your Mac after uninstalling VirtualBox, you must delete the contents of the VirtualBox VMs directory. It houses your OS X, Windows, and Linux operating system disk images.
The folder is located within the root of your Mac user account. To get to it, type the following into a Go to Folder box and press Return:
- ~/VirtualBox VMs
Each virtual machine resides inside a sub-folder inside the directory. Trash any VM you don’t need.
Warning: If you’re planning to reinstall VirtualBox later, consider keeping the images or moving them to an external storage device. If you delete the VMs, you permanently lose all data inside them.
VirtualBox Fully Uninstalled on Mac
Using the VirtualBox Uninstall Tool is the best approach for a thorough VirtualBox uninstallation on your Mac. Use an app removal utility if that fails, or take matters into your own hands and remove the application and all of its leftovers manually. Also, don’t forget to deal with your virtual machine disk images separately.
