It’s essential to keep track of your expenses, including those from Apple. These expenses can include purchases from the App Store, iTunes, Apple service subscription, or even product purchases from the Apple Store.
You’ll need to use your MacOS or iOS device or access the Apple website to check what you’ve been spending money on. If you see something that looks off, you can dispute it. Or, if you have a recurring payment that you think you don’t need, you can cancel it.
How to Check Your Apple Bill Charges
Checking Your Apple bill charges keeps you informed about your transactions and subscriptions. The process for checking your purchase history depends on your device.
Check Your Purchase History on iOS
You can check your purchase history on your iOS device through the Settings app.
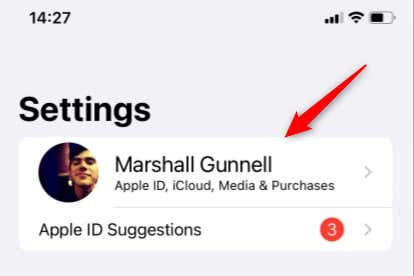
- Launch the Settings app and tap your name at the top of the screen.
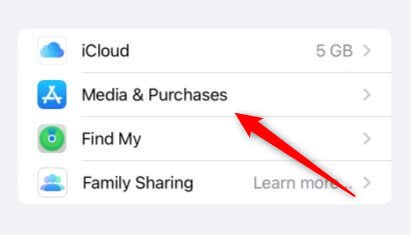
- On the next screen, tap Media & Purchases.
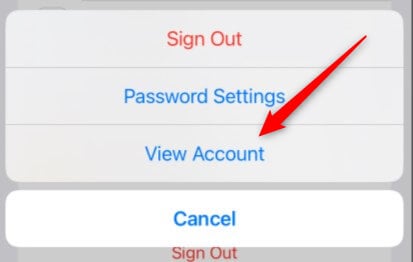
- A menu will appear at the bottom of the screen. Tap View Account.
- You’re now on the Account Settings screen. Tap Purchase History.
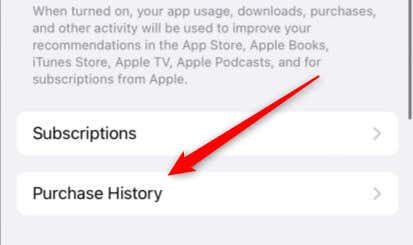
Your purchase history is displayed on this screen.
Check Your Purchase History on a Mac
You can access your purchase history through the Music app on a Mac.
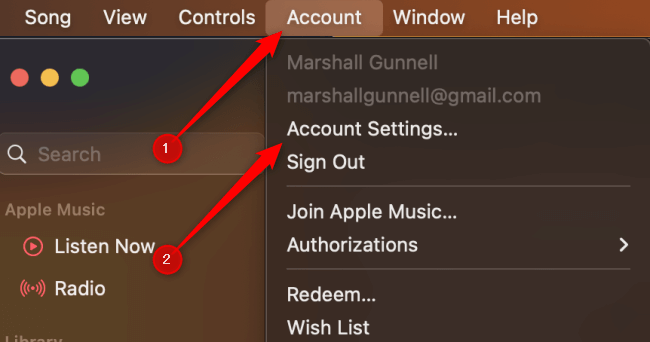
- Open the Music app and then click Account > Account Settings.
- You’ll now be on the Account Information page in the Music app. In the Purchase History section, click See All.
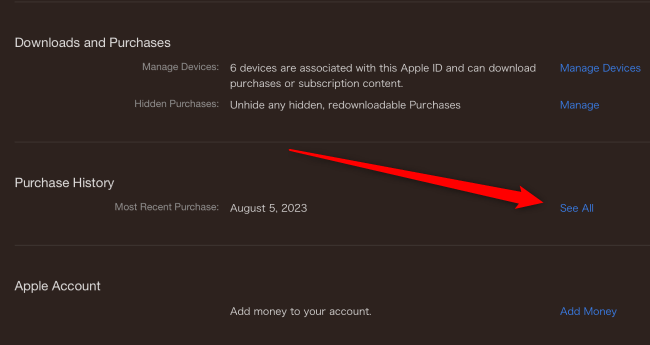
You’ll now see your Apple purchase history.
Check Your Purchase History on Apple.com
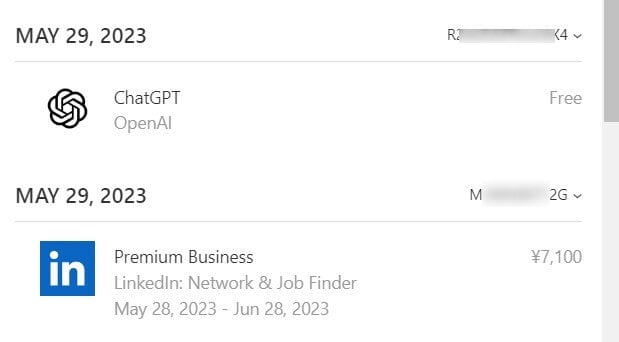
You can also check your purchase history from the official Apple website. To do so, access reportaproblem.apple.com and then sign in with your Apple ID. You’ll see your purchase history once you sign in.
How to Cancel Recurring Subscriptions
You can cancel recurring subscriptions from your iOS device or the official Apple website. If you attempt to cancel a recurring subscription from the Music app on your Mac, it will redirect you to the Apple website.
Cancel Subscriptions From Your iOS Device
You can cancel recurring subscriptions from the Settings app on your iOS device.
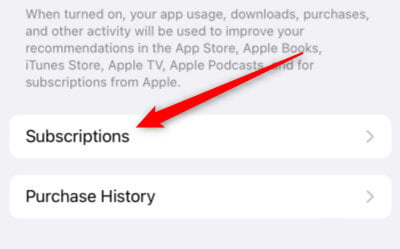
- Navigate to the screen before your purchase history. Open the Settings app and tap your name > Media & Purchases > View Account. Next, tap Subscriptions.
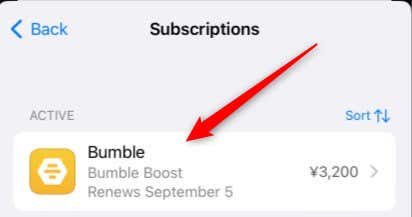
- In the Active section, tap the subscription you’d like to cancel.
- On the next screen, tap Cancel Subscription.
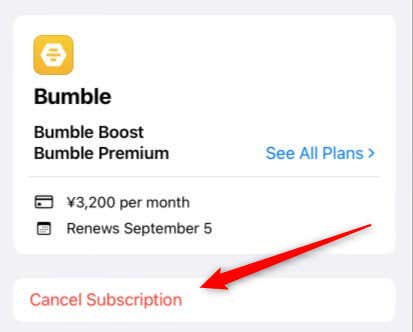
You’ll be asked to confirm that you want to cancel the subscription. Confirm, and your subscription will be canceled. You will not be charged during the next billing cycle.
Cancel Subscriptions From Apple.com
If you don’t have an iOS device handy, you can cancel recurring subscriptions from the Apple website as long as you have iTunes.
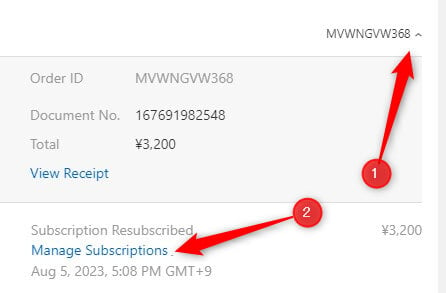
- Go to reportaproblem.apple.com. Click the billing number to the right of the subscription you want to cancel, then click Manage Subscriptions.
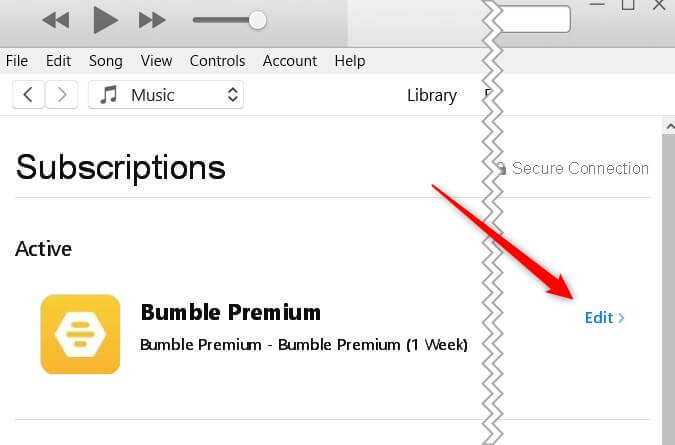
- iTunes will open on your computer, and you’ll automatically be in Subscriptions of the Store section. Click Edit next to the subscription you want to cancel.
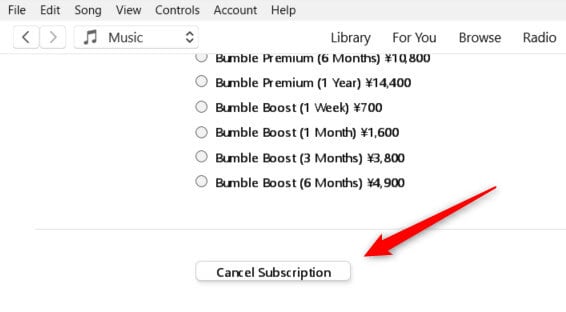
- Scroll to the bottom of the next page and click Cancel Subscription.
- A popup will appear. Click Confirm to confirm the cancellation.
The subscription will remain valid until the next billing period.
How to Dispute Charges on Your Account
If you’ve noticed an unfamiliar or incorrect charge on your Apple account, you’d naturally want to dispute it. Apple makes it relatively easy to dispute a charge but review it first to verify that it isn’t from a forgotten purchase or a subscription renewal.
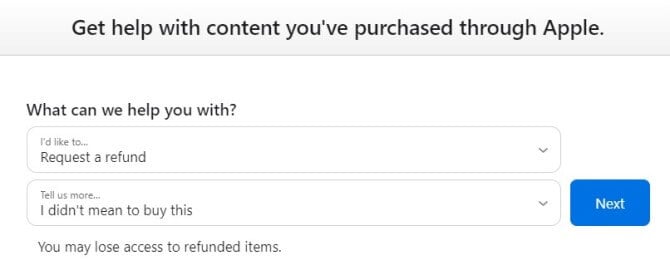
If you’ve confirmed that it’s an unfamiliar charge, the first thing to do is go to reportaproblem.apple.com and request a refund. You can do this at the top of the screen.
The process is simple. Once you’ve told them you want a refund and why, they’ll ask which purchase it was. Select the item you’d like to dispute.
If this process doesn’t yield results, you must contact Apple directly. You can call them or use the online chat service on their support site.
Don’t Overlook Your Apple Purchases
Keeping an eye on your Apple expenses is a positive step towards staying in control of your expenses. Regularly check your purchase history and be aware of active subscriptions to avoid getting charged.
[related_posts_by_tax posts_per_page="5"]