Most people haven’t considered changing the name assigned to their MacBook by macOS. Many people use the original name chosen during the initial setup, like their full name or something generic like “MacBook Air” or ” iMac “. However, understanding how to modify your Mac’s name is one of the most common commands every Mac admin should know.
This is especially true if you’re part of a small team or large organization and can easily rename your Mac to identify and manage multiple devices.
This tutorial will walk you through the steps to rename your computer, adjust its hostname, and modify the local hostname on macOS.
Why Change the Name of Your Mac?
If you’re still confused about why you should change the name of your MacBook, here are a few possible reasons.
- Personal Preference. Sometimes, the default username doesn’t resonate with you. Instead of putting up with a strange username that irks you every time you see it on your Mac, take control and change it to something you like.
- Simplifying AirDrop. AirDrop is a popular tool for file transfers, but when your Mac sports a random or confusing username, it can create confusion about the sender or the destination. A clear and recognizable name for your MacBook or Mac resolves this issue seamlessly.
- Streamlining Bluetooth Connections. Have you ever struggled to connect a device to your Mac and been greeted with a perplexing string of characters instead of a device name? The same frustration arises when connecting your Mac to a display-equipped device. A well-named Mac significantly simplifies the pairing process.
- Enhanced System Experience. Your username is omnipresent within your Mac’s system, including the main filesystem. Opting for a meaningful username facilitates typing commands and maneuvering through Terminal, streamlining your experience.
- Multi-User Environment. In scenarios where multiple individuals share the same Mac, customizing Mac filenames based on users ensures everyone has their distinct account, promoting a sense of ownership and organization.
- Network Clarity. In the event of network issues at home, identifying which devices utilize your Wi-Fi becomes crucial. A familiar and identifiable Mac name allows you to easily recognize and manage your devices, preventing connectivity hitches when changing passwords or managing your network.
Computer Name vs. Hostname vs. Bonjour Hostname
Before creating a new name and hostname for your Mac, you must understand the difference between computer name, hostname, and Bonjour hostname. It’s essential in managing your Mac effectively.
We’ll start with a computer name. This is a user-friendly label that identifies your computer. It’s like a name tag for your device that makes it easily recognizable to you and others using the computer.
What about the hostname? Think of a hostname as a digital identification for your computer within a network. It helps in various network communications and proves useful when accessing your device remotely using SSH (Secure Socket Shell).
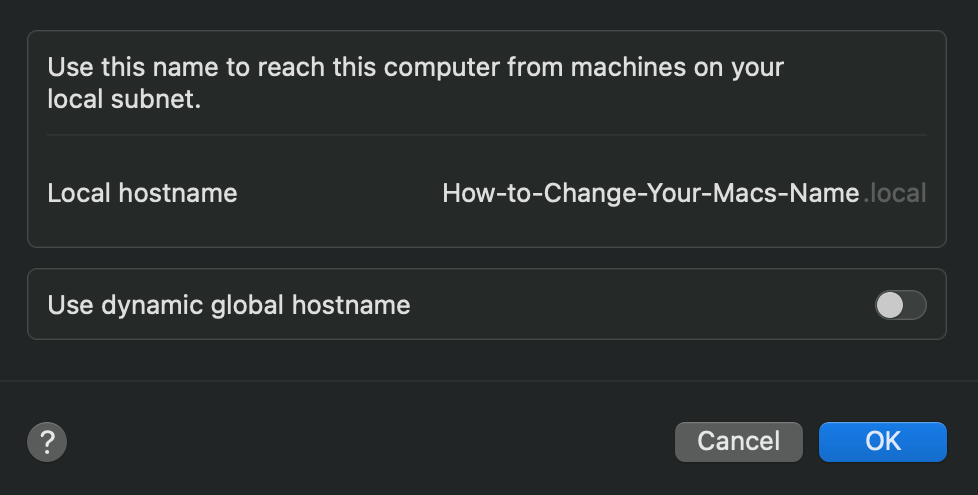
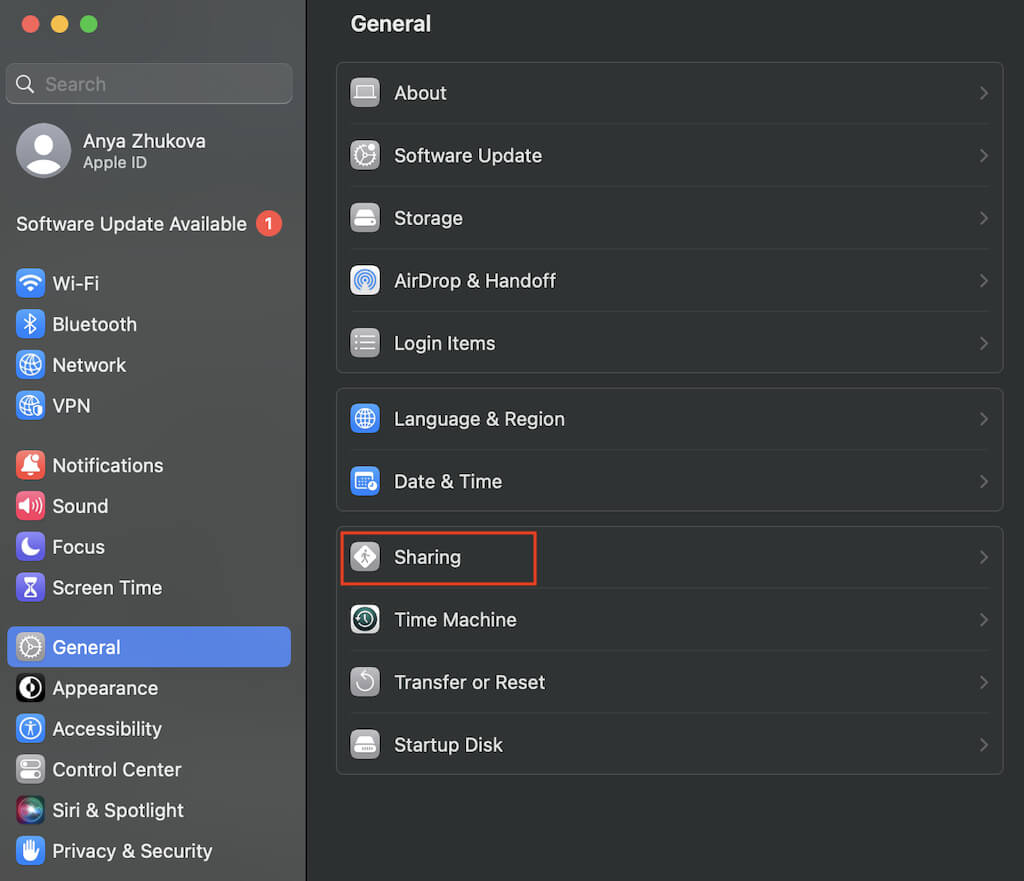
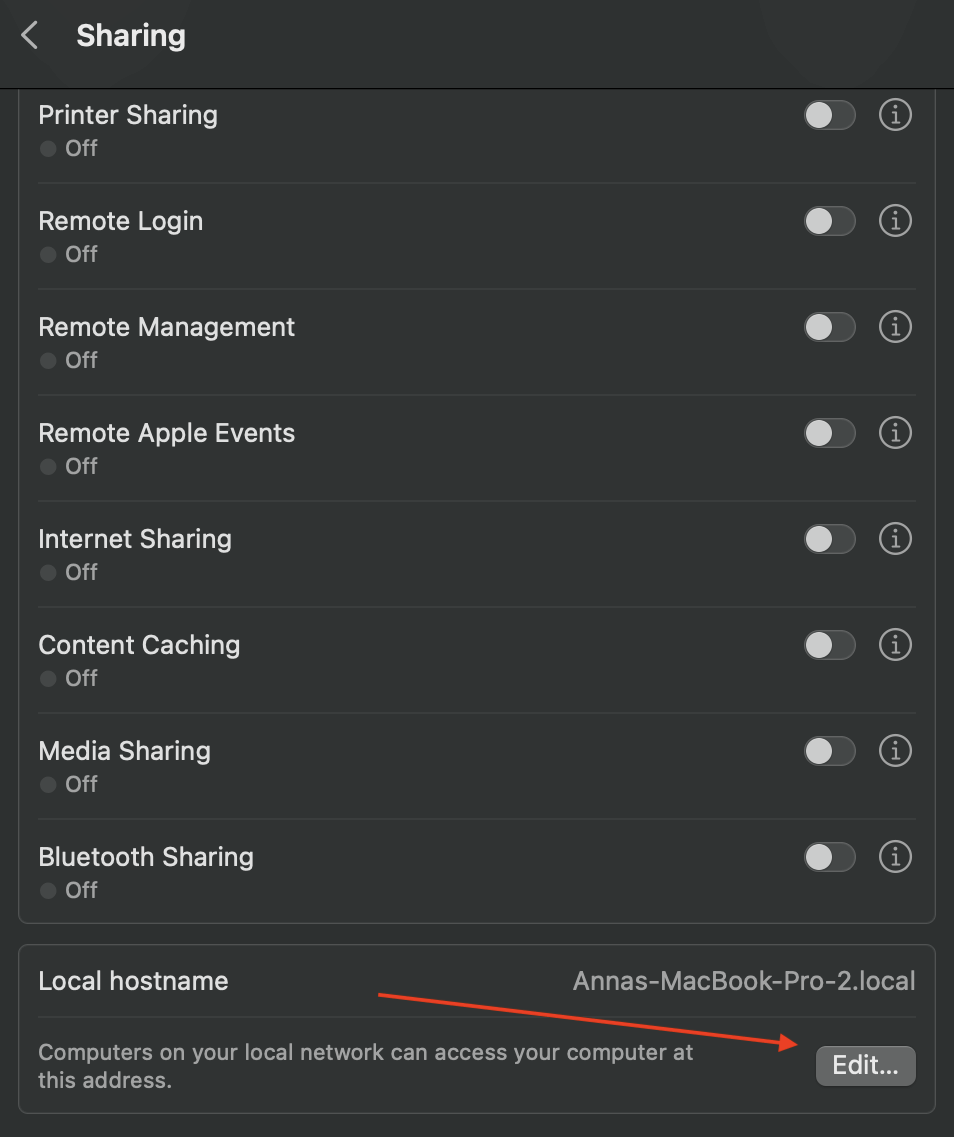
Finally, we have the Bonjour hostname or local hostname. The Bonjour name, also known as the local hostname, facilitates connections within your local network. Using this name, computers on the same network can locate and link up with your Mac. You can see your Mac’s current local hostname if you follow the path Apple Menu > System Settings (or System Preferences if you’re running an older version of macOS) > General > Sharing. Then scroll down, and you’ll find the current name next to the Local hostname.
For example, if your computer name is “Annas-MacBook-Pro-2,” your local hostname, also known as Bonjour name, will be “Annas-MacBook-Pro-2.local,” allowing seamless communication within your local network. Local hostnames aren’t case-sensitive, so Annas-MacBook-Pro is the same as annas-macbook-pro.
How to Change MacBook Name
Now that we have established the difference between all types of names your Mac has, here’s how to change your computer name. Note that the macOS Username is the one shown on the startup page of your Mac and is different from your Apple ID.
Before you do it, it’s recommended to back up your Mac since you will have the option of restoring your data if you corrupt your user profile.
To change your Mac computer name from the default name, follow the steps below. First, we’ll cover the steps for those running macOS Ventura and later.
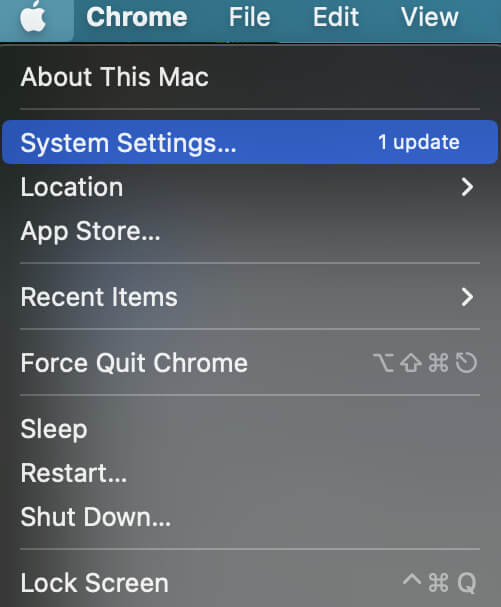
- On your Mac, select the Apple logo in the top left corner of the screen.
- From the drop-down menu, select System Settings.
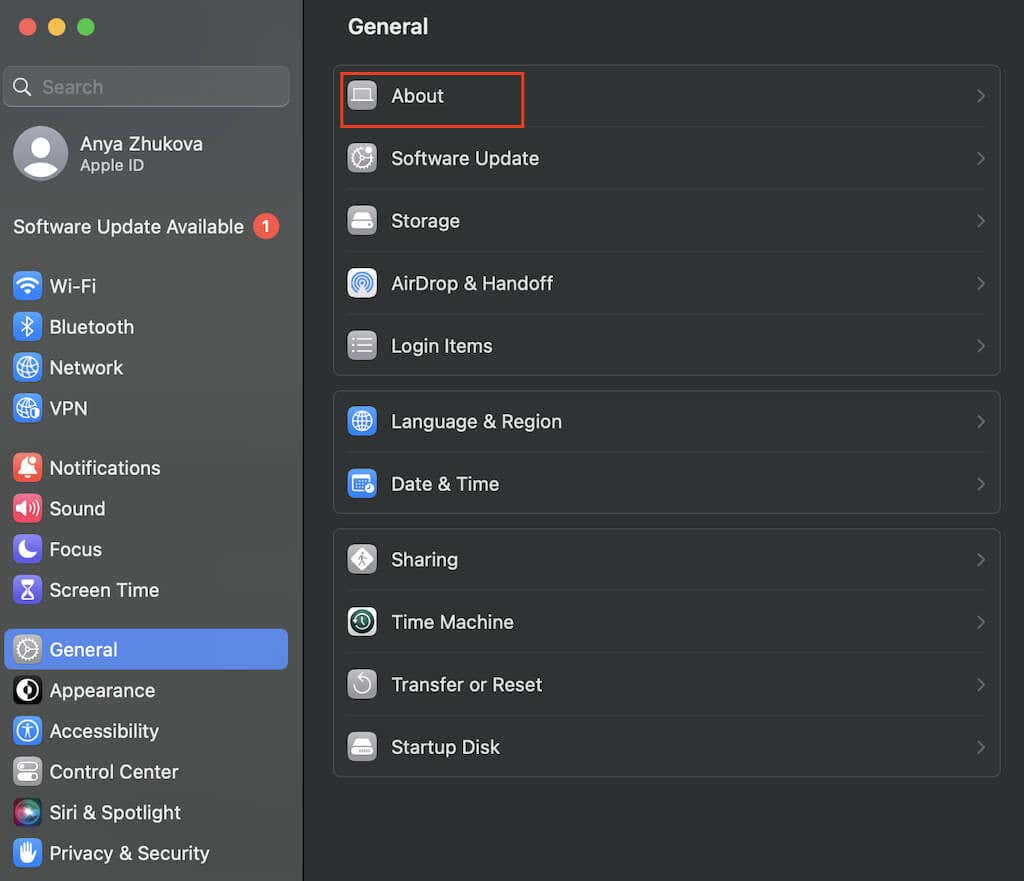
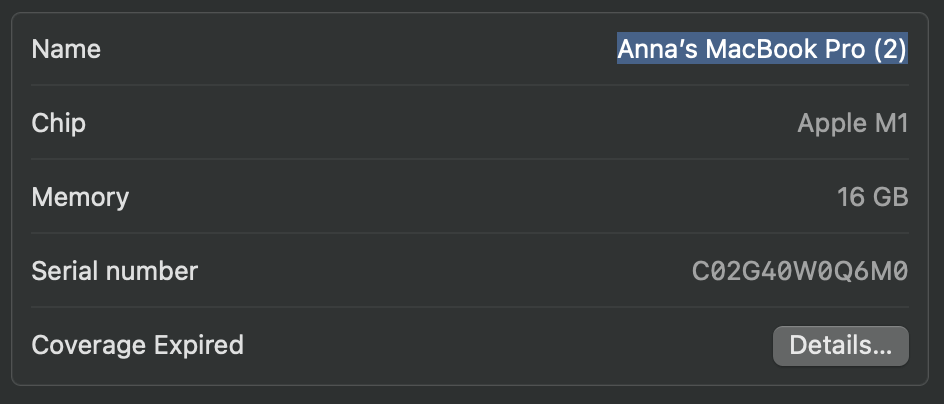
- From the menu bar on the left side of the screen, select General in the sidebar, then select About. You’ll find your current computer name in the Name field.
- Click on the name and type a new one in the computer name field.
Press Enter or exit the About preference pane to set the new name.
If you’re running macOS Monterey and earlier, follow the steps below.
- On your Mac, select the Apple logo to open the Apple Menu.
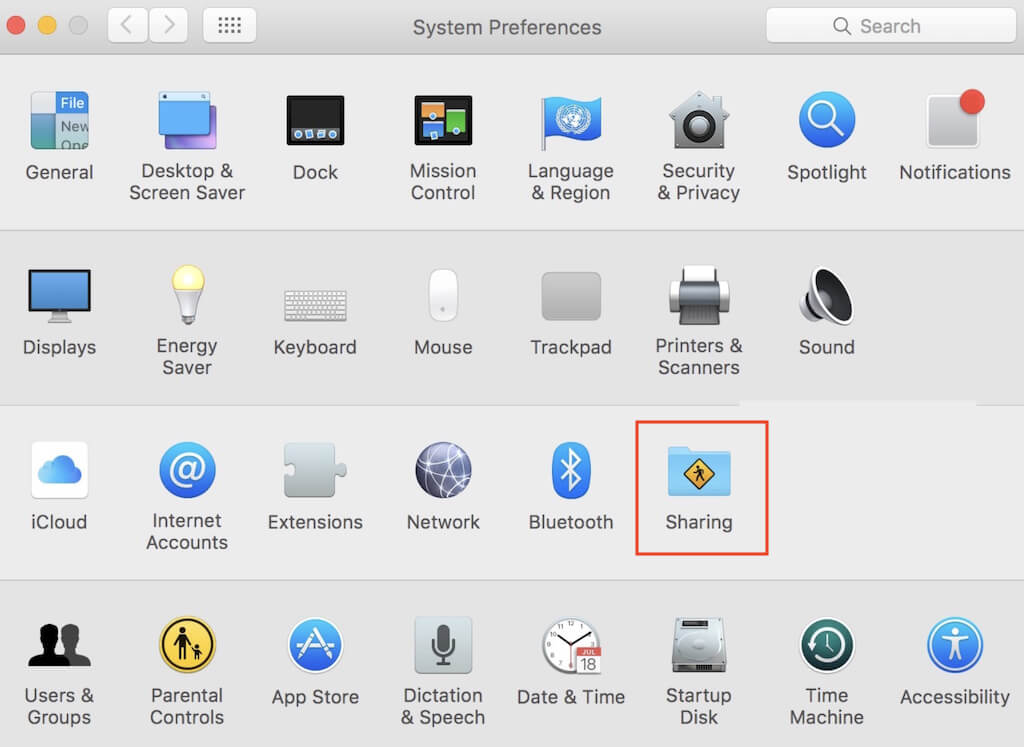
- From the menu, select System Preferences.
- Open the Sharing folder. If the Sharing pane is locked for security reasons, click the lock icon in the bottom left corner and enter your administrator name and password to unlock it.
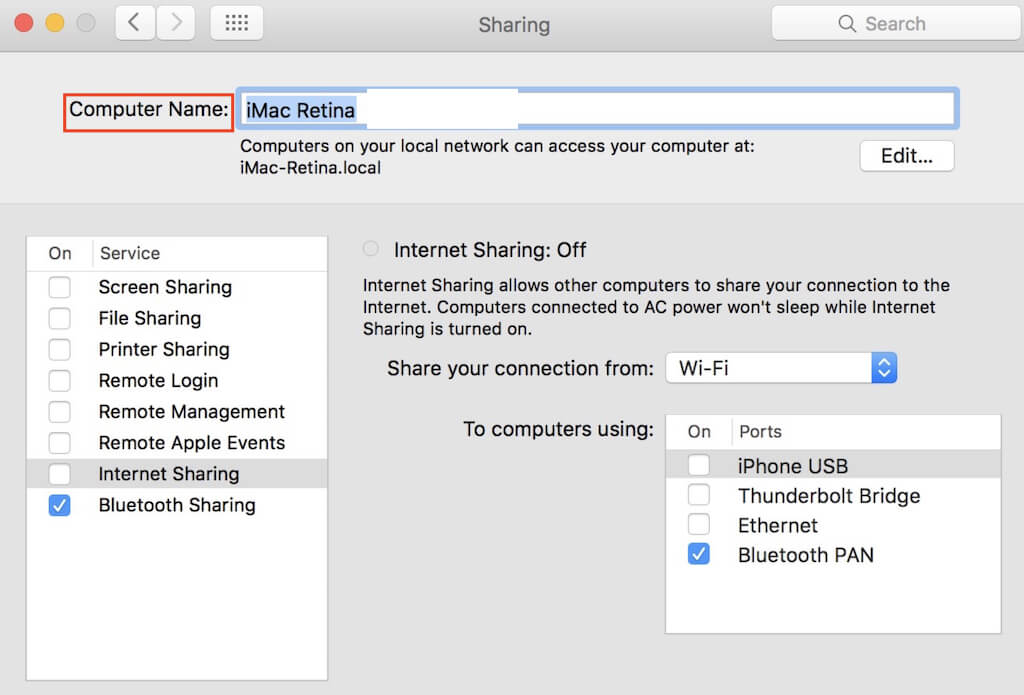
- Inside the Sharing pane, you’ll see the Computer Name box with your current Mac name. Type in the name you want to use with your computer.
- Close the window to save changes.
How to Change Your Computer Name Using Terminal
If you prefer using Terminal to execute various commands on your Mac, you can also use it to change your computer name. To do that, follow the steps below.
- On your Apple device, launch Terminal. To do this, search for Terminal in the Spotlight search option of your computer or by following the path Applications > Utilities > Terminal.
- Type in the following command. Make sure to replace the YourComputerName with the name you want to set.
sudo scutil –set ComputerName YourComputerName
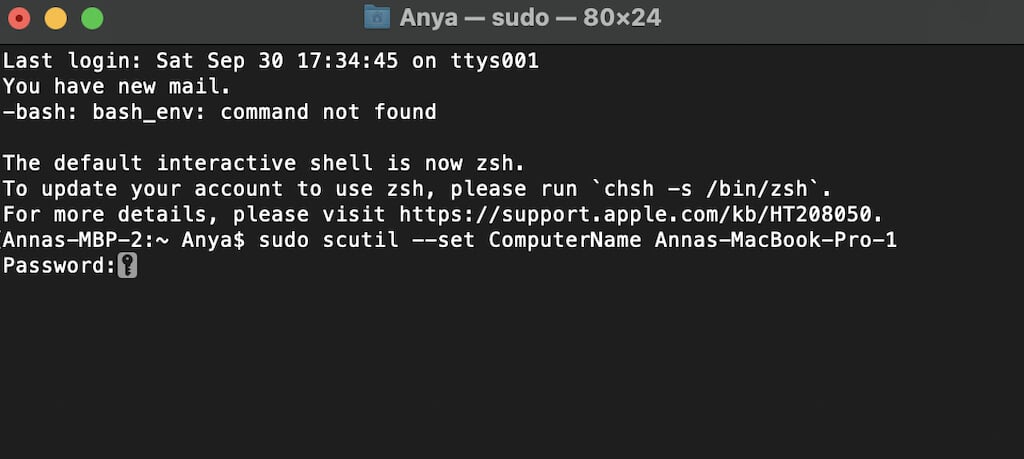
For example, to rename your computer name from Annas-MacBook-Pro to Annas-MacBook-Pro-1, you need to execute the following command via the terminal:
sudo scutil –set ComputerName Annas-MacBook-Pro-1
If you want to set a computer name with spaces in it, you must enclose it in double quotation marks (” “). For example, to rename my Mac into Anna MacBook Pro, I’ll need to execute the following Terminal command:
sudo scutil –set ComputerName “Anna MacBook Pro”
- Press Enter to execute the command.
- Terminal may require you to enter your password to confirm.
If the new name doesn’t reflect in your computer’s System Settings/Preferences, reboot your Mac and recheck it.
You can also check if the changes were applied using Terminal. To do that, you’ll need to execute the “–get”command:
sudo scutil –get ComputerName
How to Change Your Hostname
You can use the same “scutil” command in Terminal to change your hostname on your Mac. To do that, open the Terminal app and run the following command:
sudo scutil –set HostName YourHostName
Make sure to change YourHostName into the new name you’d like to use. For example, if you want your hostname to be AnnasMacBookPro, use the command
sudo scutil –set HostName AnnasMacBookPro
To confirm the change, you can run the following command in Terminal:
sudo scutil –get HostName
How to Change Your Bonjour Hostname
Finally, you can change your Bonjour or Local hostname on your Mac. You can use two different methods to do this – with the System Settings on your Mac and also via Terminal.
To change your local hostname using your computer’s System Settings, follow the steps below.
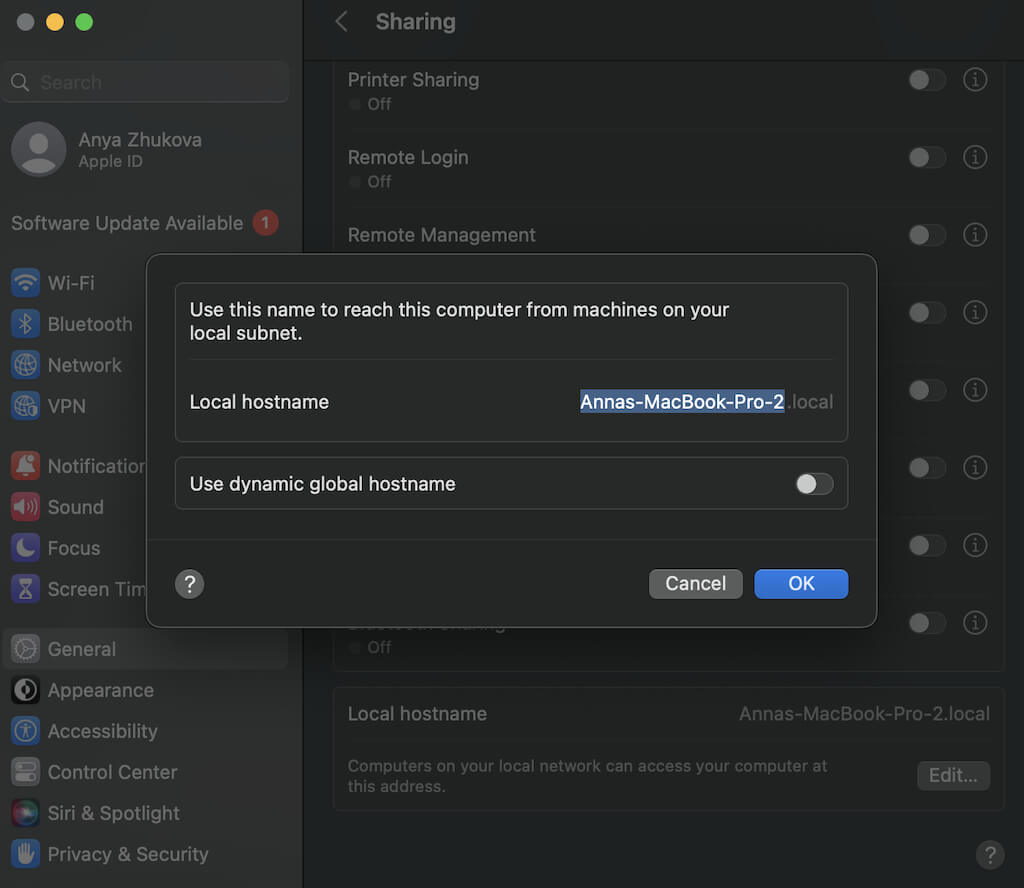
- On your Mac, follow the path Apple Menu > System Settings > General > Sharing.
- Scroll down until you see Local hostname.
- Select edit, type the new name next to Local hostname and select Ok.
- If your Mac’s running macOS Monterey or earlier, follow the path Apple Menu > System Preferences > Sharing.
- Then select Edit under the Computer Name.
- Type the new name next to Local Hostname and select OK to confirm.
Close the window to save changes.
You can also use a “scutil” Terminal command to change your Bonjour hostname. To do that, run the following command in Terminal:
sudo scutil –set LocalHostName YourLocalHostName
That way, if you want to set your local hostname to be annasmacbookpro.local, you’ll need to run the following command:
sudo scutil –set LocalHostName annasmacbookpro
Similarly, to check that the changes took place, there’s a Terminal command that will bring up your new local hostname:
sudo scutil –get LocalHostName
Alternatively, you can reboot your Mac to see if your local hostname is changed.
Customize Your Mac to Make it Feel Personal
Personalizing your Mac can help you keep your digital space tidy and work more efficiently.
If you want to personalize your Mac further, you can go through the advanced options and change your user account and home folder names.
[related_posts_by_tax posts_per_page="5"]