Tweak it to suit your needs
By default, macOS automatically dims and eventually turns off the display after a certain period of inactivity. This feature helps save battery life and prolongs your Mac’s lifespan. However, depending on your preferences and workflow, you may want to increase or decrease the default screen timeout duration.
Whether you need the display to stay on for longer during a presentation or want to conserve power throughout the day by having it turn off faster, changing the screen timeout in macOS is a simple and customizable process.
In this tutorial, we’ll show you how to change the screen timeout on a Mac, including other useful stuff like modifying your screensaver and passcode preferences.
Note: With macOS Ventura, Apple introduced the System Settings app, a fresh take on the older System Preferences more in line with the iOS Settings app on the iPhone and iPad. If your Mac uses an older version of macOS, such as macOS Monterey, Big Sur, or Catalina, follow the alternative set of instructions to change the screen timeout and manage other aspects of your Mac’s display.
Change Screen Timeout on Mac
You can change the default screen timeout for your Mac through the Lock Screen or Battery/Energy Saver preferences panel on your Mac. You can also specify different timeouts on a MacBook model for battery power and the power adapter.
macOS Ventura and Later
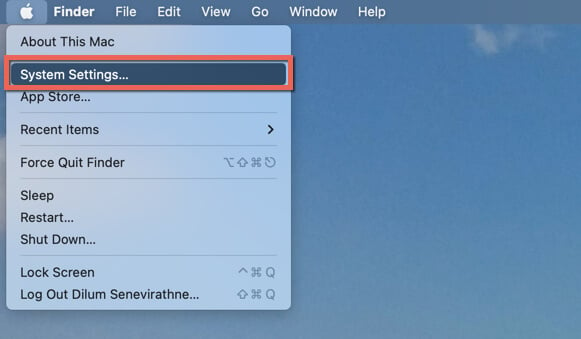
- Select the Apple icon on the top left of the menu bar and select System Settings.
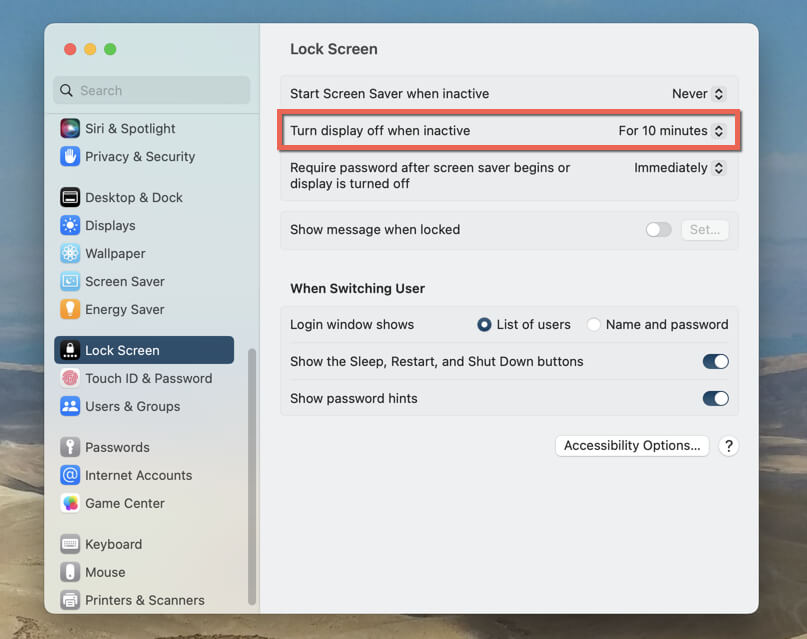
- Scroll down the System Settings sidebar and choose Lock Screen.
- If you use a MacBook Pro or a MacBook Air, open the menus next to Turn display off on battery when inactive and Turn display off on power adapter when inactive and pick an alternative timeout—5 minutes, 10 minutes, 20 minutes, etc.
For example, you could set a shorter duration while on battery power and a longer period while on the power adapter.
On an iMac or Mac mini, use the menu next to Turn display off when inactive option to adjust the screen timeout.
macOS Monterey and Older
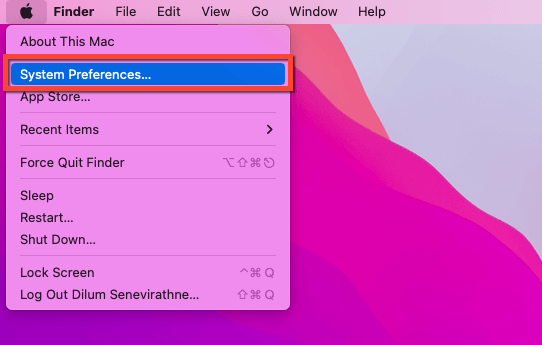
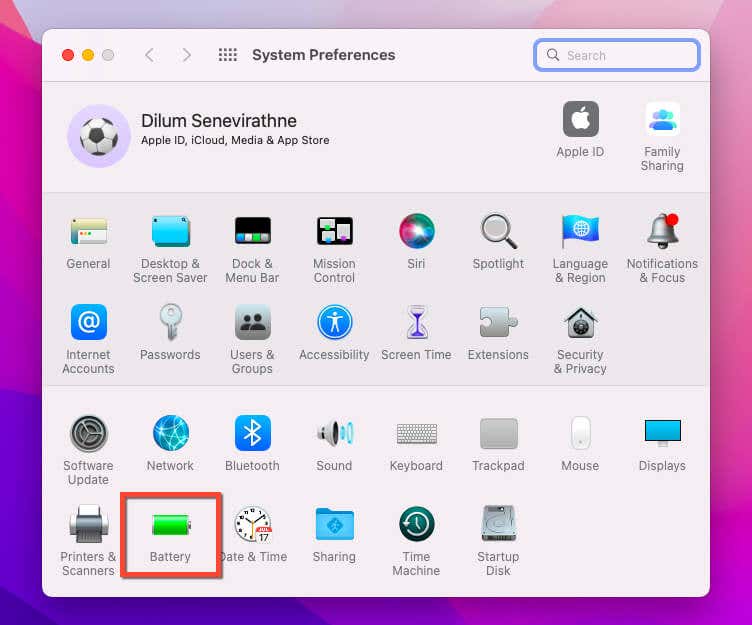
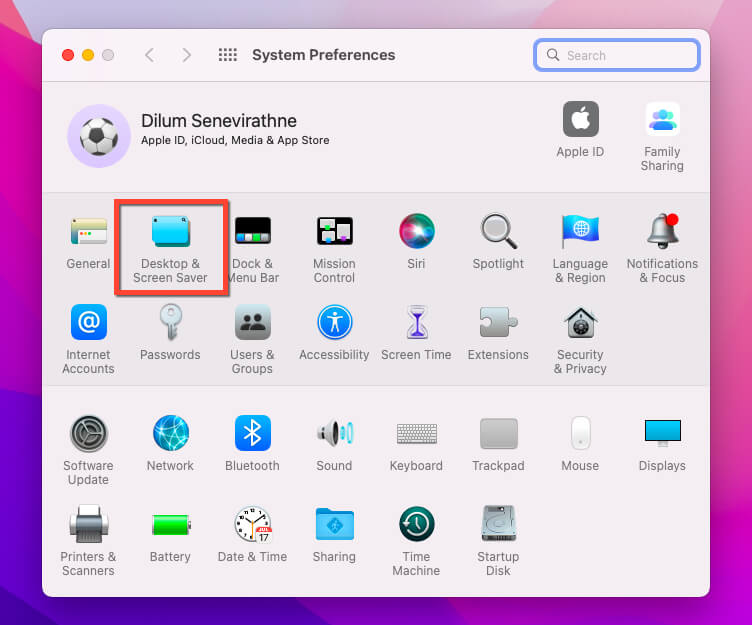
- Open the Apple menu and select System Preferences.
- Select Battery/Energy Saver.
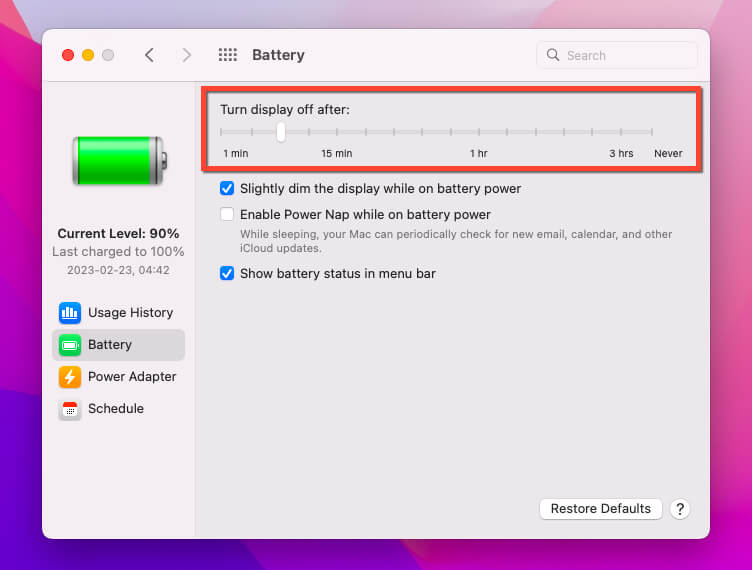
- Use the slider under Turn display off after under the Battery and Power Adapter tabs to modify the default screen timeout if you use a MacBook.
If you use an iMac or Mac mini, use the Turn display off after slider under the Power tab to change the screen timeout duration.
Stop Your Mac From Sleeping
In addition to the display, macOS automatically puts other hardware components to sleep mode to conserve additional power and reduce the wear on its internal components. You can stop that by disabling the relevant sleep setting, but only when the Mac runs off a power adapter.
macOS Ventura and Later
- Select the Apple logo on the top left corner of the screen and choose System Settings.
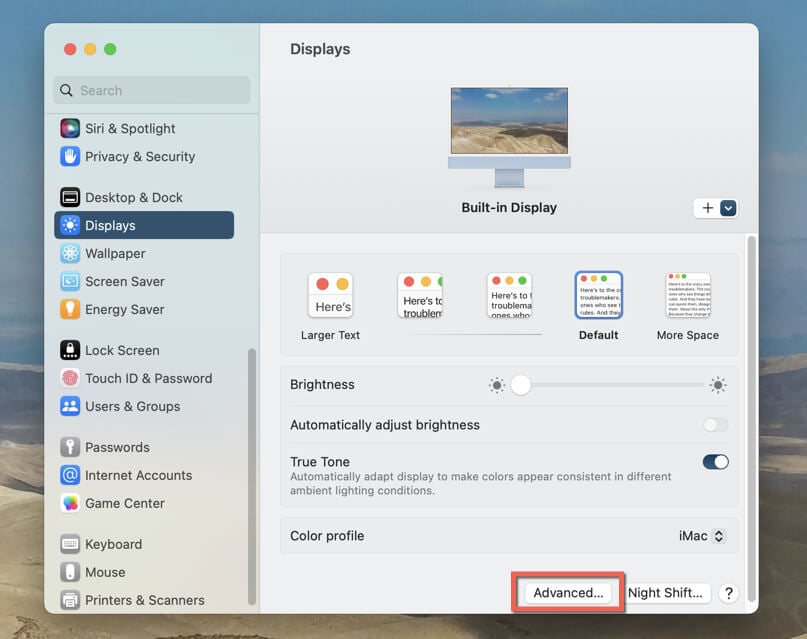
- Select Displays on the sidebar.
- Select the Advanced button.
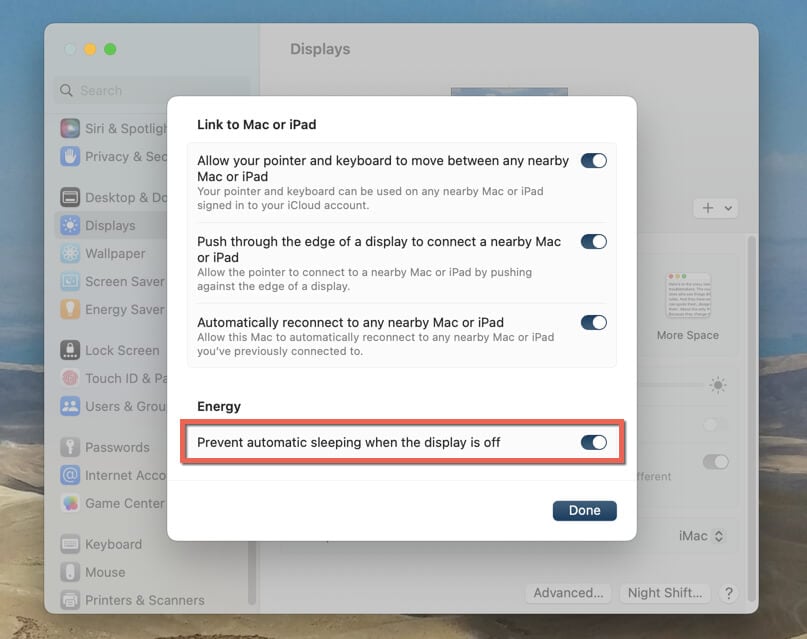
- Turn off the switch next to Prevent automatic sleeping on power adapter when the display is off. On an iMac or Mac mini, turn off the switch next to Prevent automatic sleeping when the display is off.
- Select Done to save your changes.
macOS Monterey and Older
- Open the Apple menu and select System Preferences.
- Select Battery/Energy Saver.
- Select the Power Adapter/Power tab.
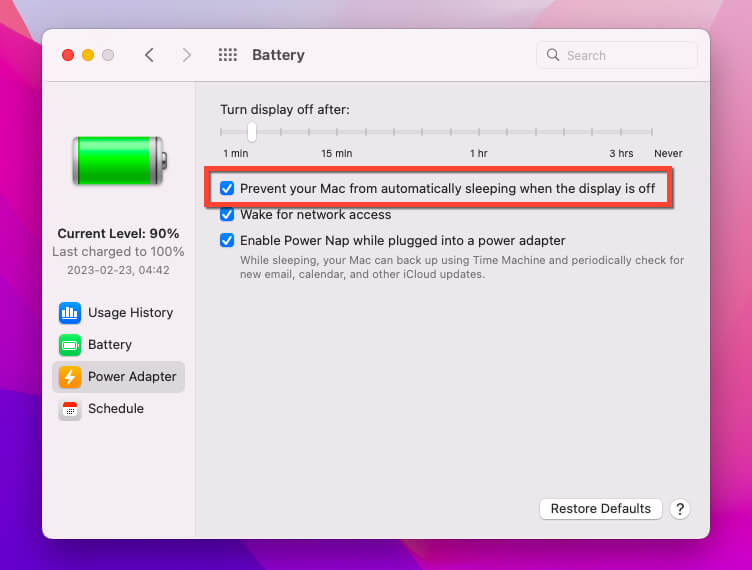
- Uncheck the box next to Prevent your Mac from automatically sleeping when the display is off.
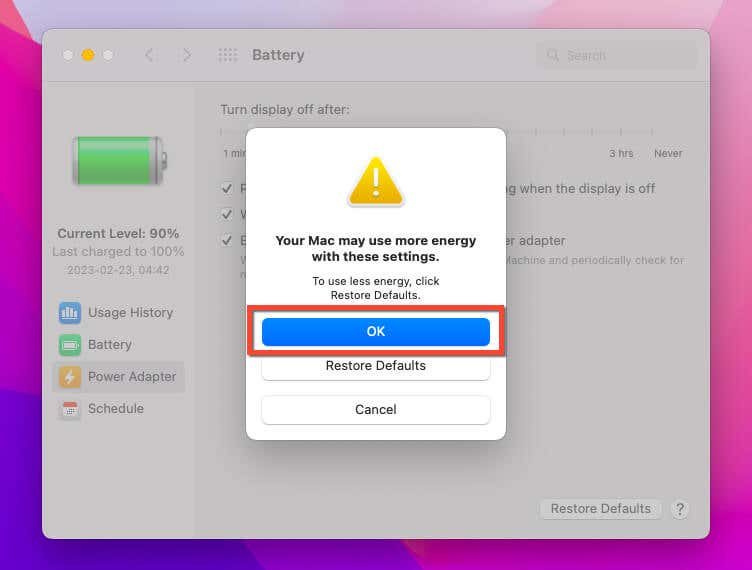
- Select OK on the confirmation pop-up.
Change Screen Saver Timeout
You can add a touch of personality to your Mac by having it display a screensaver before the screen times out. Here’s how to set up a screen saver and change the amount of time before it kicks in.
macOS Ventura and Newer
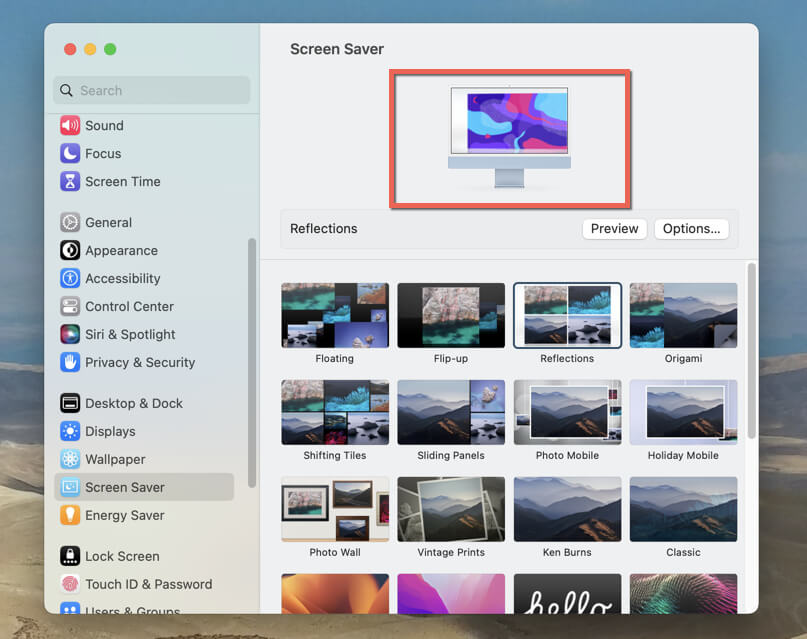
- Open the System Settings app and choose Screen Saver on the sidebar.
- Pick a screensaver on the list—Floating, Flip-up, Reflections, etc.—and select Options to customize it. For example, you can decide what colors and pictures show up with the screensaver.
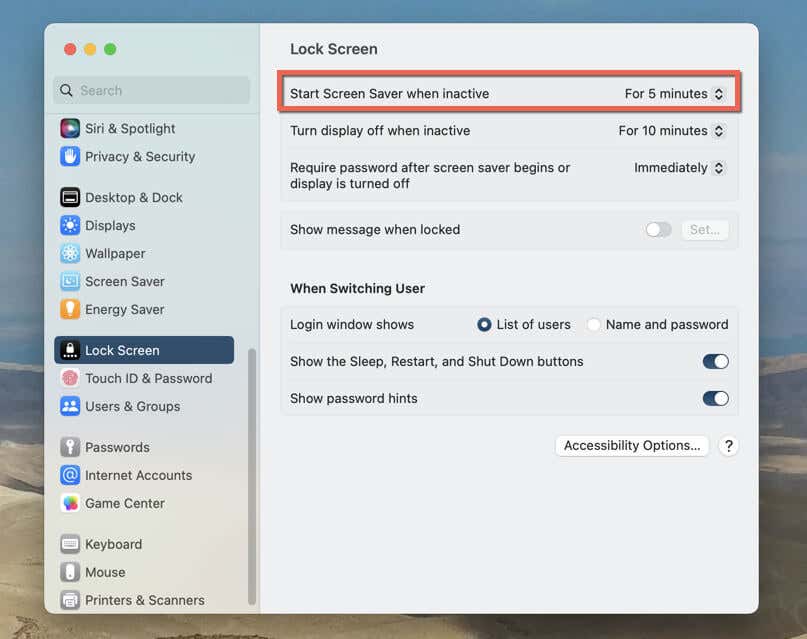
- Switch to Lock Screen on the sidebar. Then, open the drop-down menu next to Start Screen Saver when inactive, and choose a duration. Make sure it’s lower than the screen timeout for your Mac.
macOS Monterey and Older
- Open System Preferences and enter the Desktop & Screen Saver category.
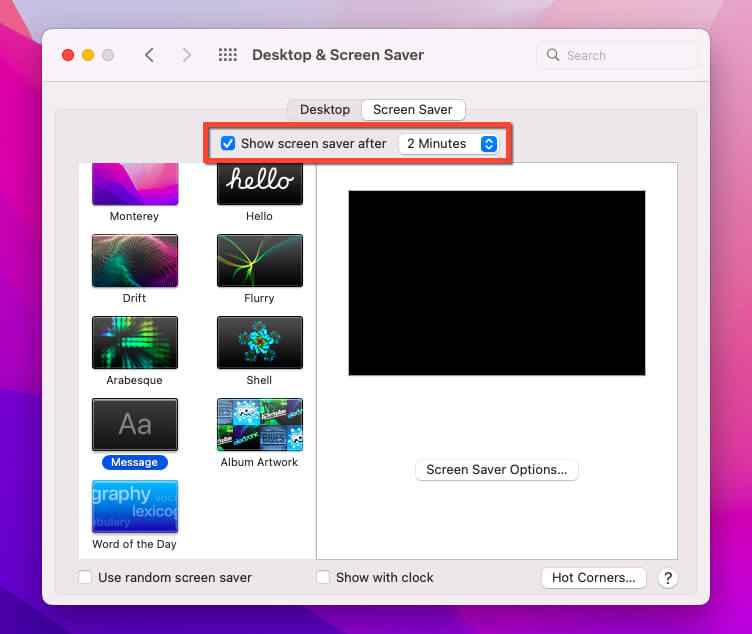
- Switch to the Screen Saver tab.
- Pick a screen saver, turn on the setting labeled Show screen saver after, and use the menu to pick a duration. Pick an option that’s lower than the specified screen timeout.
Tip: You can bind your Mac’s screensaver to a hot corner on the screen to activate it whenever you want. Learn how hot corners work on macOS.
Change Password Request Duration
By default, your Mac asks you for your password when you want to regain access after your screensaver kicks in or the screen times out. You can delay that for a defined amount of time if you wish.
macOS Ventura and Later
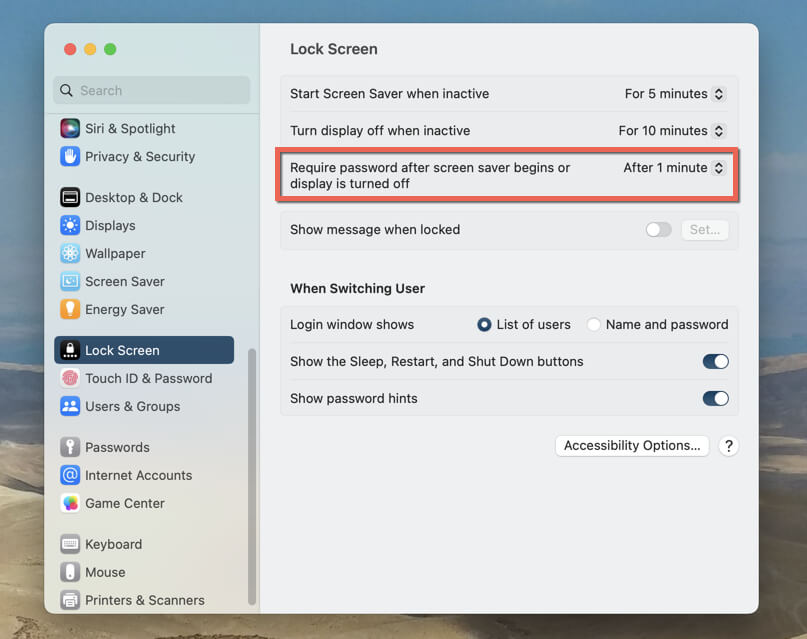
- Open System Settings and select Lock Screen on the sidebar.
- Open the menu next to Require password safer screen saver begins or display is turned off and pick a time duration.
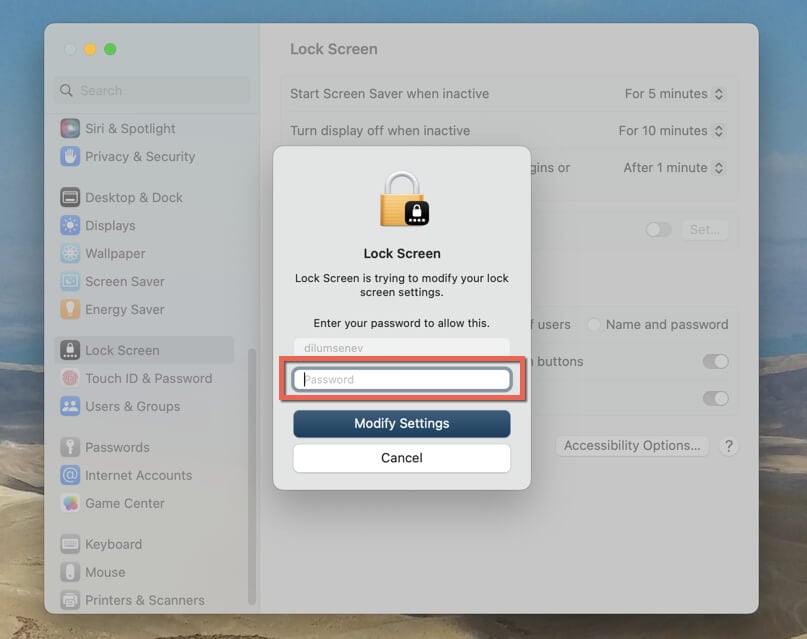
- Enter your Mac user account password and select Modify Settings.
macOS Monterey and Older
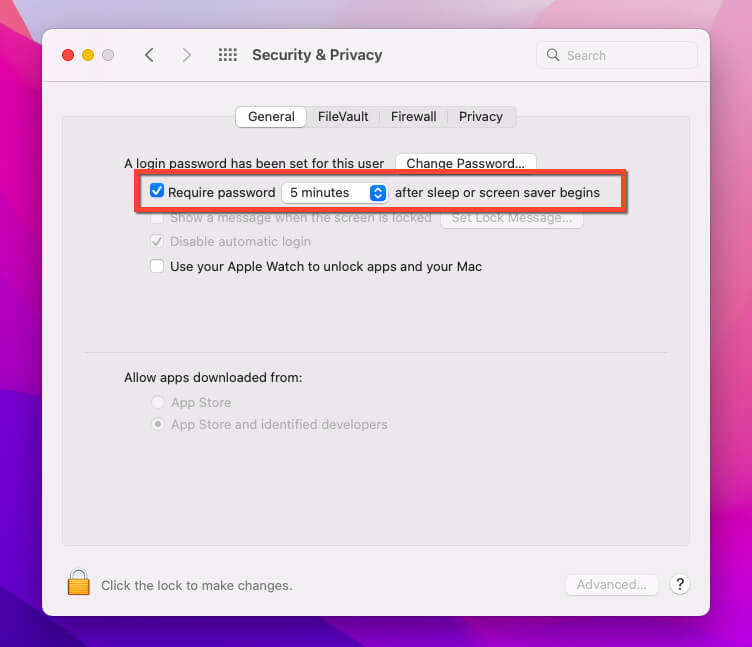
- Go to System Preferences and select Security & Privacy.
- Check the box next to Require password and use the menu to pick a time duration.
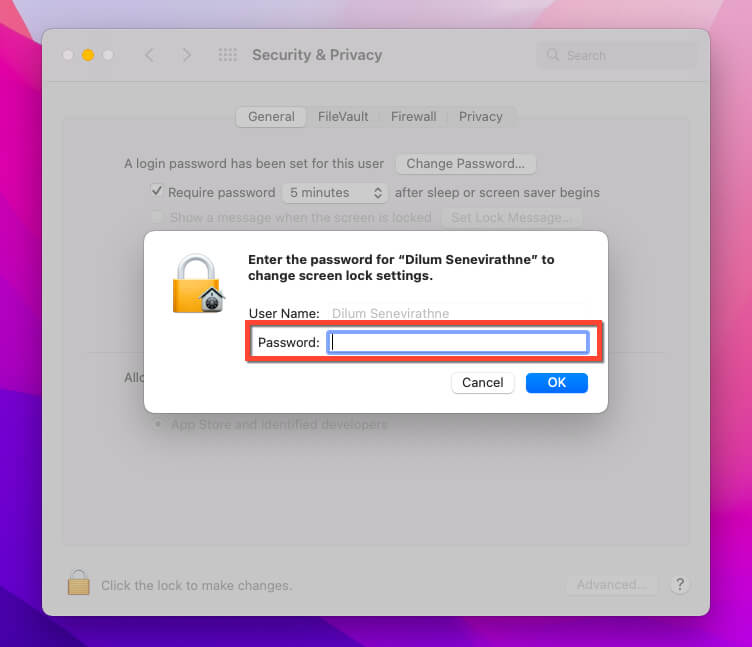
- Enter your Mac user account password and select OK.
Adjust Your Mac’s Screen Timeout to Suit Your Needs
Customizing your Mac’s screen timeout settings can conserve battery life, protect your privacy, and boost productivity. With the simple steps outlined above, you can easily adjust the screen timeout time to suit your needs and preferences. Remember to use the other pointers above to maximize how your Mac’s display behaves while idle and personalize your macOS experience.

