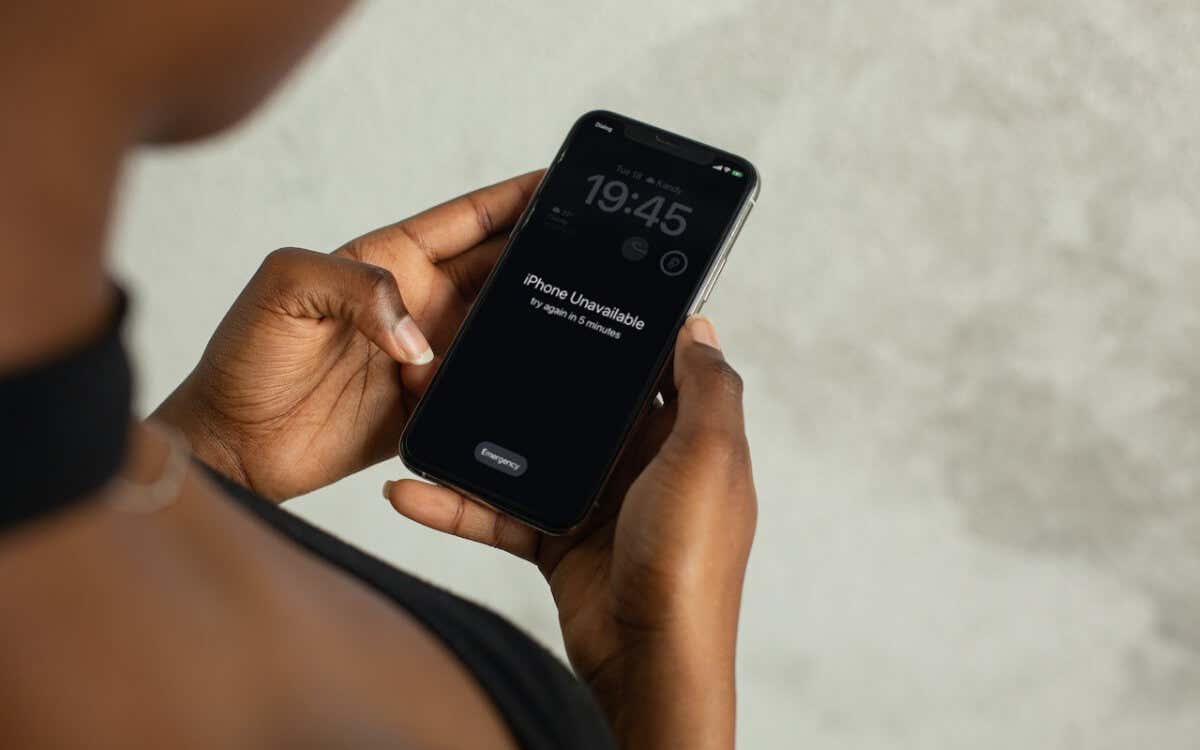
Does your iPhone say “iPhone Unavailable” on the Lock Screen? That happens when you enter the wrong device passcode multiple times. We’ll show you what you must do to bypass the “iPhone Unavailable” Lock Screen message.
Despite having Face ID or Touch ID, your iPhone still asks for your device passcode as part of routine security. However, if you repeatedly enter the wrong passcode five times, you’ll come across an “iPhone Unavailable” or “Security Lockout” Lock Screen message.
If it’s your first warning, you must wait for one minute before you get to try again. Fail again, and you get locked out for five minutes. Keep failing, and the wait period increases until you get locked out completely.
What You Must Do to Bypass the iPhone Unavailable Screen
You’ve got a couple of ways to bypass the “iPhone Unavailable” or “Security Lockout” Lock Screen message. The first method is obvious—keep guessing the correct passcode. You might get lucky!
If you can’t remember, or if your iPhone no longer allows you to, the second method is to erase and reinstall iOS. There are three approaches to this—wipe your iPhone directly via the Lock Screen, erase it through the Find My app on another Apple device, or restore the system software in Recovery Mode.
However, because of Find My iPhone and Activation Lock, you’ll need your Apple ID email and password to authenticate yourself as the device owner before or after erasing your iPhone. Learn what to do if you’ve also forgotten your Apple ID password.
What Happens to the Data on Your Disabled iPhone If You Erase It?
Reinstalling iOS means you lose all data and settings on your iOS device. However, if you have a recent iCloud or iTunes/Finder backup, you have the option to restore the information minus anything created after the backup. Getting back stuff—like photos, contacts, and notes—that actively sync with iCloud shouldn’t be a problem.
Also, if you have a trusted Mac or PC around (meaning you’ve backed up or synced your iPhone to the computer at least once), you should be able to create a new iCloud or offline backup even if you see the “iPhone Unavailable” and “Security Lockout” screen. We recommend you do that to minimize data loss.
1. Erase iPhone via the Lock Screen
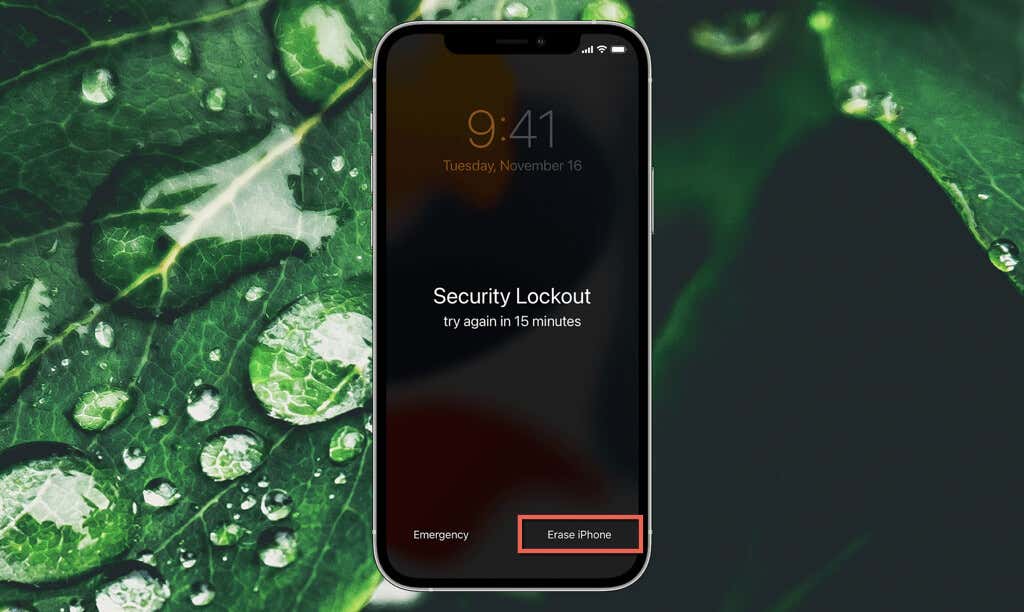
If you use an iPhone running iOS 15.2 or later, you should have the option to erase your iPhone on the lower right corner of the “iPhone Unavailable” or “Security Lockout” screen. You won’t see it if the device isn’t connected to Wi-Fi—you can’t join a network after a lockout—or doesn’t have an active cellular plan.
- Tap the Erase iPhone option to begin.
- Enter your Apple ID and password, and tap Erase iPhone again.
- Follow all on-screen instructions to remove your data and settings permanently. Your iPhone will automatically restart to complete the reset procedure.
During iPhone setup, choose to restore your data from an iCloud or iTunes/Finder backup. Also, sign back in with the same Apple ID to sync information from iCloud.
2. Erase iPhone via Find My or iCloud.com
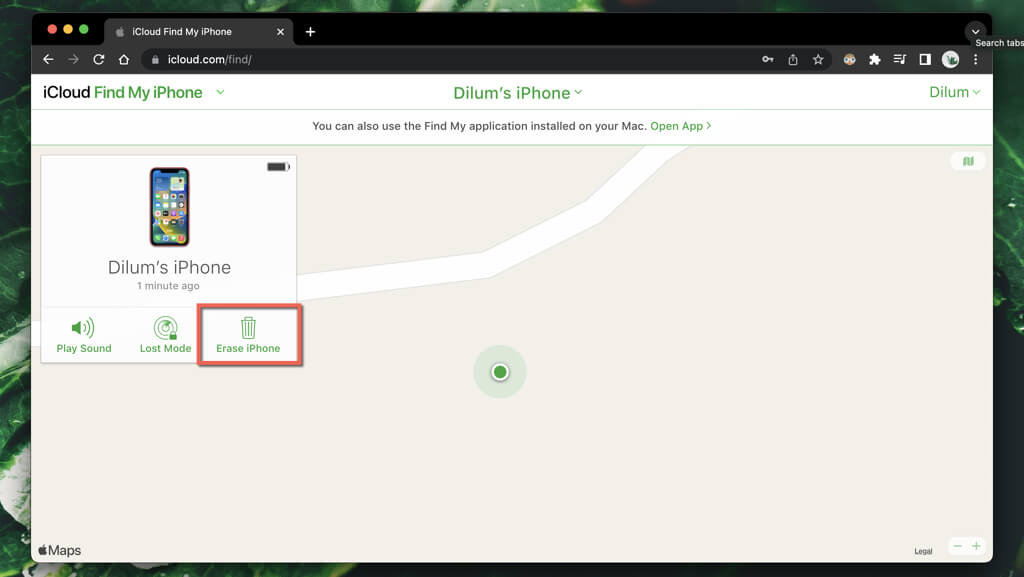
Alternatively, you can reset your iPhone via the Find My app on another trusted Apple device. Or, you can do that after signing into iCloud.com via a web browser. This is ideal if you’re on an iPhone running iOS 15.1 or earlier. However, you must connect the disabled iOS device to the internet via Wi-Fi or cellular.
- Open the Find My app on another Apple device like an iPad or Mac. Or, sign into iCloud.com on a web browser and select Find My—you must still authenticate your action via a trusted Apple device unless you’ve “trusted” the browser before.
- Switch to the Devices tab. In iCloud.com, open the Devices menu from the top of the screen.
- Tap or Control-click your iPhone and select Erase Device/Erase This Device.
Find My or iCloud.com will remotely erase and reinstall iOS. Enter your Apple ID and password while setting up your iPhone afterward and restore your data.
3. Erase iPhone via Recovery Mode
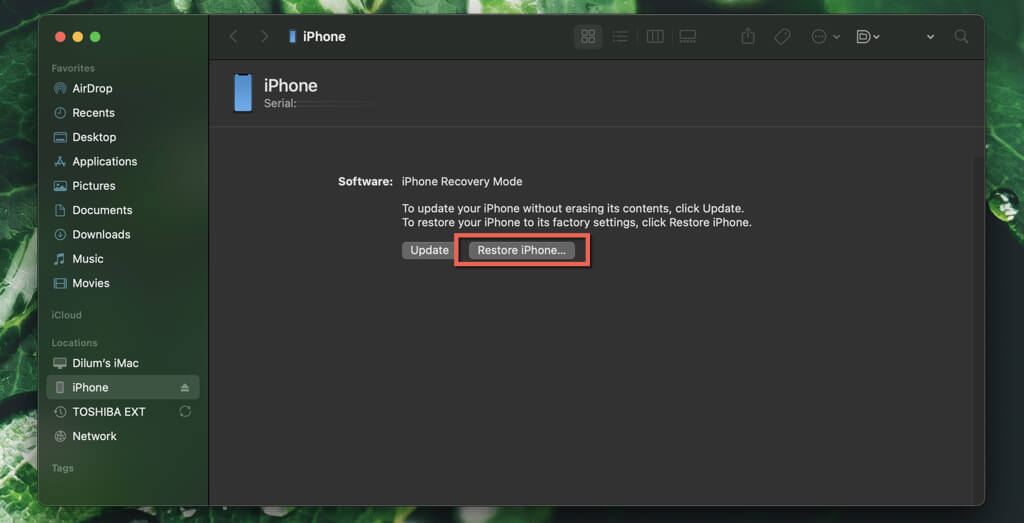
If your iPhone runs iOS 15.1 or older or has no internet connectivity, you must erase and reinstall iOS via Finder or iTunes on a Mac or PC. However, because of Activation Lock, the only way to do that is through Recovery Mode.
Recovery Mode is a special troubleshooting environment that fully restores iOS to factory settings via an IPSW (iPhone Software) file (which it automatically downloads from the Apple servers). It does not require a trusted computer.
For comprehensive step-by-step instructions, check our complete guide to using Recovery Mode on iPhone. However, here’s the process in brief.
Prepare to Enter Recovery Mode
Begin by preparing your iPhone to enter Recovery Mode.
- Connect your iPhone to a Mac or PC via USB.
- Open Finder (only on macOS Catalina and older) or iTunes.
- If you’ve connected your iPhone to the computer before, don’t forget to create a new iCloud or offline backup.
Boot Into Recovery Mode
Depending on your iPhone model, pick a method below to enter Recovery Mode.
- iPhone 8 and Newer (All iPhone Models Starting 2018): Quickly press and release the Volume Up button, and then the Volume Down button. Immediately hold the Side button until you see the Recovery Mode screen in Finder or iTunes.
- iPhone 7 and 7 Plus: Press and hold the Volume Up and Side buttons simultaneously until you see the Recovery Mode screen in Finder or iTunes.
- iPhone 6 and Older: Press and hold the Volume Up and Home buttons at the same time until you see the Recovery Mode screen in Finder or iTunes.
Factory Reset iPhone in Recovery Mode
After entering Recovery Mode, you can proceed with factory resetting your iPhone.
- Select the Restore option on the There is a problem with this iPhone pop-up.
- Wait until Finder or iTunes downloads the latest iOS firmware package. If that takes longer than 15 minutes, your iPhone will reboot—enter Recovery Mode again to complete the download.
- Erase and reinstall iOS. Then, sign in with your Apple ID and restore your data via iCloud or an offline backup.
Don’t Forget to Set Up a Memorable Passcode
As you just saw, bypassing the “iPhone Unavailable” and the “Security Lockout” screens can be complicated, and you risk losing data unless you have a trusted Mac or PC to create a fresh iCloud or iTunes backup. Create a memorable passcode when setting up your iPhone to avoid running into the same problem going forward.
The methods above aside, you can also use third-party applications like iPhone Unlocker and 4UKey to reinstall iOS. These applications automatically put your iPhone in Recovery Mode, download the latest IPSW file to your computer, and reinstall iOS. However, they come at a cost, and you still need your Apple ID and password.
[related_posts_by_tax posts_per_page="5"]