iCloud Photos is not limited to the iPhone and Mac. If you use a PC, you can take advantage of Apple’s image sync and backup service to access, download, or even upload photos.
It’s not as convenient or seamless compared to what you get on an iOS or macOS device. But you should still be in for a decent experience.

In this article, we’ll walk you through a couple of ways to use iCloud Photos on a PC. The first method involves using iCloud Photos in web app form, while the second method relies on the iCloud for Windows desktop app.
iCloud Photos on PC — Use iCloud.com
Apple offers a host of iCloud services in web app form that you can access using any web browser on the PC. One of them is iCloud Photos, where you can view, download, and back up photos. It provides an experience similar to the Photos app on the Mac, but its online-oriented nature might translate to sluggish performance on slower internet connections.
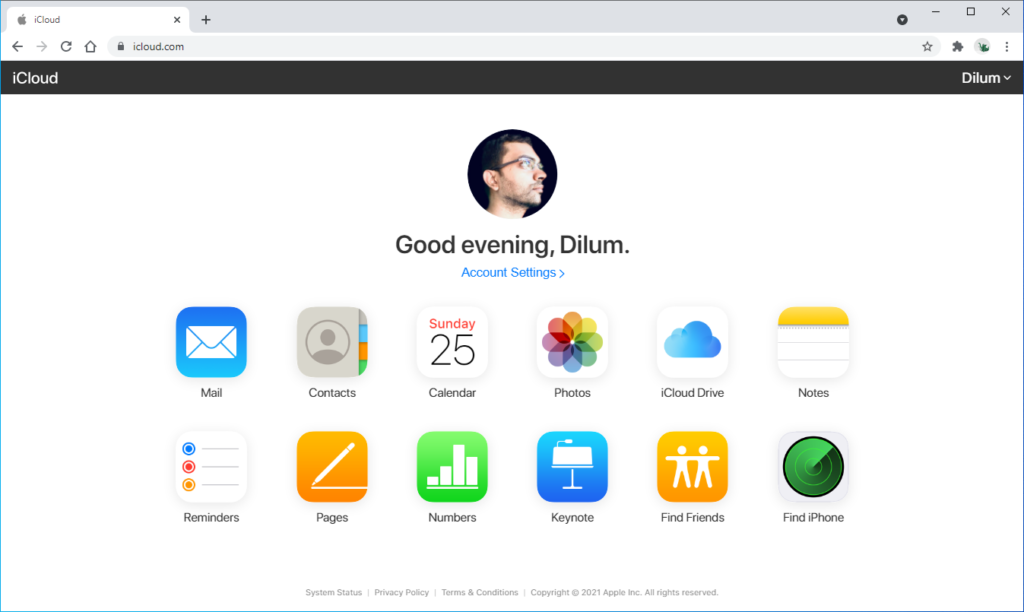
To open the iCloud Photos web app, start by visiting iCloud.com. Then, sign in using your Apple ID credentials and select Photos on the iCloud Launchpad.

Access iCloud Photos
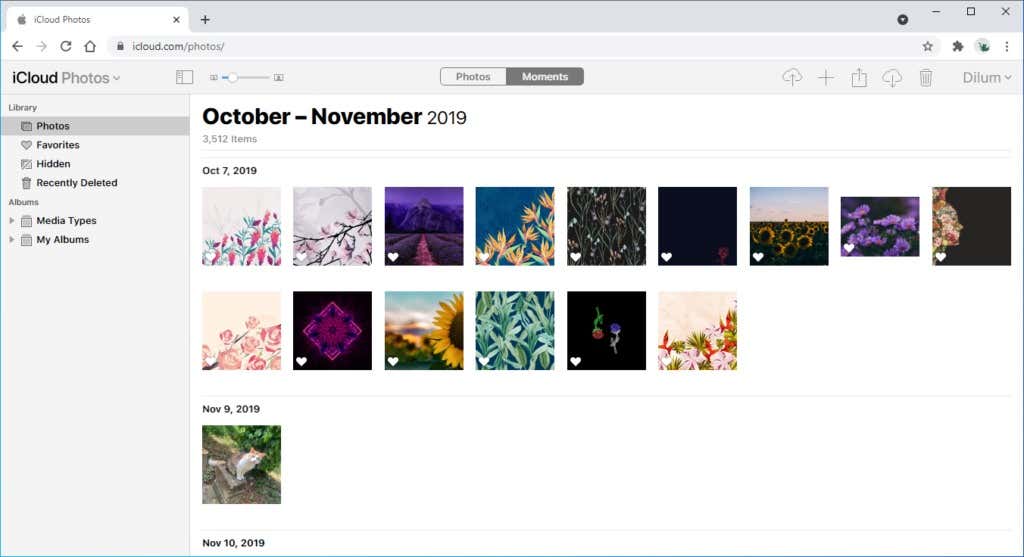
The iCloud Photos web app lets you access all photos you’ve backed up using an iPhone or Mac. You have two tabs at the top of the screen to switch between the Photos and Moments view modes. The former displays images in a continuous list, while the latter breaks them down by date and location.
The sidebar to the left allows you to select between the image master list, your favorites, media types (such as live photos and videos), and any albums you’ve created on an iOS or macOS device.

To view a photo, simply double-click its thumbnail. You can then move back and forth between images using the arrow keys on both sides of the screen.
The icons to the top-left of the screen also allow you to perform a host of actions. The plus-shaped Add icon, for example, enables you to add photos to albums and folders, while the Share icon lets you share individual or select images via email.
Download iCloud Photos
The iCloud Photos web app also allows you to download photos to your PC’s local storage. Just pick an image thumbnail and select the Download icon to the top-left of the screen, and it should automatically download in JPEG format.
You can also select multiple photos for download by clicking and dragging the cursor over the thumbnails or by holding down the Control key as you select them.

But if you prefer downloading your photos in the original HEIC format, you must first click and hold the Download icon. Then, pick the Unmodified Originals option and select Download.
Upload to iCloud Photos
If you want to upload photos from your PC to iCloud Photos, simply select the Upload icon from the top-left of the screen. On the file picker window that then shows up, pick the photos you want to upload and select Open.
iCloud Photos should upload the photos (avoid closing the browser window during this time) and automatically organize them within your photos library.
iCloud Photos on PC — Use iCloud for Windows
If you prefer syncing your photos instead of accessing them in your browser, you must set up iCloud for Windows on your PC. It’s a free app from Apple that allows you to access iCloud services (such as iCloud Photos and Drive) on Windows.
You can install iCloud for Windows via the Microsoft Store. After that, sign in with your Apple ID credentials and go through any two-factor authentication prompts to get the program up and running.

To activate iCloud Photos on PC, open the iCloud app and check the box next to Photos. Then, select Apply. You can also opt to use iCloud Drive on your PC or sync Safari bookmarks and passwords with Chrome should you want.
Access iCloud Photos
To access iCloud Photos, select the iCloud Photos option on the File Explorer sidebar. You should then find all photos inside. Switch to the Details view and select Date to sort them from newest to oldest and vice-versa.
You can also view any shared photos by selecting This PC > Pictures > iCloud Photos > Shared. If you don’t see anything, open the iCloud app, select the Options button next to Photos, and check the box next to Shared Albums.

However, iCloud for Windows doesn’t come with a dedicated image viewer or organizer, so you must use the Photos app in Windows 10 to view them. To make things easier, you can add iCloud Photos as a source folder to the Photos app. Go to the Photos app’s Settings screen, select Add a folder, choose iCloud Photos on the sidebar, and select Add this folder to Pictures.
Download iCloud Photos
By default, iCloud Photos attempts to conserve disk space on your PC, so it only downloads photos locally when you access them. Otherwise, you’ll see placeholder icons only. A cloud-shaped symbol next to an image denotes a placeholder, while a checkmark indicates a downloaded item.
To download a file locally without opening it, right-click the item and select Always Keep on This Device.

Or, you can right-click iCloud Photos on the File Explorer sidebar and select Always Keep on This Device to download your entire photos library to local storage.
Upload to iCloud Photos
If you want to upload any photos from your PC to iCloud Photos, just drag and drop the images into any File Explorer window with the iCloud Photos directory open.
Or you can copy and paste them into the folder.
The photos should then upload and sync with your other devices with iCloud Photos enabled.
Start Using iCloud Photos on the PC
As you just saw, you should have no trouble viewing, downloading, and backing up photos using iCloud Photos on a PC. Just pick the method that works best for you, and you should be fine. Or, you can use a combination of both the iCloud Photos web app (which is ideal for viewing images) and iCloud for Windows apps (which excels at downloading and uploading) for better results.
[related_posts_by_tax posts_per_page="5"]