Getting quick access to recent items is something every Mac user desires as it immediately lets them get back to their previously unfinished work. You may want to continue reading the PDF file that someone sent you yesterday, or maybe you want to finish off the story that you left unfinished last night.
Unless you keep all of these files on your desktop, you really can’t access them with a few clicks. Even if you decide to store these files on the desktop, there’s a limited amount of space beyond which you can’t go.

If you’re troubled by these limitations, there’s a hidden feature in the Dock of your Mac that will help you out. This feature helps add frequently accessed items to the Dock for you to quickly access them.
Add The Recent Items Stack To The Dock
There are already a number of apps sitting in the Dock of your Mac. If you bring your cursor to the bottom of your screen, you’ll reveal the Dock with everything it has in it.
The Dock isn’t limited to what it shows by default. One of its hidden features is the ability to add your custom items to the list. This way you can add a custom stack to the Dock that shows recent items on your Mac.
Once the stack is added, it’s then just a matter of clicking on it to bring up your recent files. Here’s how you do it using the Terminal:
Launch the Terminal app on your Mac. Type in the following command into the Terminal and hit Enter.

defaults write com.apple.dock persistent-others -array-add '{ "tile-data" = {"list-type" = 1; }; "tile-type" = "recents-tile";}' && killall Dock

A new stack will be added to the Dock and you can click on it to open it.
By default, the stack will show the recently accessed applications on your Mac. You can keep it if you want, or you can customize it to show something else instead.
Replace Recent Apps With Other File Types
If recent apps isn’t what you’re looking for and you’d rather prefer quick access to your recent documents, for example, you can change the stack in the Dock to show those items accordingly.
Customizing the newly added stack is as easy as clicking on it and choosing an option. You don’t even need to run any commands this time to get the stack to show your chosen items in the list.
Find the newly added stack in the Dock, right-click on the stack, and choose any of the options shown at the top of the menu. These options include Recent Applications, Recent Documents, Recent Servers, Recent Volumes, and Recent Items.
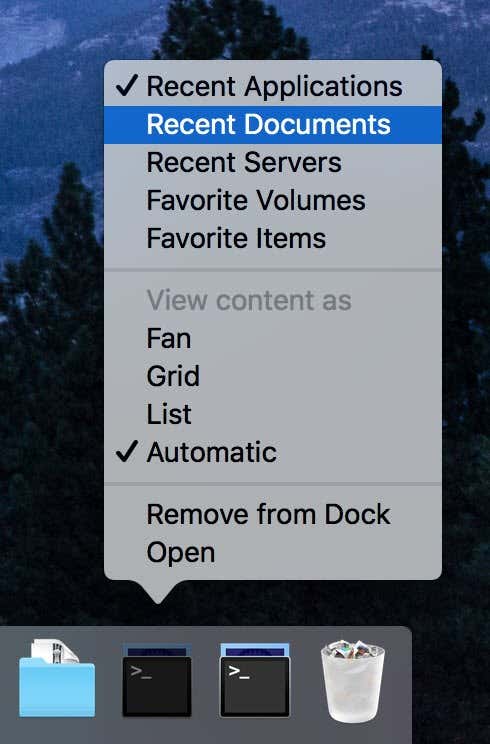
Depending on what you choose, the stack will show your items accordingly.

You can play around with other options as well until it meets your needs.
Add Additional Custom Stacks To The Dock
If you need access to recent items that are of various types, one stack wouldn’t be sufficient for you. You’re going to need to add additional stacks each with its own file type to your Mac’s Dock.
The following is how you add it:
Fire up the Terminal app and run the following command in it.
defaults write com.apple.dock persistent-others -array-add '{ "tile-data" = {"list-type" = 1; }; "tile-type" = "recents-tile";}' && killall Dock
When a new stack appears in the Dock, right-click on the stack and choose the file types you want it to show.
You can run the above command as many times as you want. It’ll add one stack each time. You can then customize what each of these stacks shows in the Dock of your Mac.
Add Custom Recent Items Stack To The Dock
If you’ve noticed, the default stack only lets you access certain recent file types. If you want more than that, there’s no option in the context menu to do it. However, that doesn’t mean you can’t add custom recent items to your Dock.
Mac has another useful feature called Smart Folders. These are actually saved searches that help you quickly find whatever files and file types you’re looking for on your Mac. Once you’ve created a Smart Folder, you can actually pin it to the Dock and access it from there.
This gives you more options and control as to what you can access from the Dock. Here’s how you do it:
Create a custom Smart Folder of your choice on your Mac. Maybe a folder that shows the recently opened PDF files on your Mac. Your screen should look something like the following.

Click on Save, enter a name for your Smart Folder, and save the folder on your desktop.
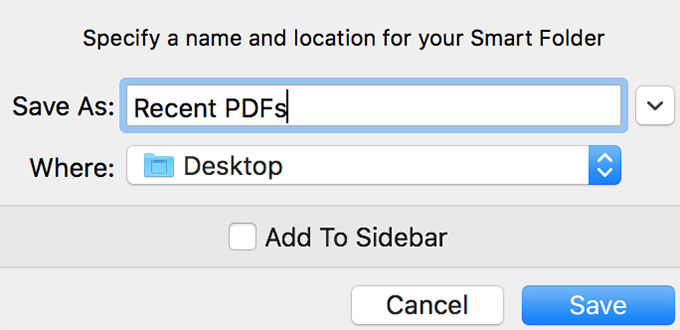
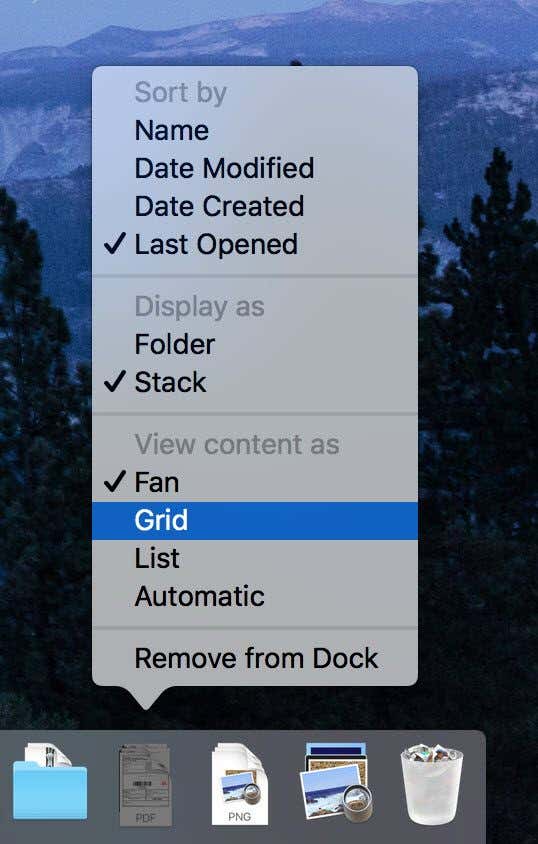
Once you see the folder on your desktop, drag and drop it onto the Dock. It’ll then sit there.
The Fan layout may not be suitable for PDF files. So right-click on the stack in the Dock and select Grid. It should look much better now.
Show More Recent Items In The Dock
By default, a stack will only show up to 10 recent items in a list. If you need more than that, you need to change a value on your Mac as shown below.
Click on the Apple logo at the top-left corner and select System Preferences.
Select General on the following screen. You’ll then find an option saying Recent Items. Use the dropdown menu next to the option to choose the number of items you want in the stack list.
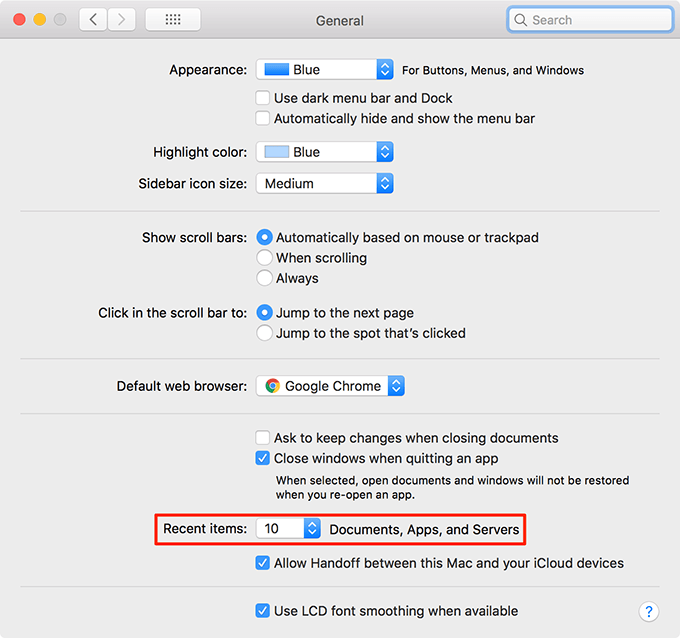
You can show a maximum of 50 items in a stack pinned on the Dock.
Delete Recent Items Stack From The Dock
If you no longer need a recent items stack, you can have it removed by clicking on an option in the Dock.
Find the stack you want to remove, right-click on the stack, and select Remove from Dock.
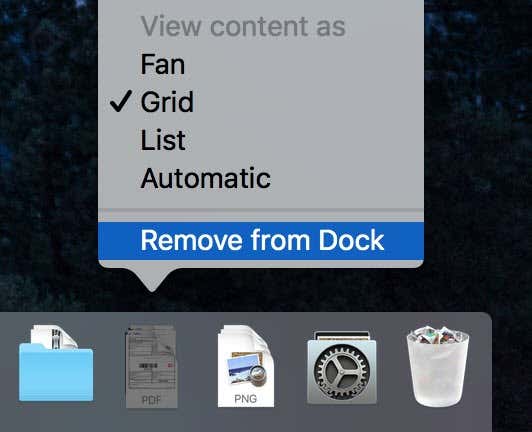
The stack will no longer appear in your Dock.