If you’ve tried loading up iTunes and have a problem accessing the iTunes Store, it can be frustrating having to wait for the connection. Often, connecting gets stuck on the message “accessing iTunes store” and only disappears after clicking the ‘X’ to close it.
This has happened through the years for various reasons, but this guide will show you some of the causes, and how to resolve them.

What Causes the Accessing iTunes Store Issue
This problem is commonly faced with iTunes in Windows and occurs when iTunes software fails to establish a secure TSL link with the iTunes server. Consequently, iTunes can’t access the iTunes store, so you’re stuck with the “Accessing iTunes Store” message.
It can also be caused by a corrupt HOSTS file and when another program interferes with Windows Socket settings. This could arise after installing network-related software like a download manager that probably corrupted the socket settings, as they’re also a part of the network functionality.

When the Windows Socket settings are corrupt, it could result in high CPU usage by the Apple Mobile Device Service.exe process as it attempts to connect to iTunes. If the service fails to connect, it continues using up the CPU, even when no application is running.
Your computer may overheat or drain the battery faster than usual, and the fans may kick into overdrive.
How to fix The “Accessing iTunes Store” Message Stuck Issue
1. Quick Fixes
- Try accessing your account on a web browser and see if it works.
- Check Windows Task Manager (CTRL+ALT+DEL) and check the Apple Mobile Device Service.exe process. If its CPU usage is more than 20 percent when iTunes isn’t running, then the Windows Socket setting is potentially corrupt.
- Update iTunes to the latest version as outdated software may result in incompatibility issues while trying to connect to the iTunes store.
- Uninstall iTunes, QuickTime, and Safari, and then reinstall iTunes. Make sure you backup your iTunes folder before uninstalling iTunes, and then after reinstalling it, select your old folder so you can get your library back.
2. Turn off the Firewall
Your computer’s firewall prevents unauthorized users from accessing your computer files and resources. Unfortunately, it’s not perfect and can sometimes cause harm, especially if another firewall is installed.
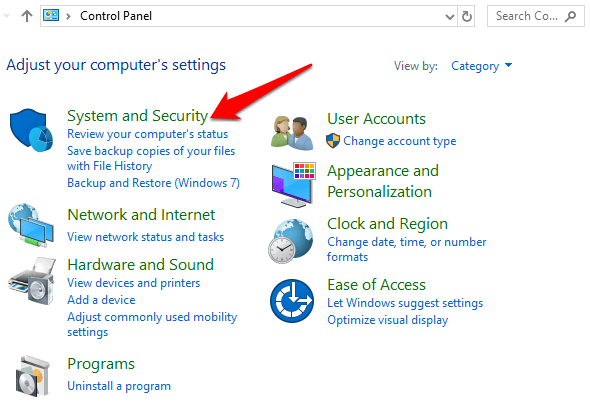
To turn off Windows Firewall, open Control Panel, and select System and Security.
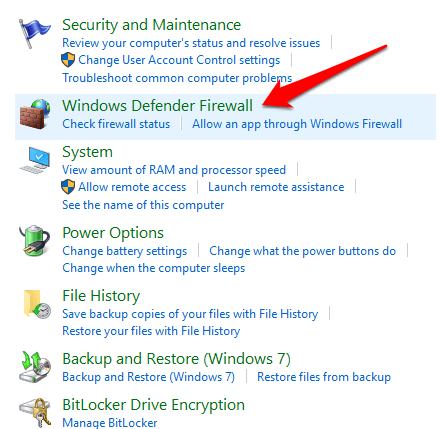
Select Windows Firewall (or Windows Defender Firewall depending on your computer’s setup).
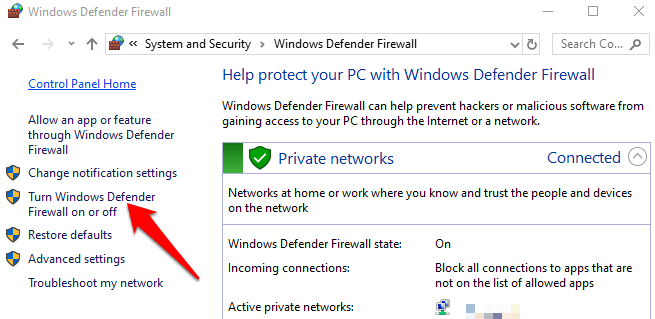
Click Turn Windows Firewall on or off.
Click on the circle next to Turn off Windows firewall (not recommended).
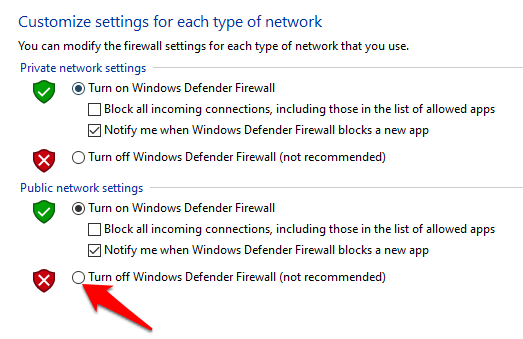
Click OK to save the changes.
Repeat the steps you took to try and access the iTunes Store and see if it resolves the problem.
3. Disable antivirus or security software

iTunes could behave abnormally due to a virus on your device’s system. You can remove the virus and see if it helps resolve the stuck “Accessing iTunes Store” message.
Your security software could also be causing conflicts with iTunes software, so try disabling it and see if it fixes the problem. If it does, you can uninstall the current antivirus software and install one that doesn’t conflict with iTunes.
4. Uninstall third-party conflict software
As with antivirus and security software, some third-party plugins may also conflict with iTunes, such that it may not work normally, or crashes the process.
If you still see the “Accessing iTunes Store” message not progressing, uninstall any plugins that could be causing the conflict and reinstate iTunes functions. You can verify this by clicking SHIFT+CTRL and open iTunes in Safe Mode.
5. Disable iTunes Store in Preferences
To do this, select the Apple menu and select Preferences>Parental controls tab.
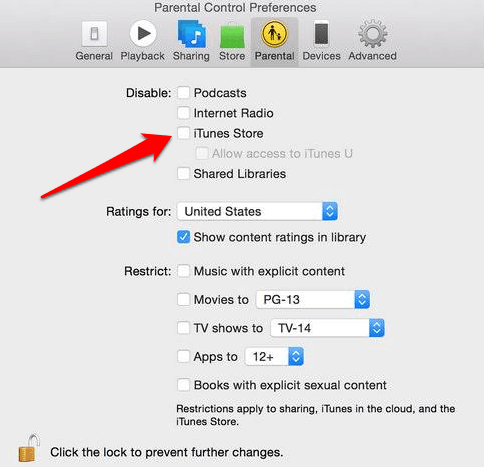
Disable the iTunes Store and then re-enable it and see if it works again.
6. Reset HOSTS file and netsh
If the HOSTS file is corrupt, iTunes won’t work normally. To resolve this, reset the HOSTS file to the default that shipped with the operating system, run the netsh command to clear the Windows Sockets catalog, and restart your computer.
To reset the HOSTS file, download the Microsoft FixIT tool and run it.
Next, run the command prompt in administrator mode by clicking Start, type CMD in the search bar, and select Run as administrator.
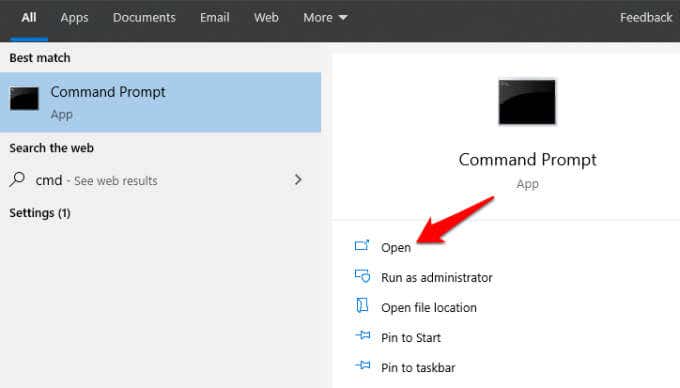
In the command prompt, type netsh winsock reset and press Enter.
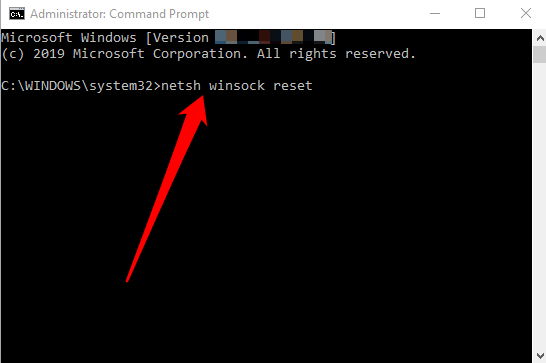
This clears the Windows Sockets catalog, after which you can restart your device. If you get an error from network-related software asking to fix the network association or remap LSP, click No to avoid making changes to the default Winsock settings.
Launch iTunes once your computer restarts and try accessing iTunes Store again.
7. Authorize and deauthorize your computer for iTunes Store
If you still see the “Accessing iTunes Store” message stuck on your screen, you can authorize your computer before using it to play or sync content downloads from the iTunes Store.
Authorizing a computer permits itto access content including movies and music, and can be done on up to five computers. However, you can’t authorize a computer from your iPhone, iPod touch, iPad, or another computer.
To authorize your computer, update it to the latest version of iTunes (Windows) and the latest macOS version.
On your Windows computer, open iTunes for Windows. If you’re using a Mac, open the Music app, Apple Books app, or Apple TV app and sign in with your Apple ID.
In the menu bar, select Account and then click Authorizations>Authorize This Computer.
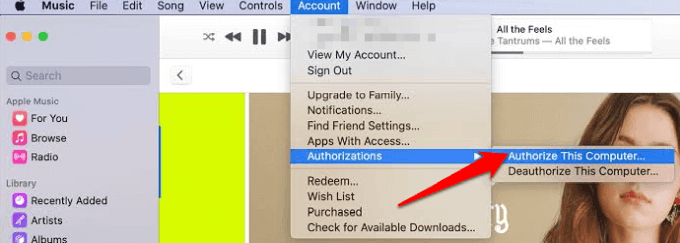
To deauthorize your computer, open iTunes (Windows), or for Mac, open the Music app, Apple Books app, or Apple TV app. Go to the menu bar and select Account > Authorizations > Deauthorize This Computer.
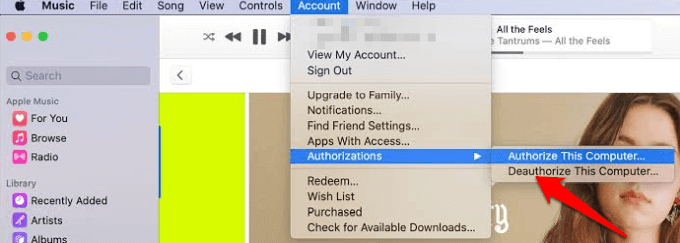
Sign in with your Apple ID and select Deauthorize.
8. Test the issue in a different user account (Mac)
You can find out if the “Accessing iTunes Store” issue is related to your user account by testing it in a different user account.
Create a new account by going to menu>System Preferences and selecting Users & Groups.
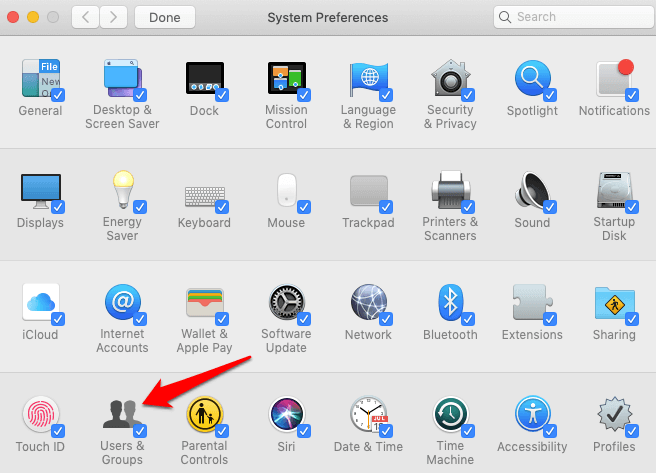
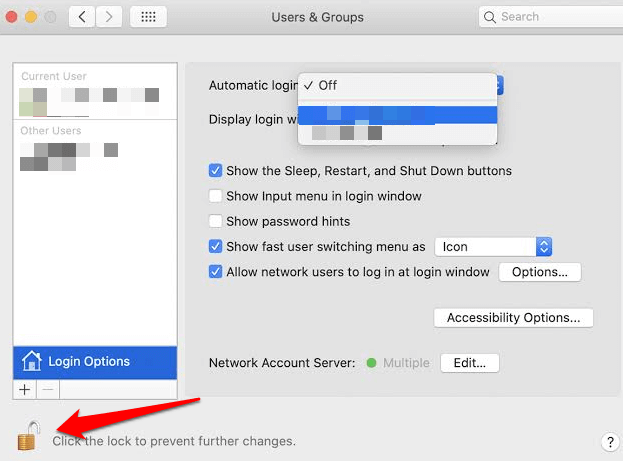
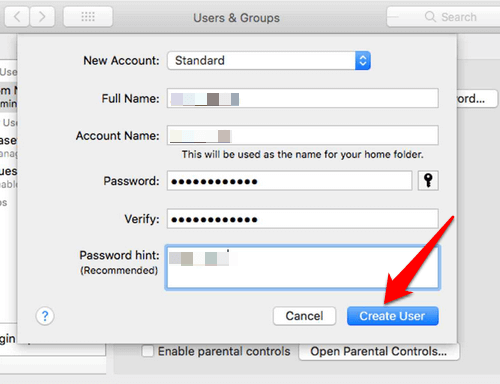
Click the padlock icon and type your administrator name and password. Click Add (+) under the user list, and fill in the fields shown for either the Standard or Administrator account.
Click Create User (Account).
Note: If there’s another user account already on your list of users, you can just log out of the current one you’re using, and try using a different one to check if the message appears in it too. If it doesn’t happen with the new account or a different account, then the problem is with the files or settings in your account.
To remove the new user account you created for testing, use the same steps but choose Remove (-) instead of Add (+). Make sure the files or settings you copied in that account aren’t needed before removing the account.
If the issue occurs with the newly created or another user account too, update the software, or try using Safe Mode and check for other hardware or software issues that could contribute to the issue.
We hope one of these solutions helped resolve the “Accessing iTunes Store” message stuck issue on your computer.
[related_posts_by_tax posts_per_page="5"]