Google Chrome is the best browser across devices. But bugs and glitches, conflicting settings, and network-related complications can prevent it from working.
If you experience endless slowdowns, freezes, and crashes while using Chrome on the Mac, here are 13 troubleshooting tips to fix when Chrome is not working.

1. Force-Quit Chrome
If Chrome freezes on you, try force-quitting it. That should end every active Chrome-related process on your Mac and end any minor technical glitches causing the browser to malfunction.
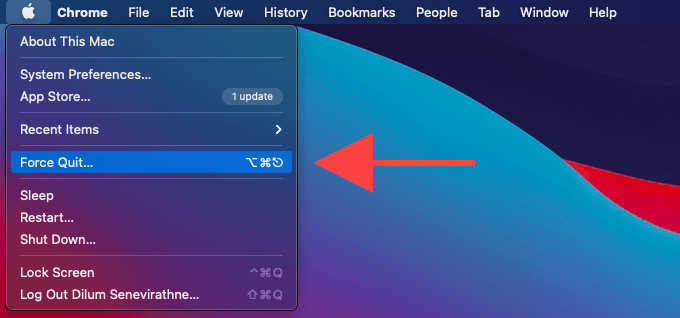
1. Open the Apple menu and select Force Quit.
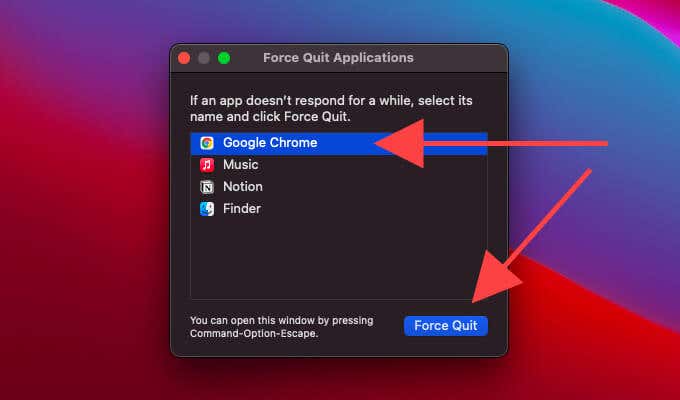
2. Pick Google Chrome and select Force Quit.
3. Wait for at least 10 seconds before re-opening the web browser.
2. Restart Mac
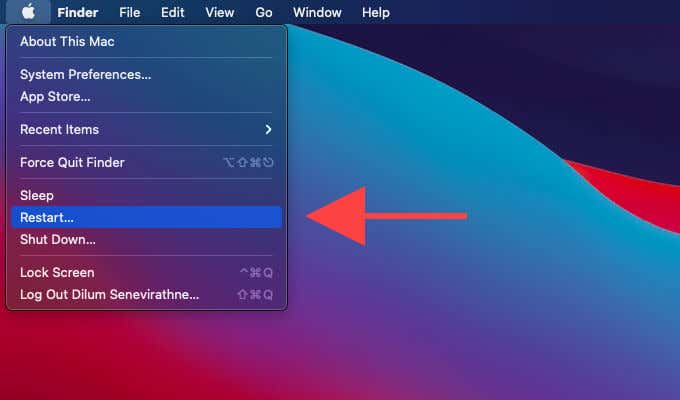
A system reboot solves software glitches that prevent programs from running. If force-quitting Chrome didn’t help, go ahead and restart your Mac.
3. Update Chrome
If you’re running an outdated version of Google Chrome on the Mac, slowdowns, crashes, and freezes will be commonplace. Chrome does update itself automatically, but you can forcibly apply pending updates whenever you want.
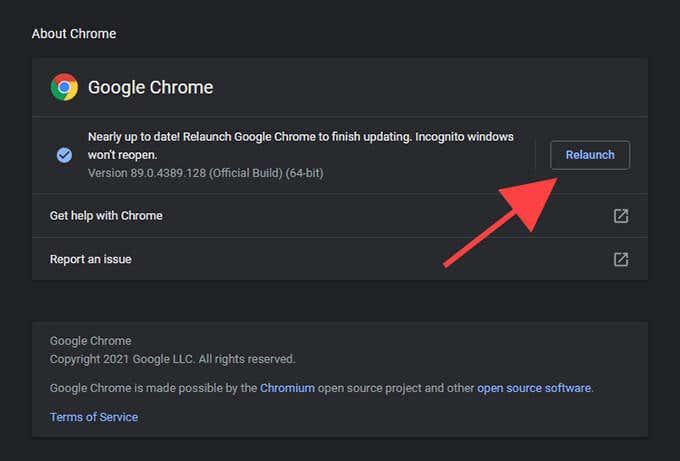
1. Open the Chrome menu. Then, point to Help > About Google Chrome.
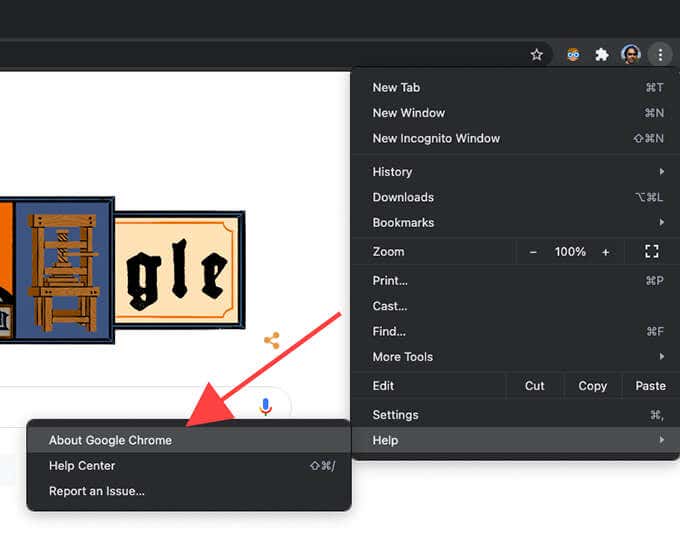
2. Wait until Chrome scans for and installs the latest updates.
3. Select Relaunch to finalize the updates.
4. Clear Browsing Data
Outdated browsing data prevents websites from loading or rendering properly. You can force Chrome to fetch updated site content by clearing the browser cache.
1. Open Google Chrome.
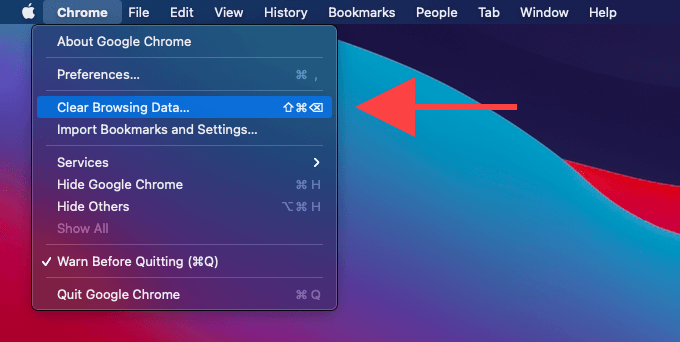
2. Select Chrome on the menu bar. Then, pick the Clear Browsing Data option.
3. Switch to the Advanced tab.
4. Set Time range to All time. Then, check the boxes next to Cookies and other site data and Cached images and files.
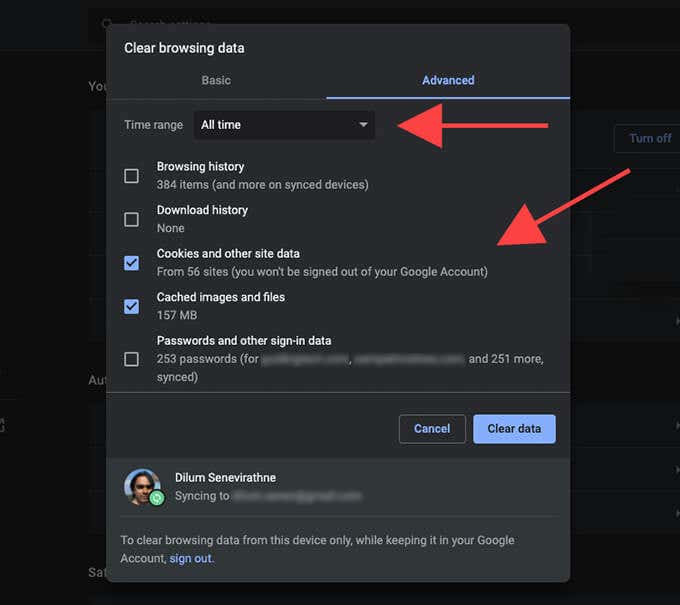
5. Select Clear data.
5. Flush DNS Cache
Chrome’s browser cache aside, an obsolete DNS cache on the Mac is another reason that stops websites from loading and leads to Chrome not working. Try deleting it.
1. Open the Mac’s Launchpad. Then, type terminal and select Terminal.

2. Copy and paste the following command into Terminal and press Enter:
sudo dscacheutil -flushcache;sudo killall -HUP mDNSResponder
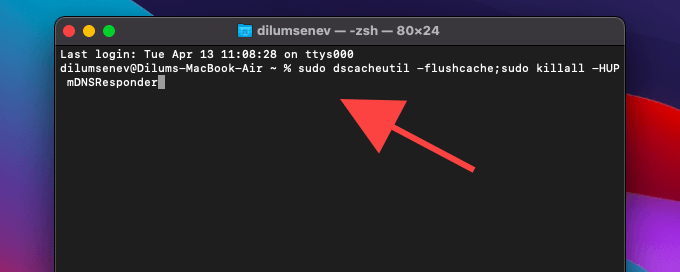
3. Type in your user account password and press Enter.
6. Renew DHCP Lease
If you experience connectivity issues within and outside Google Chrome on the Mac, you should renew the DHCP lease.
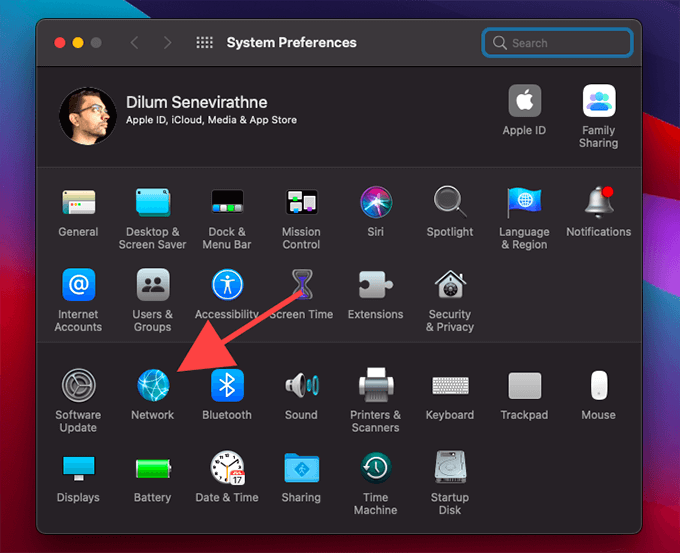
1. Open the Apple menu and select System Preferences.
2. Choose Network.
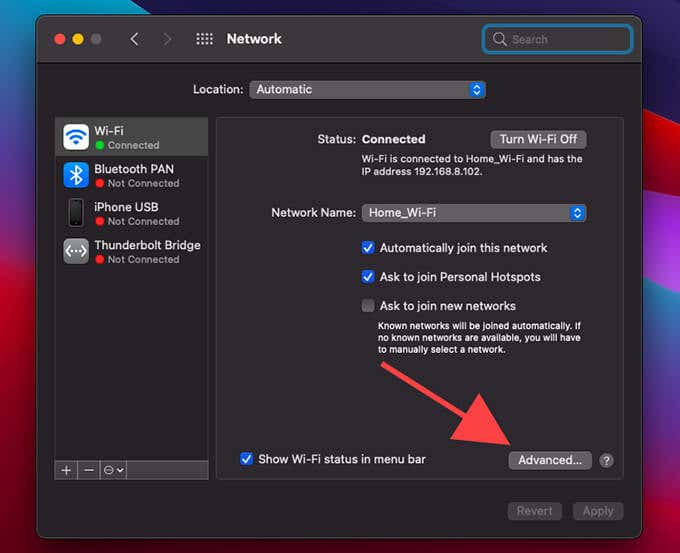
3. Pick your network service (e.g., Wi-Fi) and select Advanced.
4. Switch to the TCP/IP tab and select Renew DHCP Lease.
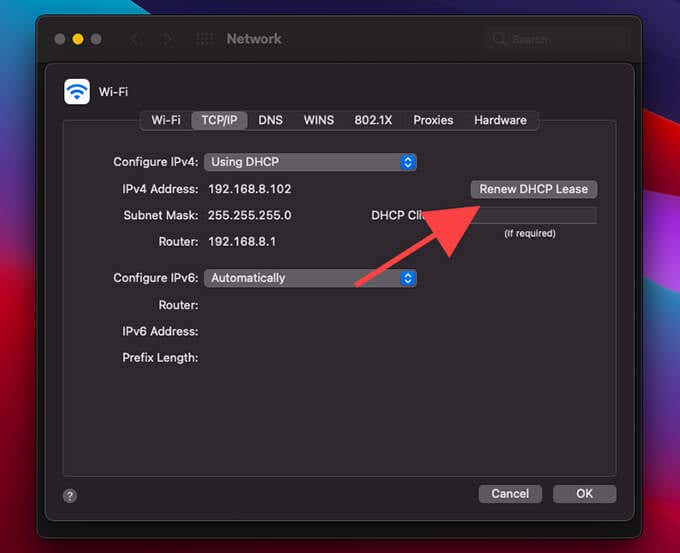
5. Select OK.
If that didn’t help, try rebooting the router. Alternatively, switch to a different Wi-Fi connection or connect to your iPhone’s Personal Hotspot.
7. Disable Extensions
Unoptimized or malicious Chrome extensions can cause severe performance-related issues. Running the browser without any browser add-ons should help you rule that out.
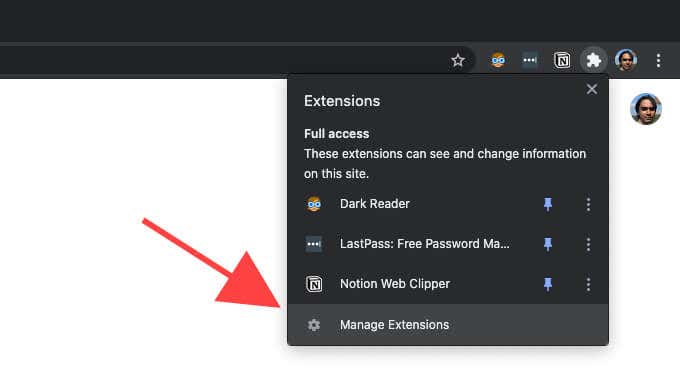
1. Open Chrome’s Extensions menu and select Manage Extensions.
2. On the Extensions page that shows up, turn off the switches next to each active extension.
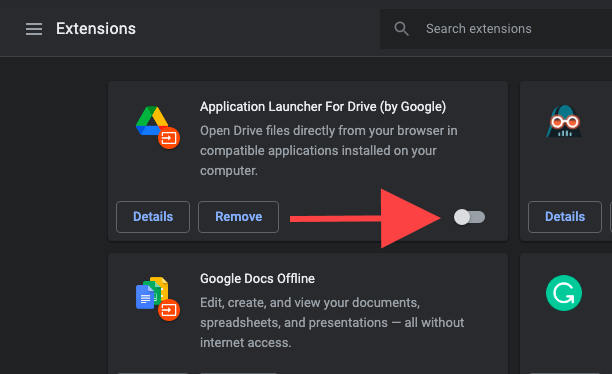
3. If Chrome begins to work as usual again, head back to the Extensions page and re-activate the items one by one. That should help isolate the extensions behind the Chrome not working.
8. Deactivate Sync
If you’ve signed into Chrome with a Google Account, it shall sync your personal data (passwords, bookmarks, etc.) between devices in real-time. But rarely, a bug in Chrome’s Sync feature can make the browser sluggish
1. Open the Chrome menu and select Settings.
2. Select Turn off under You and Google.
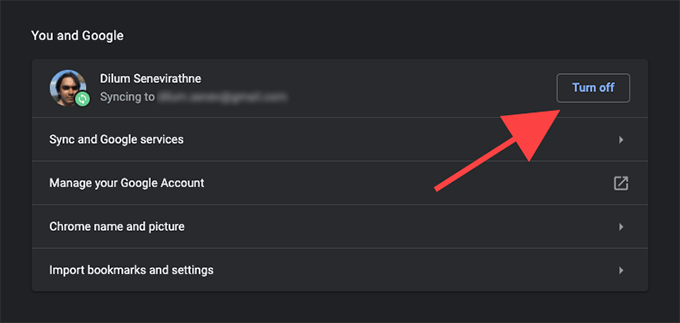
3. Select Turn off again. However, do not check the box next to Clear bookmarks, history, passwords, and more from this device.
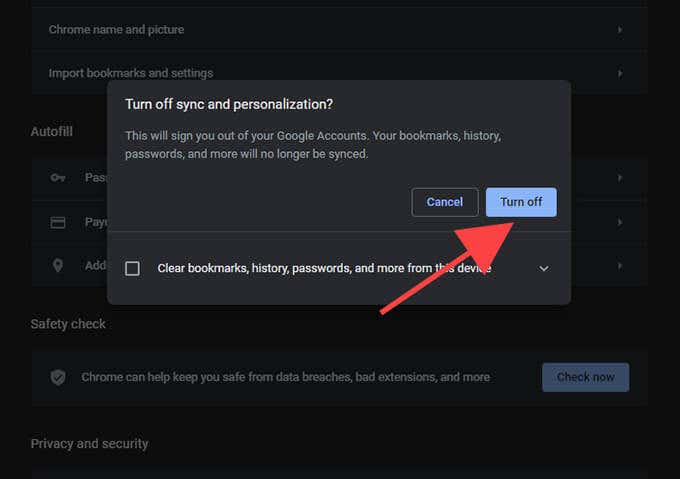
If that prompts the browser to start working without issues again, you must reset Chrome Sync.
9. Disable Hardware Acceleration
Hardware acceleration speeds up Google Chrome. But it can also result in slowdowns and crashes, especially when running the browser on dated versions of Mac’s system software.
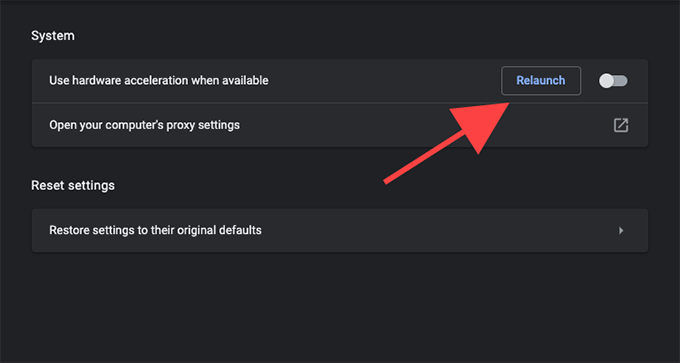
1. Open the Chrome menu and go to Settings > Advanced > System.
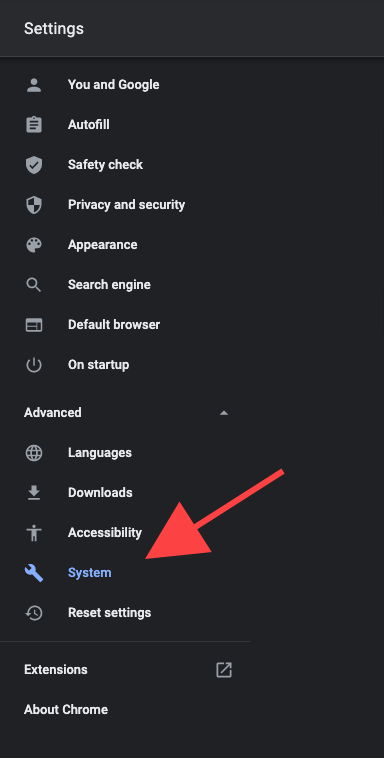
2. Turn off the switch next to Use hardware acceleration when available.
3. Select Relaunch.
If that helped, you might want to continue by updating your Mac.
10. Update Mac
Updating your Mac helps fix known bugs and issues within the operating system that prevents Google Chrome from working normally.
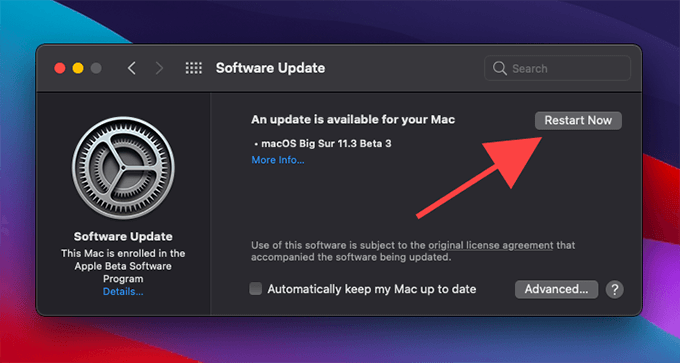
1. Open the Apple menu and select System Preferences.
2. Select Software Update.
3. Select Update Now.
11. Set Up New Browser Profile
Chrome saves profile-related data to a separate folder within its installation directory. If you have trouble opening the browser, however, that data is likely corrupted. Try setting up a new browser profile from scratch.
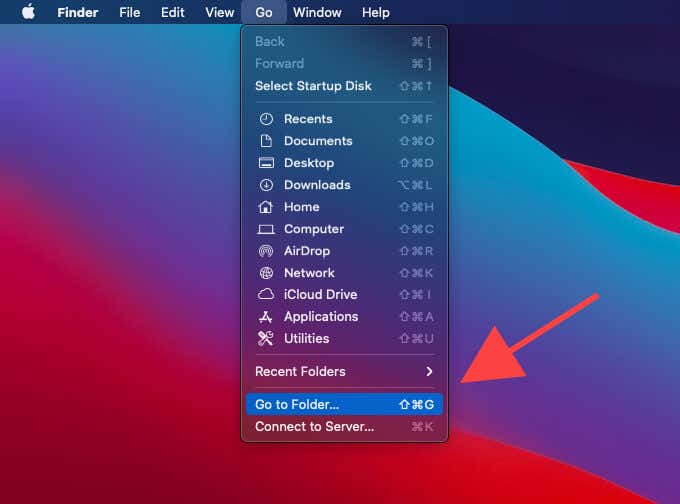
1. Open Finder and select Go > Go to Folder.
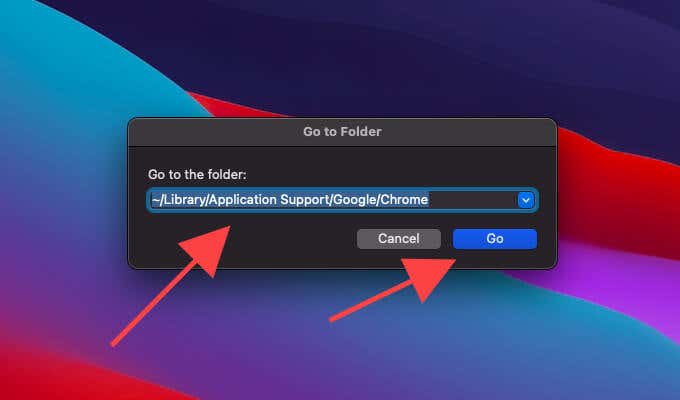
2. Copy and paste the following folder path and press Enter:
~/Library/Application Support/Google/Chrome
3. Rename the folder labeled Default to Default.old.
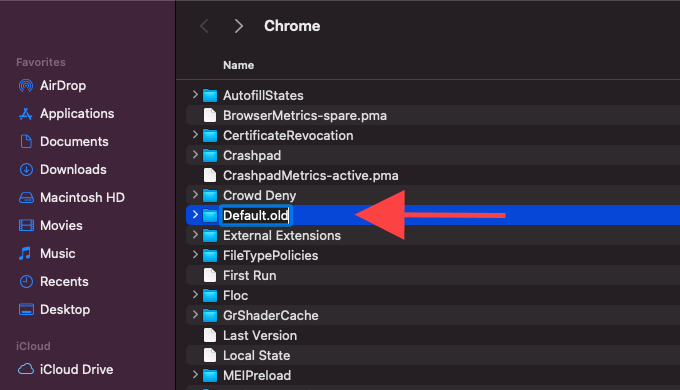
4. Open Chrome. The browser should automatically create a new profile.
5. Sign in with your Google Account.
12. Reset Chrome
If you continue to keep experiencing issues in Chrome, you should reset it. That reverts the browser to its factory defaults. However, the procedure won’t delete your bookmarks, history, and passwords.
1. Open the Chrome menu and go to Settings > Advanced > Reset settings.
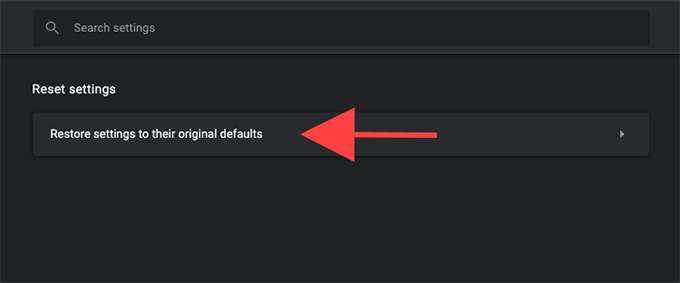
2. Select Restore settings to their original defaults.
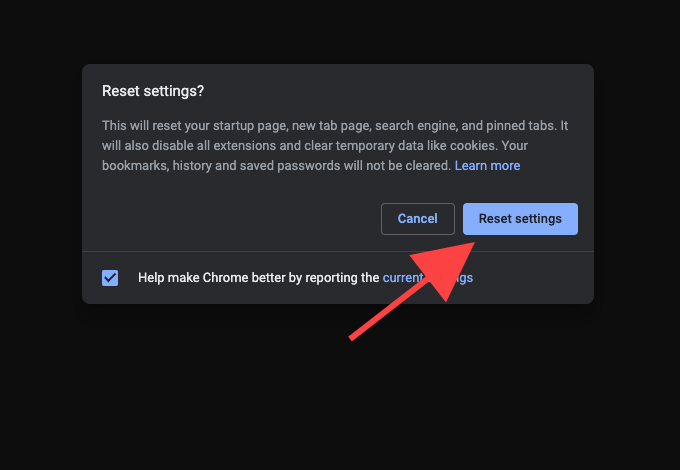
3. Select Reset settings.
13. Reinstall Chrome
If resetting Chrome didn’t help (or if you couldn’t open the browser to do that), you must reinstall Chrome. That should fix issues caused by a corrupt browser installation.
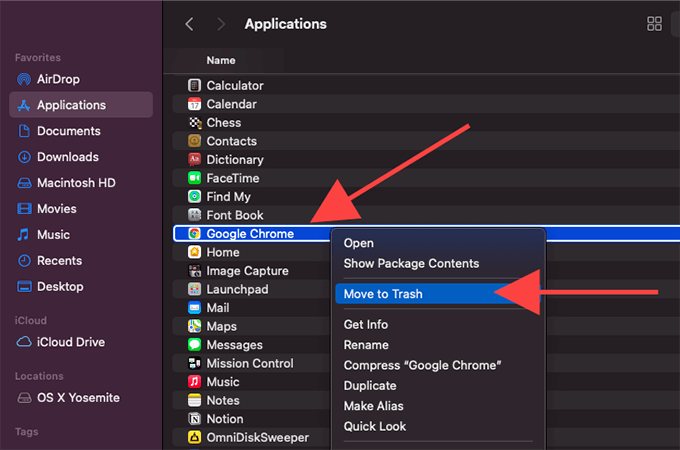
1. Open Finder and go to the Applications folder on your Mac.
2. Control-click Google Chrome and select Move to Trash.
3. Open Finder and select Go > Go to Folder on the menu bar. Then, delete the folder labeled Chrome from each of the following directories:
- ~/Library/Application Support/Google/
- ~/Library/Caches/Google/
- ~/Library/Application Support/Google/
Continue by deleting the two files below:
- ~/Library/Preferences/com.google.Chrome.plist
- ~/Library/Saved Application State/com.google.Chrome.savedState
4. Restart your Mac.
5. Download the latest version of the Google Chrome installer.
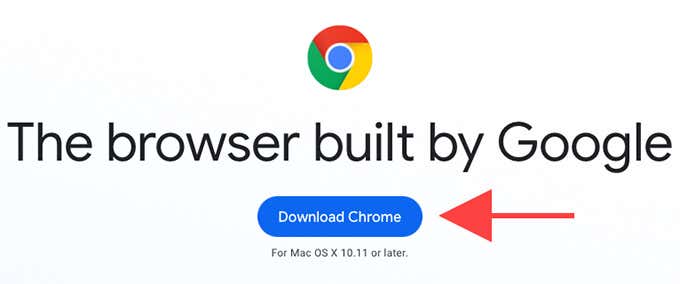
6. Run the Google Chrome installer and follow all on-screen prompts to reinstall the browser. Follow by signing in with your Google Account.
Success: Chrome Running Perfectly on Mac
Did you manage to fix Google Chrome? If so, make sure to keep both the browser and your Mac updated to lessen the chances of running into more issues with Chrome not working going forward.
If not, consider making the switch to Microsoft Edge until the next Chrome update (which would hopefully resolve your problem) hits the shelves. It’s also based on Chromium, comes with a smaller memory footprint, and supports thousands of extensions.
[related_posts_by_tax posts_per_page="5"]