Face ID is the easiest way to unlock your iPhone, authorize app purchases, and sign in to third-party apps. Enrolling your face for Face ID is a straightforward process. However, you might run into some issues during the process.
“Face ID Is Not Available” is a common error many iPhone users encounter when setting up Face ID. This tutorial covers potential troubleshooting fixes for Face ID problems on your iPhone.
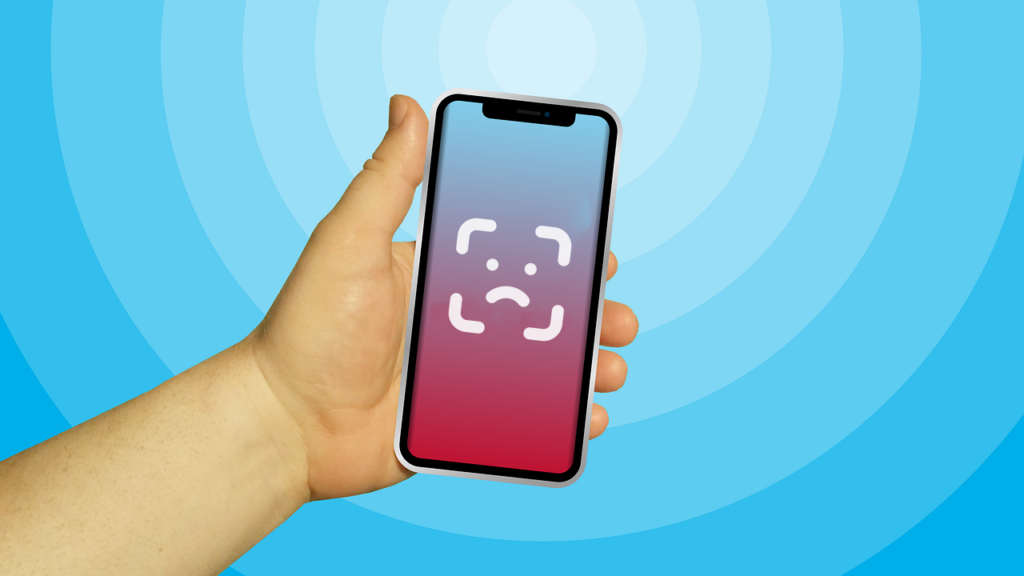
Note: Only iPhone models with a rectangular notch at the top of the screen support Face ID—from iPhone X upward. This Apple Support document has a comprehensive list of iPhones and iPad that support facial recognition authentication.
1. Set up Face ID Correctly
When you set up Face ID, make sure you position your face correctly in the camera frame. Afterward, move your head in circles and ensure the Face ID setup agent captures all angles of your face.
You also need to scan your face twice, so ensure you complete both face scans. Otherwise, iOS may fail to set up Face ID. Finally, if using an iPhone, position it upright in portrait orientation; doing the scan in landscape might fail.
Note: If using an iPad, you can set up and use Face ID in any orientation—portrait or landscape.
As a refresher, let’s walk through the process of setting up Face ID the right way on an iPhone.
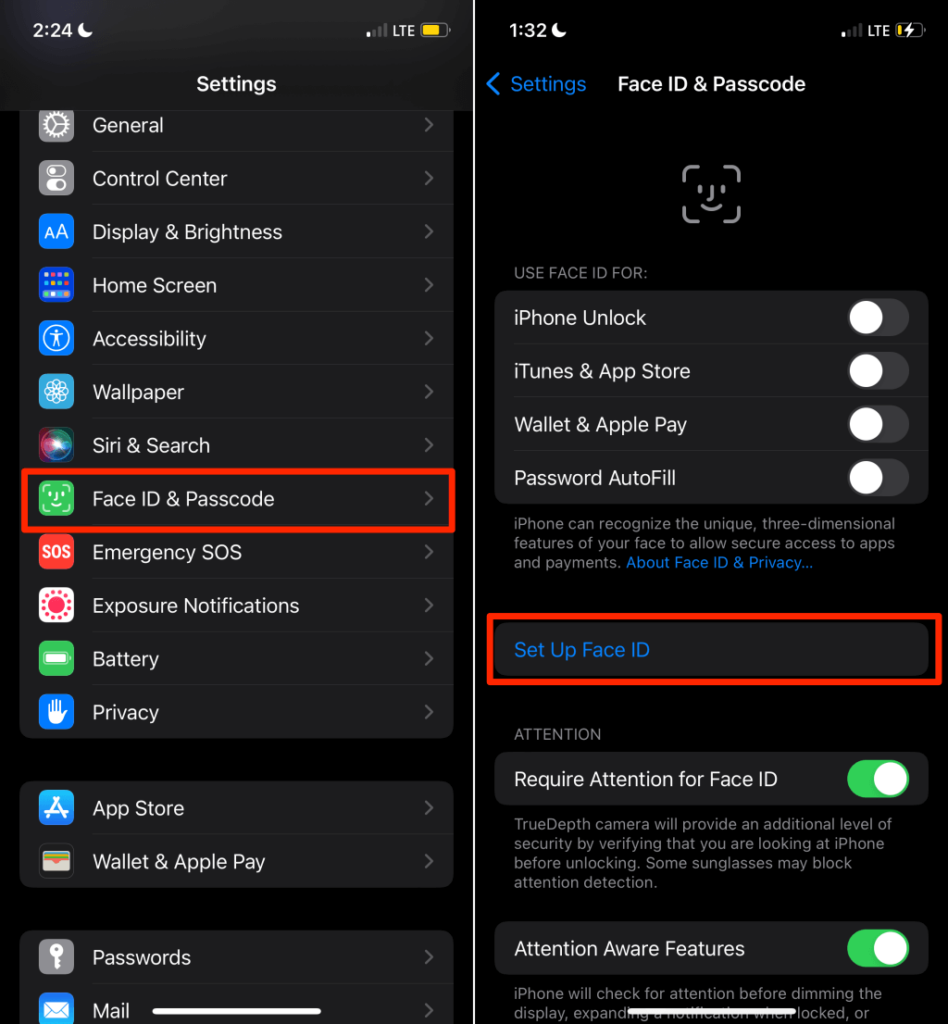
- Head to the Face ID menu on your iPhone (Settings > Face ID & Passcode) and enter your iPhone’s passcode.
- Tap Set Up Face ID.
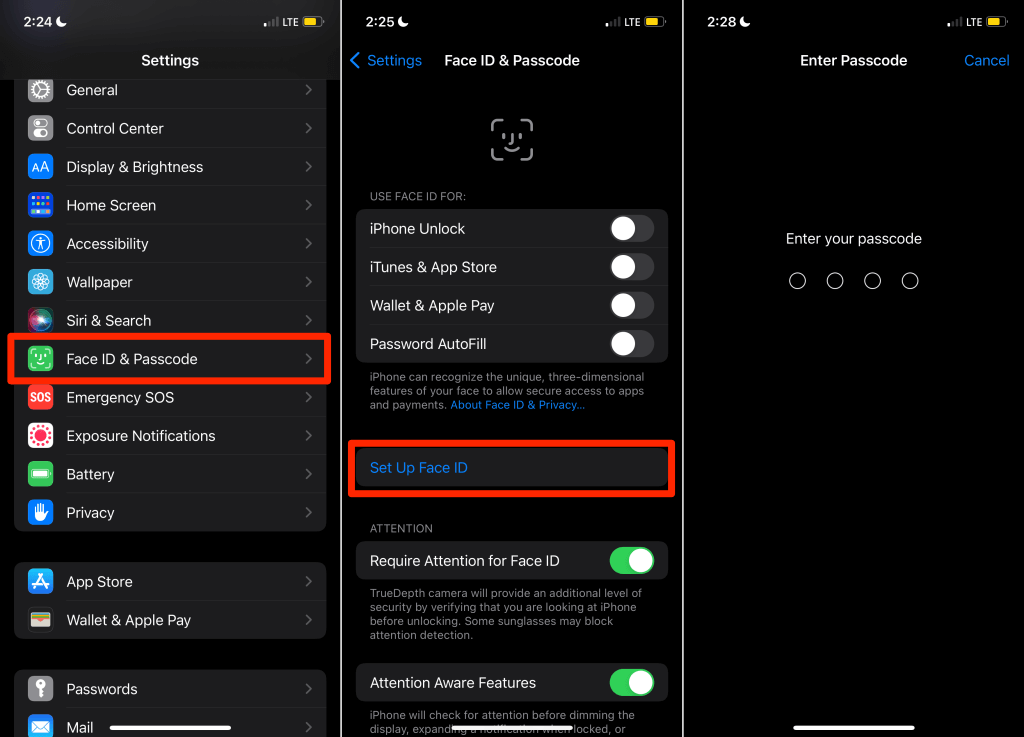
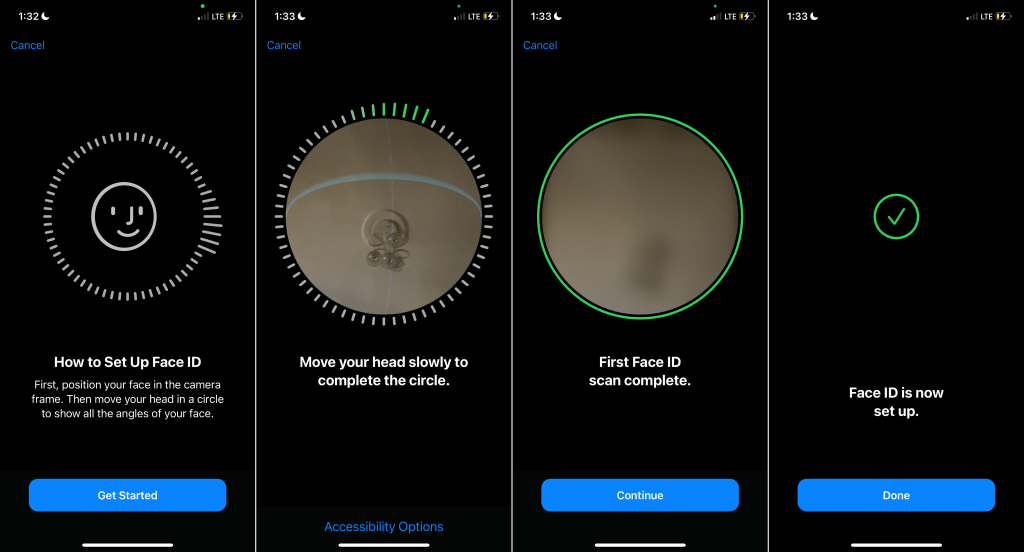
- Go through the instructions for more details and tap Get Started to proceed.
- Hold your iPhone upright in portrait orientation and position your face within the frame. Move your head in circular motions until the green progress bar completes the circle.
- When the first Face ID scan is complete, position your face in the frame again and complete the second face scan.
- Tap Done when your phone displays a “Face ID is not set up” message. Lock your iPhone and check if Face ID works.
Although you can use Face ID with sunglasses, masks, hats, scarves, etc., they may disrupt the setup process. If the problem continues, remove any accessories on your face and retry the scan.
2. Move Your iPhone Closer to Your Face
Your iPhone needs to be at arm’s length (or closer) from your face to set up and use Face ID. Apple recommends a 25-50cm proximity distance.

If your iPhone won’t scan your face when setting up Face ID, move your face closer to your iPhone and try again. Again, remember to position your face within the camera frame and move your head in circles.
3. Clean Your iPhone’s TrueDepth Camera
The TrueDepth camera system on your iPhone is the heart and soul of Face ID. It’s the TrueDepth camera that creates a depth map and infrared image of your face when setting up Face ID. The notch at the top of your iPhone’s display houses the TrueDepth camera system.
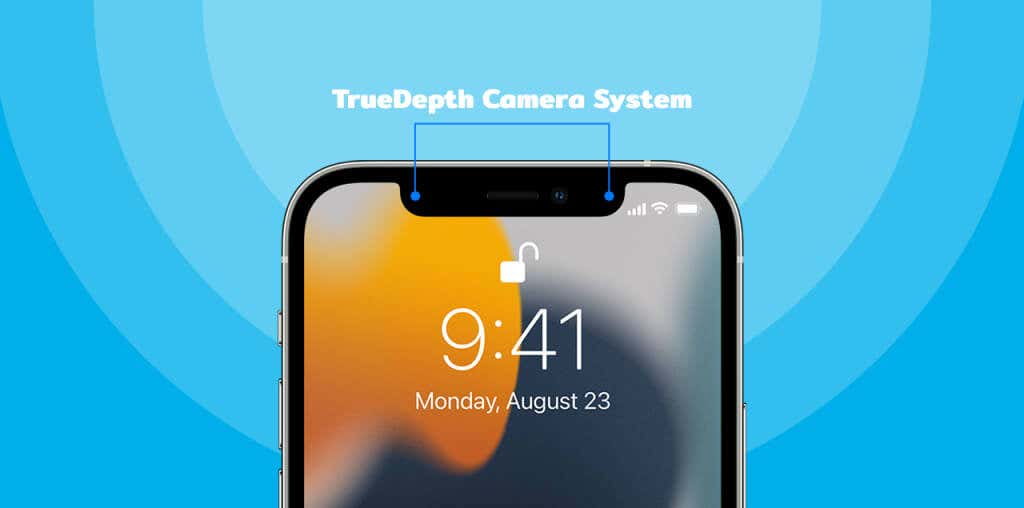
If you can’t set up Face ID, check that nothing is covering the TrueDepth camera. Wipe your iPhone’s notch with a clean, soft, dry cloth. That will remove dirt, oil, and other particles blocking the TrueDepth camera. If a phone case or screen protector covers your iPhone’s notch, remove it and retry the Face ID scan.
4. Set up Face ID with Accessibility Options
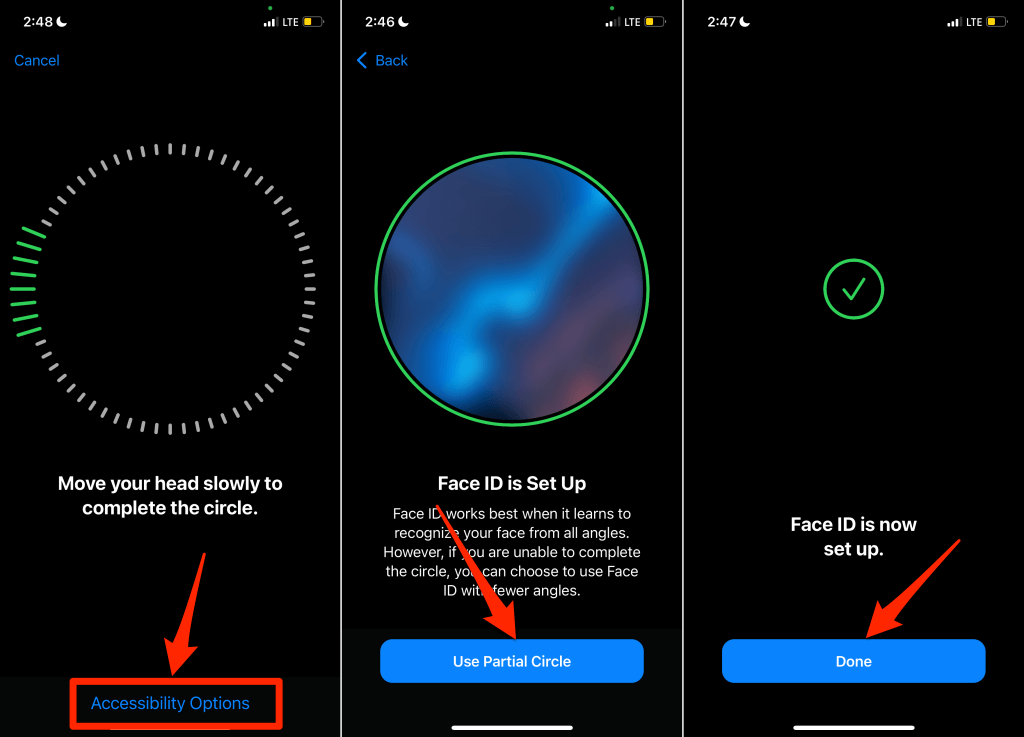
Face ID enrollment may also fail if you have a facial or visual impairment. In that case, set up your iPhone’s Face ID using ”Accessibility Options.” The feature lets you quickly set up Face ID without scanning your entire face. The TrueDepth camera captures a few angles of your face and sets up Face ID using the partial scan.
Here’s how to set up Face ID in “Accessibility Options” mode:
- Go to Settings > Face ID & Passcode, type your iPhone’s passcode, and tap Set Up Face ID. Follow the instructions and scan your face when prompted.
- Tap Accessibility Options on the camera frame screen.
- Next, tap Use Partial Circle and tap Done on the next screen to complete the setup.
5. Reboot or Force-Restart Your iPhone
Restarting your iPhone is an easy fix for temporary software glitches affecting Face ID. Power off your iPhone, turn it back on and try setting up Face ID again.
Press and hold your iPhone’s Side button and either of the Volume buttons. Move the slide to power off slider to the right to shut down your iPhone.
Alternatively, open the Settings app, select General, tap Shut Down, and move the slider to the right.
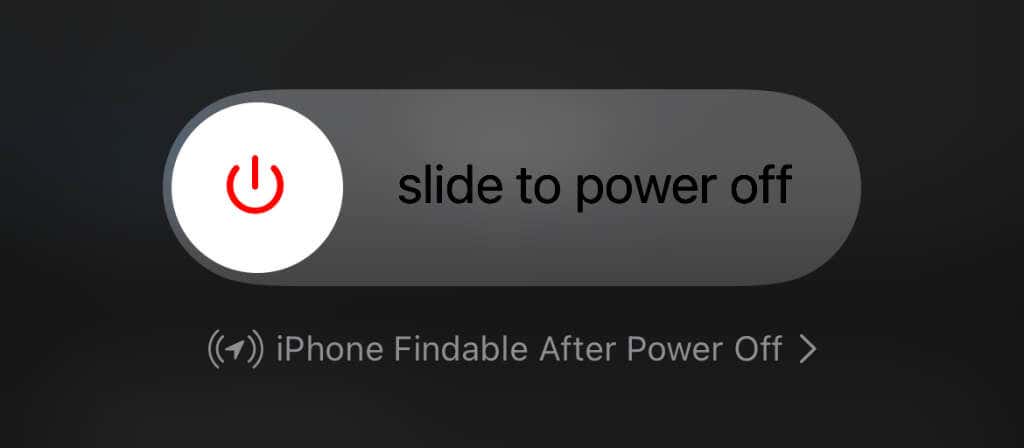
Wait for about 10 seconds for your iPhone to shut down completely. Afterward, press and hold your iPhone’s Side button until the Apple logo shows up on the screen.
Force Restart iPhone
If your iPhone is freezing and won’t go off, force-restart it instead. Press and release the Volume Up button, press and release the Volume Down button, then press and hold the Side button until the Apple logo appears on the screen.
Try and set up your Face ID from scratch and check if restarting your iPhone fixed the problem.
6. Reset Your iPhone’s Settings
Refreshing your iOS settings can also fix problems preventing your iPhone from setting up Face ID. Note that resetting your iPhone’s settings will remove all location, privacy, and network-related settings. The operation will also remove all Apple Pay cards linked to your device. However, your data and accounts aren’t deleted.
Follow the steps to reset your iPhone’s settings:
- Go to Settings > General > Transfer or Reset iPhone and tap Reset
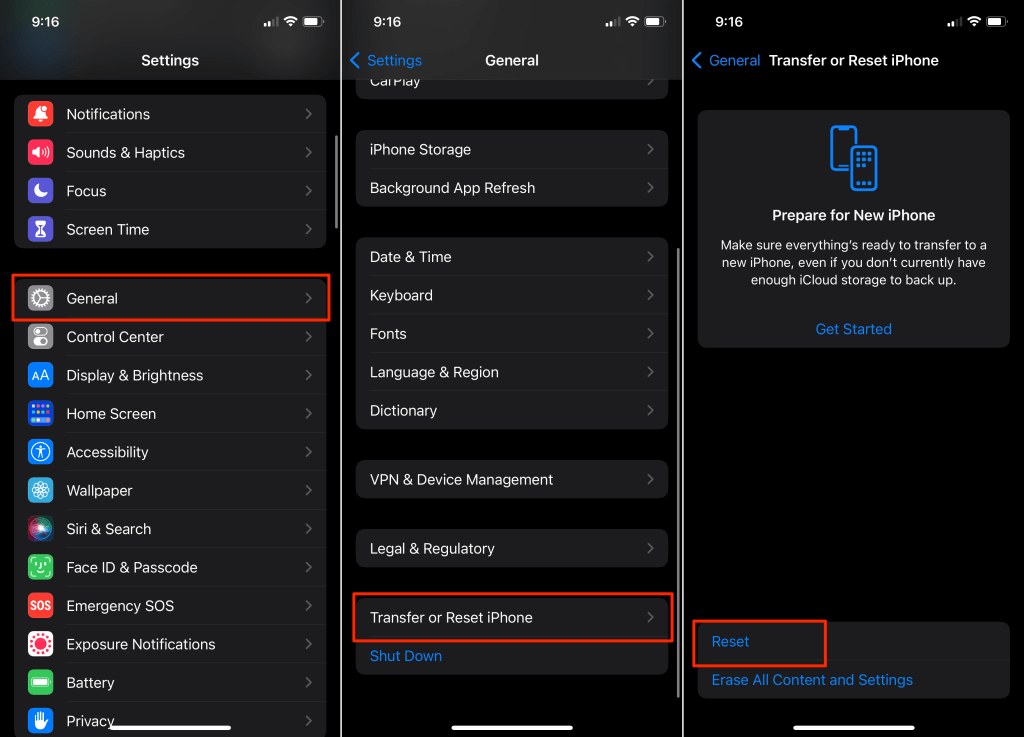
- Select Reset All Settings and enter your iPhone’s password. Select Reset All Settings again on the confirmation prompt.
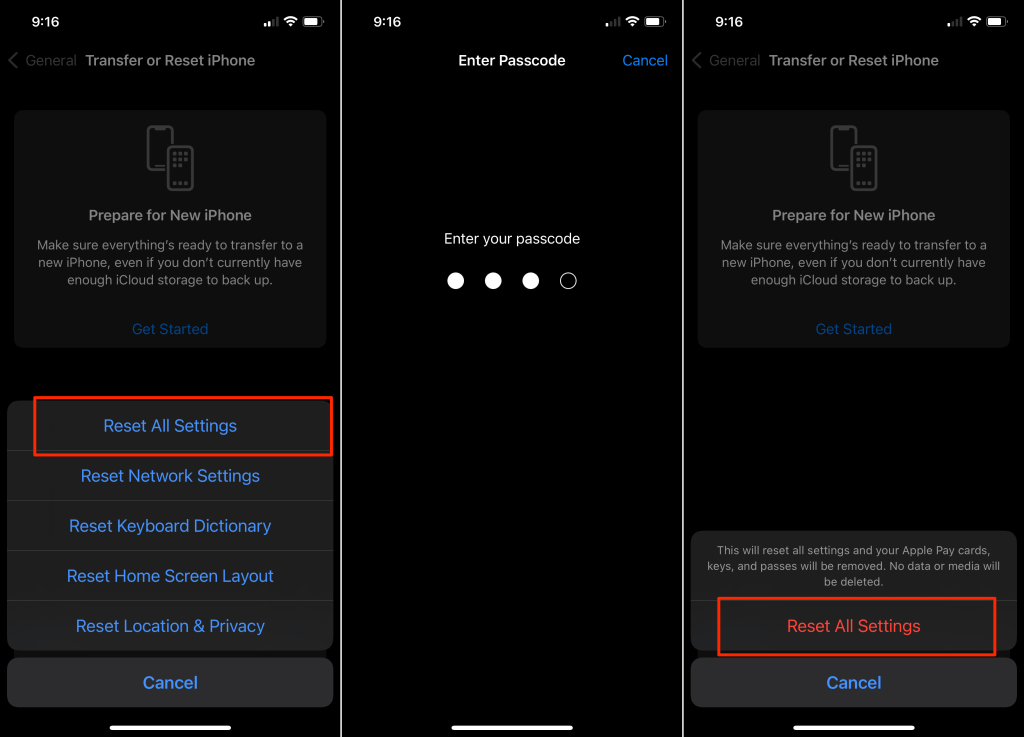
If your iPhone runs iOS 14 or older, go to Settings > General > Reset > Reset All Settings to reset its settings.
Wait for your iPhone to come back on and set up Face ID before doing anything else.
7. Update Your iPhone
Software-related issues (buggy or outdated operating system) may also cause Face ID to malfunction. If you still can’t set up Face ID, update your iPhone and try again.
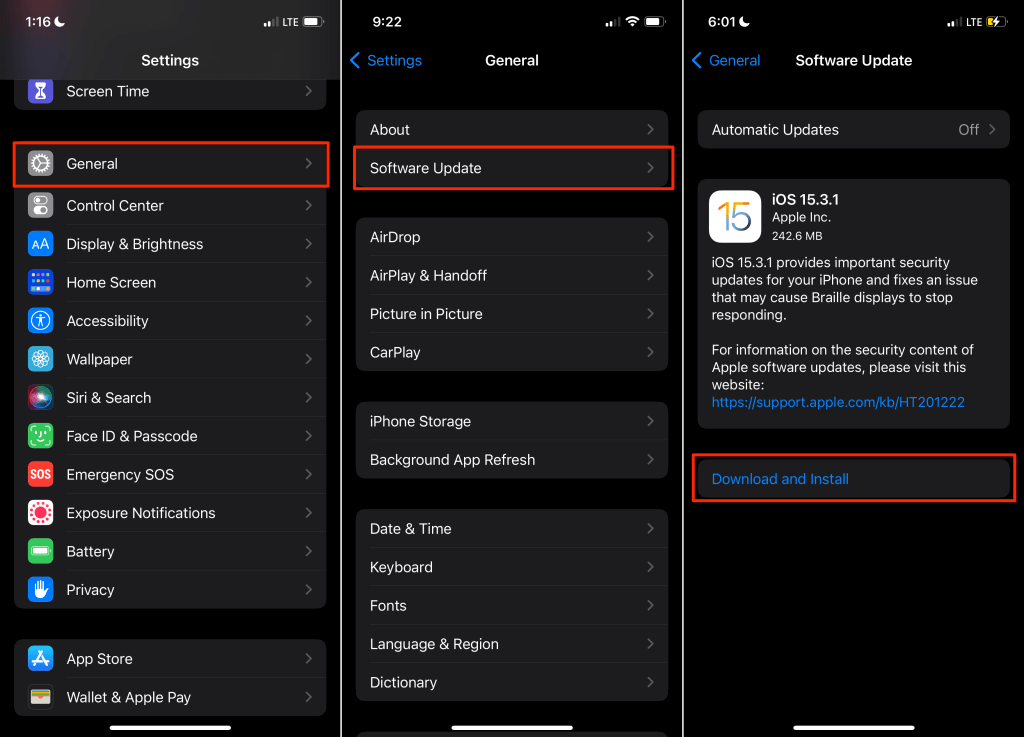
Connect your iPhone to a Wi-Fi network and go to Settings > General > Software Update. Tap Download and Install to update your iPhone to the latest version of iOS.
Get Professional Help
If you still can’t set up Face ID, your iPhone’s TrueDepth camera is likely faulty. Head to a nearby Apple Retail Store or Apple Service Provider to check for hardware-related problems. Contact Apple Support if there’s no authorized Apple service center near you.
[related_posts_by_tax posts_per_page="5"]