Includes a list of models you can do it on
One of the cheapest ways to boost your Mac’s performance and prolong its shelf life is to perform a Mac RAM upgrade. On older Macs, this process is easy. It takes about an hour and only requires a handful of tools you can get at Walmart if you don’t happen to have them at home.
We will help you figure out which Macs can be upgraded and which RAM you should purchase before walking you through the process.
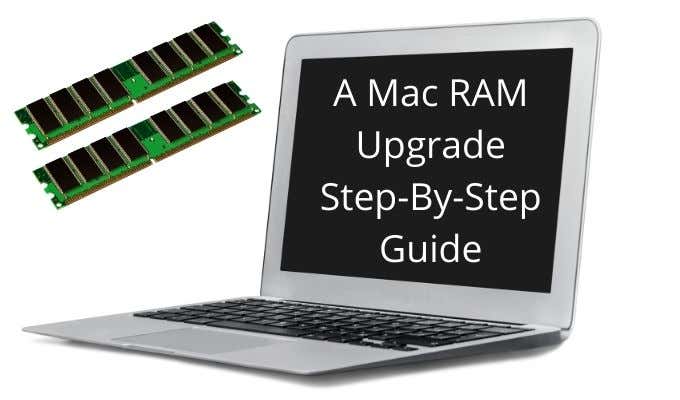
Can I Upgrade the RAM On My Mac?
A Mac RAM upgrade isn’t possible on every Mac. Older Macs shipped with RAM that could be removed and upgraded, while newer models have RAM soldered into the motherboard. If you have one of the older models below, you can upgrade your RAM:
- MacBook: 2008 to 2011 models only.
- MacBook Pro (retina): The RAM can’t be updated in any Retina MacBook Pro.
- MacBook Pro (13in, non-retina): 2009-2012 models only.
- MacBook Pro (15in, non-retina): 2008-2012 models only.
- MacBook Pro (17in, non-retina): Any model can be updated.
- MacBook Air: The RAM can’t be updated in any MacBook air model.
- MacBook: The RAM can’t be updated in any MacBook.
- iMac: Most iMacs can be upgraded except the 21.5-inch iMac from Mid-2014 and Late 2015, both of which had their RAM soldered into place.
- Mac mini: 2010 – 2012 and the 2018 models only.
- Mac Pro: You can add RAM to any model.
- iMac Pro: RAM isn’t user-accessible. You need to contact Apple if the RAM needs to be replaced.
If your Mac is not on the safe list above, then you can’t remove the RAM without professional-level soldering tools and experience. Even then, you likely will damage the Mac.
How To Find The Right RAM For Your Mac
You should purchase your RAM online from a provider like Crucial or OWC (MacSales), both of which are known for their high-quality RAM and excellent customer service. Both Crucial and OWC have guides that help you find RAM modules that are compatible with your Mac. Follow their instructions, and you will be able to purchase the correct RAM for your specific model.
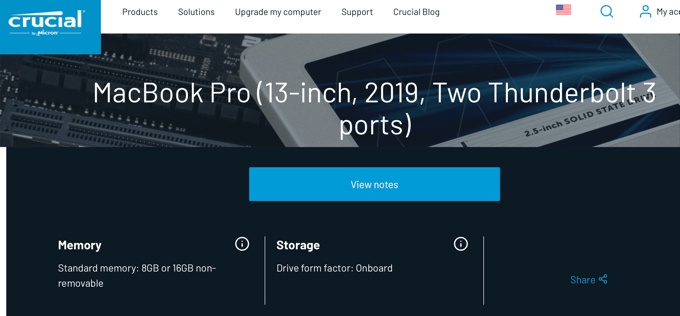
If you don’t know your model, some memory retailers even have a system scanning tool that can do the hard work for you.
Performing a Mac RAM Upgrade
Before you can remove the RAM for your Mac, you need to open up the computer and find where it is located. Some desktops like the iMac have a specific flip cover that you remove, while others like the Mac mini and MacBook Pro require you to remove the bottom of the case.
Once you have access to the RAM, it’s as simple as unclipping the older RAM modules, removing them, and inserting the new ones. Below are instructions from the MacBook Pro as an example:
Remove Existing RAM
- Shut down your Mac, disconnect the power cord, and wait for the computer to cool down.
- Turn over your Mac, so the back cover is facing upwards.
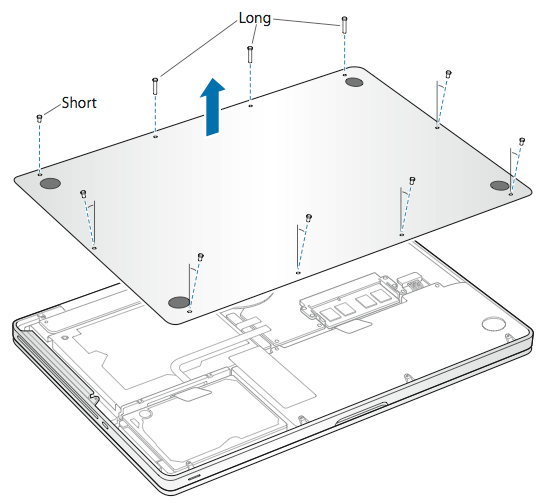
- Remove the 10 screws securing the bottom part of the case. These screws are different lengths so take care to keep track of which screw goes where.
- Lift off the back case gently and place it aside.
- Touch a metal part of the notebook to discharge any static electricity.
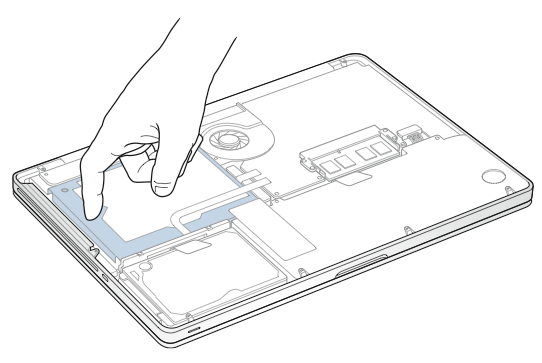
- Find the existing memory and remove it by pushing the levers on the sides of the RAM module. The levers push outwards, and the RAM chip should pop up at an angle.
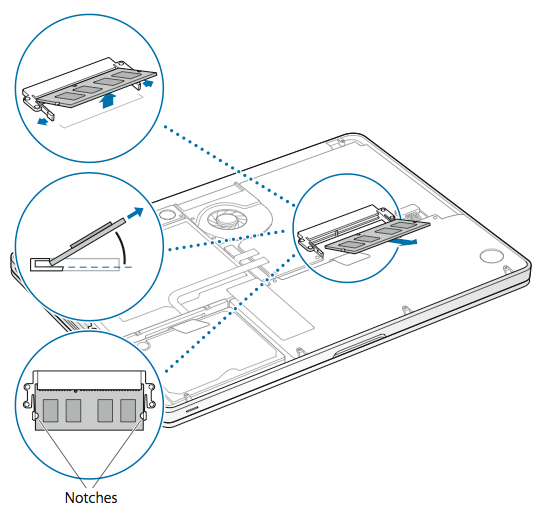
- Look for the half-circle notches that appear when the RAM is lifted out of its slot. If you don’t see the notches, try pressing the lever again.
- Grab the RAM module by the notches and remove it from its slot. Try to avoid touching the gold connectors.
- Repeat the steps above to remove the other memory module.
Install New RAM
- Remove the new RAM module from its packaging, being careful to hold it by its notches and not the gold connectors.
- Align the notches of the new memory with the notch in the memory slot.
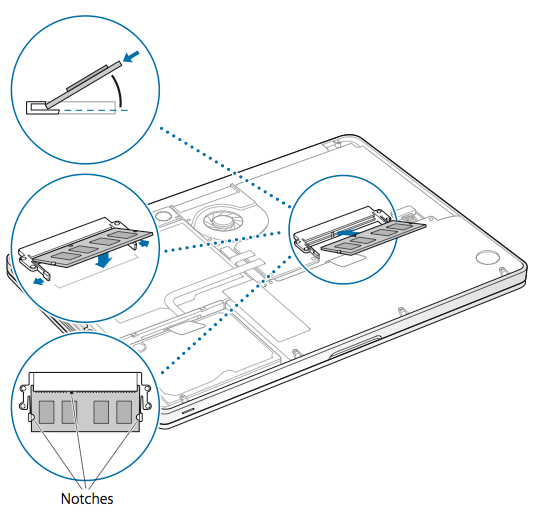
- Tilt the RAM module and slide it into the memory slot at an angle.
- Using two fingers, press down on the RAM module so it lays flat. There should be an audible click when it is inserted correctly. The gold contacts should be inserted almost completely into the connector.
- Repeat this procedure to install the second RAM module.
- Fit the case onto the back of the Mac Pro.
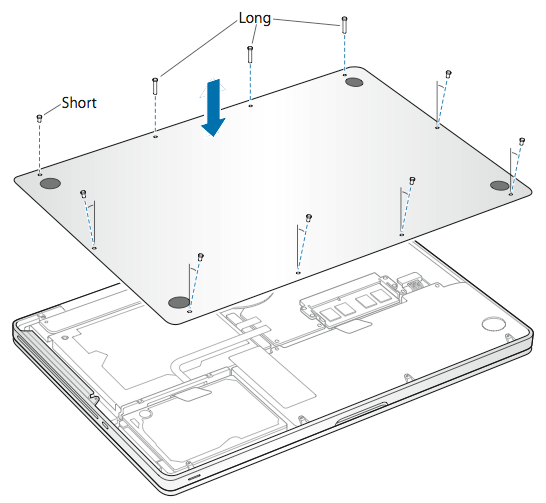
- Replace the screws, keeping track of their original location.
- Tighten the screws.
Check Installation
- Power on the computer to make sure it starts.
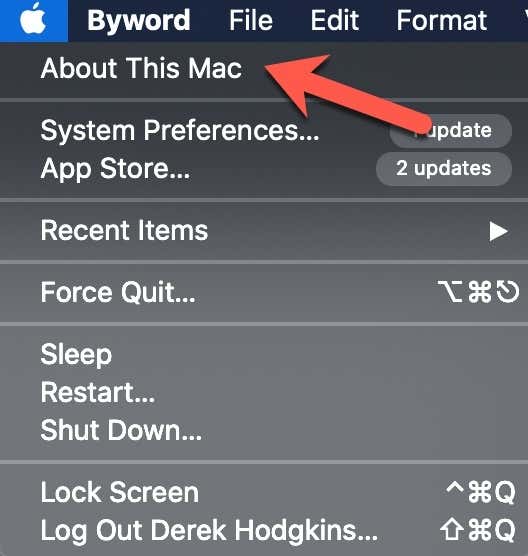
- Select the Apple logo in the upper left corner.
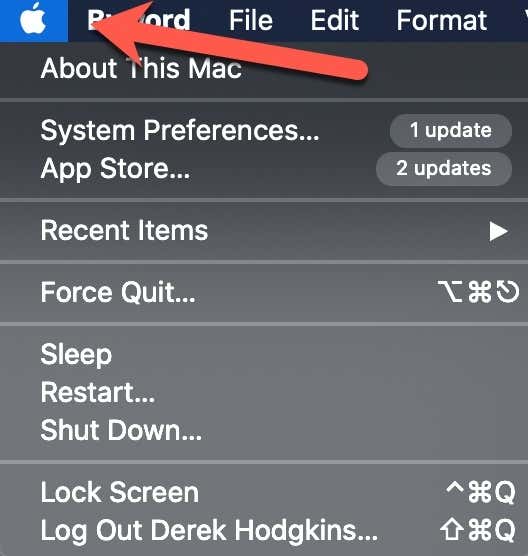
- Select About this Mac.
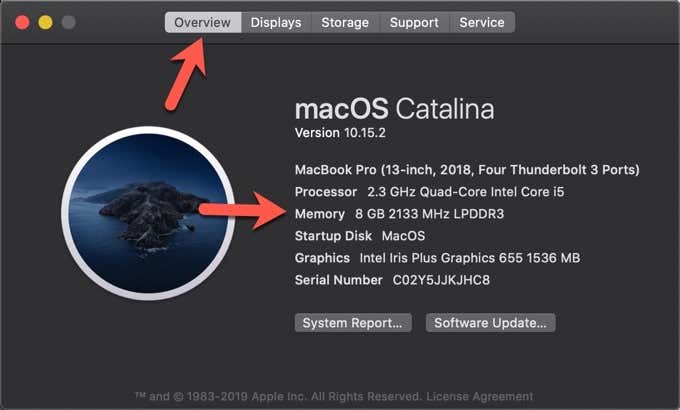
- The proper amount of RAM should appear in the Overview tab.
Why Mac RAM Upgrades are Necessary
Random Access Memory (RAM) is a temporary storage place that your CPU uses to store data. It is meant to hold short-term data used by apps and processes that are running on your computer. The more RAM you have, the more you can store data in this fast-access storage spot.
If you want your Mac to perform smoothly and reliably, you need to have enough RAM. This is especially important in older mac models that may have shipped with only a small amount of RAM. As applications grow bigger and more complex, you need more RAM if you want them to perform without glitching or crashing.
Installing RAM is cheap and easy, so it should be one of the first steps you take when your Mac starts to slow down in its performance.
Cost to Upgrade Your RAM
In most cases, it’ll cost less than a hundred dollars to double the RAM in your Mac. Even if you have a model that’s more expensive to replace, you likely won’t have to spend more than $200 on an upgrade.
If you cannot afford a RAM upgrade on your Mac, there are a few things you can do to keep your computer running as best as it can. The most effective trick is to limit the number of apps you have open at once. If you are writing a paper in Microsoft Word and want to check your email, shut down Word first and then open Mail.
Try to keep as few apps open as possible. If you are not sure which apps are running, you can check which apps are running by opening the Activity Monitor app and then using these instructions.


