Your iPhone has a top-notch camera capable of taking phenomenal pictures, and the best way to view or edit them is through a Mac’s larger Retina display. But how do you import photos from iOS to macOS?
Likewise, you could have photos on your Mac computer you’ve downloaded from the internet or taken from a high-end DSLR that you prefer to store on your iPhone. Again, how do you move them from one device to another?
Luckily, you have several ways to transfer pictures from the iPhone to Mac and vice versa. This guide will walk you through each method in detail.
How to Transfer Photos Between iPhone and Mac With iCloud Photos
The simplest and most convenient way to import photos from an iPhone to Mac and the other way is to use iCloud Photos. It’s a built-in cloud storage service that automatically syncs pictures and videos between Apple devices.
If you have an Apple ID, you automatically get 5GB of free storage space. It’s shared among other iCloud services and is admittedly not enough. However, you can buy additional storage at a reasonable price—e.g., 50GB of storage for $0.99/month.
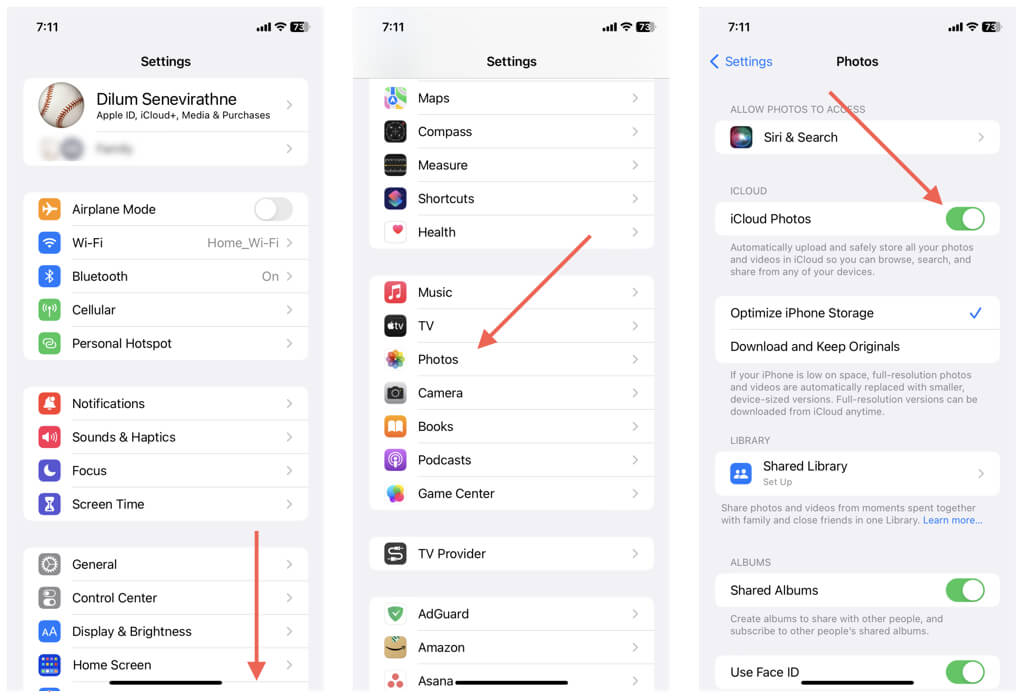
Activate iCloud Photo Library on iPhone
- Open the Settings app on your iPhone.
- Scroll down and tap Photos.
- Turn on the switch next to iCloud Photos.
Note: You can use the same steps above to activate iCloud Photos on an iPad or iPod touch.
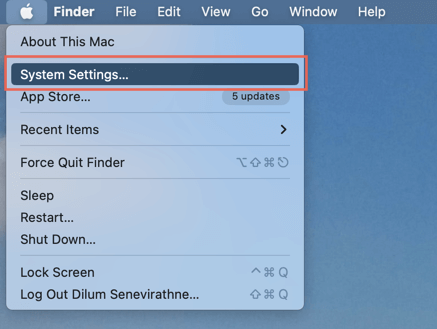
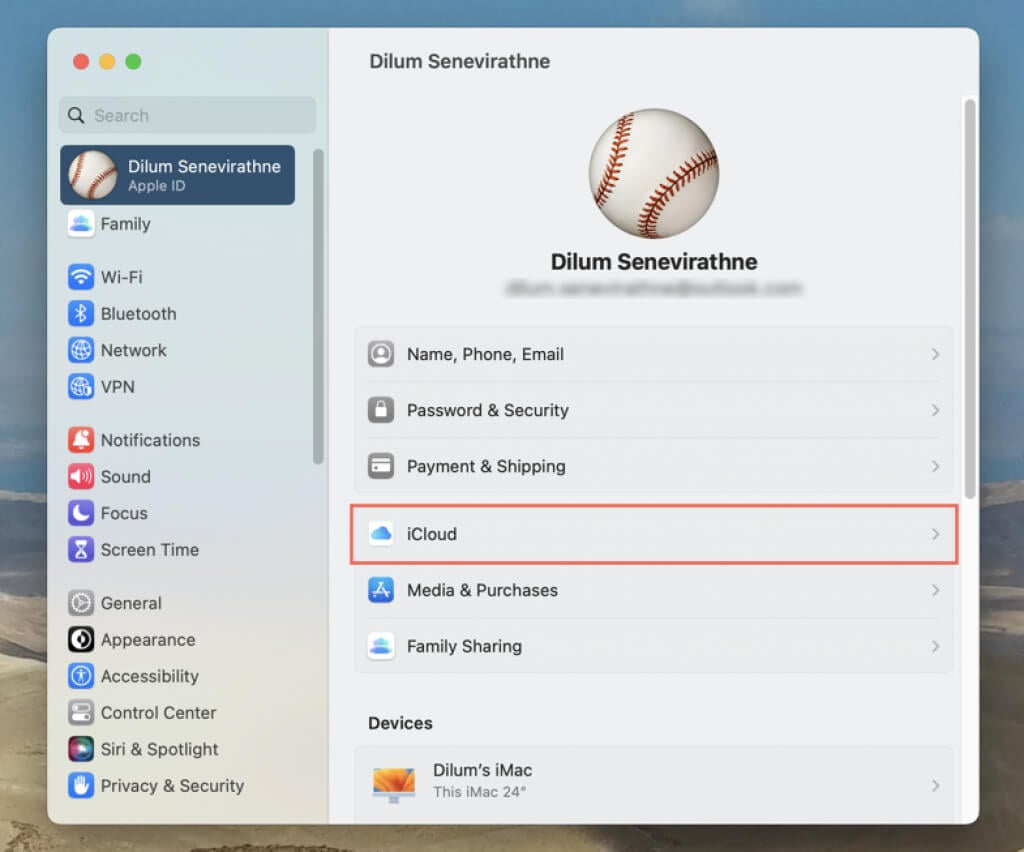
Activate iCloud Photos on Mac
- Open the Apple menu and select System Preferences/Settings.
- Switch to the iCloud tab.
- Activate the switch next to Photos.
Depending on the size of the photo libraries, you might have to wait up to 24 hours for the images to sync. They should be visible on the Photos app of each device after that. Connect your iPhone to a Wi-Fi network and a power source to speed things up.
Alternatively, use third-party cloud storages like Google Photos, Dropbox, and OneDrive to sync images between your iPhone and Mac.
How to Import iPhone Photos Through the Mac’s Photos App
If you don’t use iCloud Photos or want to transfer photos from your iPhone to a Mac with a different Apple ID, you can import the items over USB via the Photos app for macOS.
- Connect your iPhone to your Mac with a USB cable.
- Unlock your iPhone, tap Trust on the Trust This Computer? pop-up, and enter the device passcode. You don’t need to do this if you’ve previously connected both devices.
- Open the Photos app on your Mac.
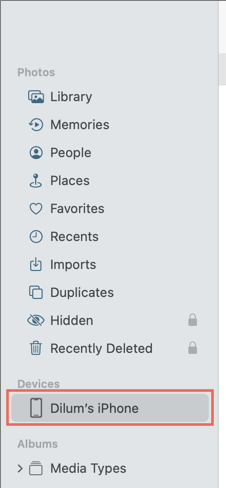
- Select your iOS device from under the Devices section of the Photos sidebar.
- Select photos to import from your iPhone’s camera roll. Hint—use the Album drop-down to filter images by album.
- Select the Import Selected button on the top-right of the screen. To import all photos (or new images only in subsequent sessions), choose Import All.
Note: Activate the Delete items box to move photos from iPhone to Mac and delete the originals afterward.
- Wait until the data transfer process completes. You’ll find all imported iPhone images under the Imports category in Photos.
How to Transfer iPhone Photos to Mac With Image Capture and Preview
Use the Image Capture and Preview apps to import iPhone images to a location other than your Mac’s Photos app.
Copy Photos on iPhone to Mac Using Image Capture
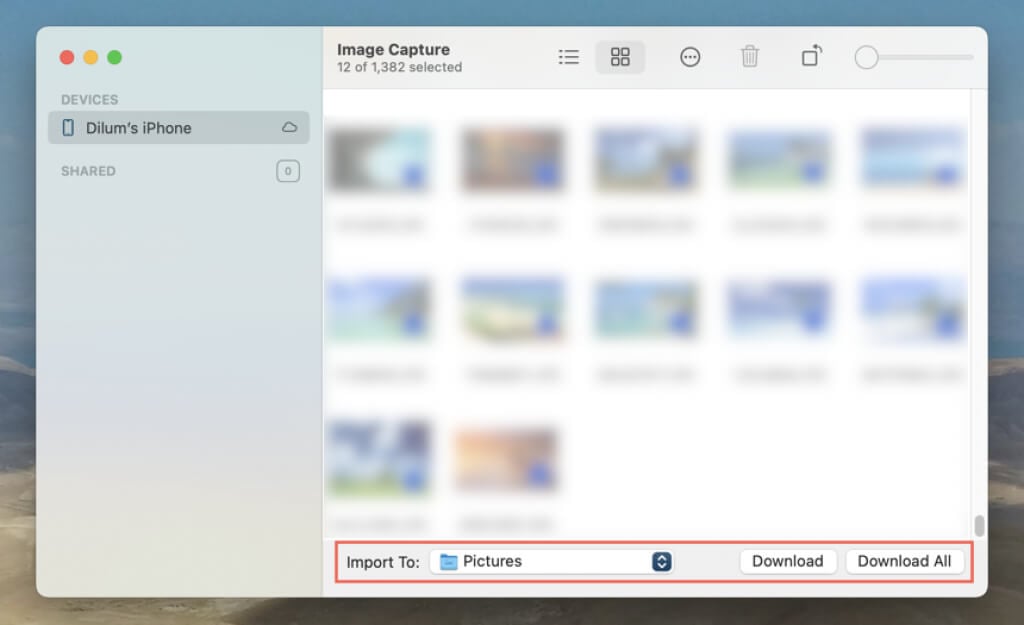
- Open your Mac’s Launchpad and select Other > Image Capture.
- Connect your iPhone to Mac over USB and unlock the iOS device.
- Pick the items you want to import from your iPhone’s camera roll.
- Open the Import To drop-down and select an import destination.
- Select Download. Or, choose Download All to import the complete iPhone photo library to your Mac.
Alternatively, you can drag and drop images from Image Capture to your preferred location in Finder.
Copy Photos on iPhone to Mac Using Preview
- Connect your iPhone to Mac over USB and unlock the iOS device.
- Open your Mac’s Launchpad and select Preview.
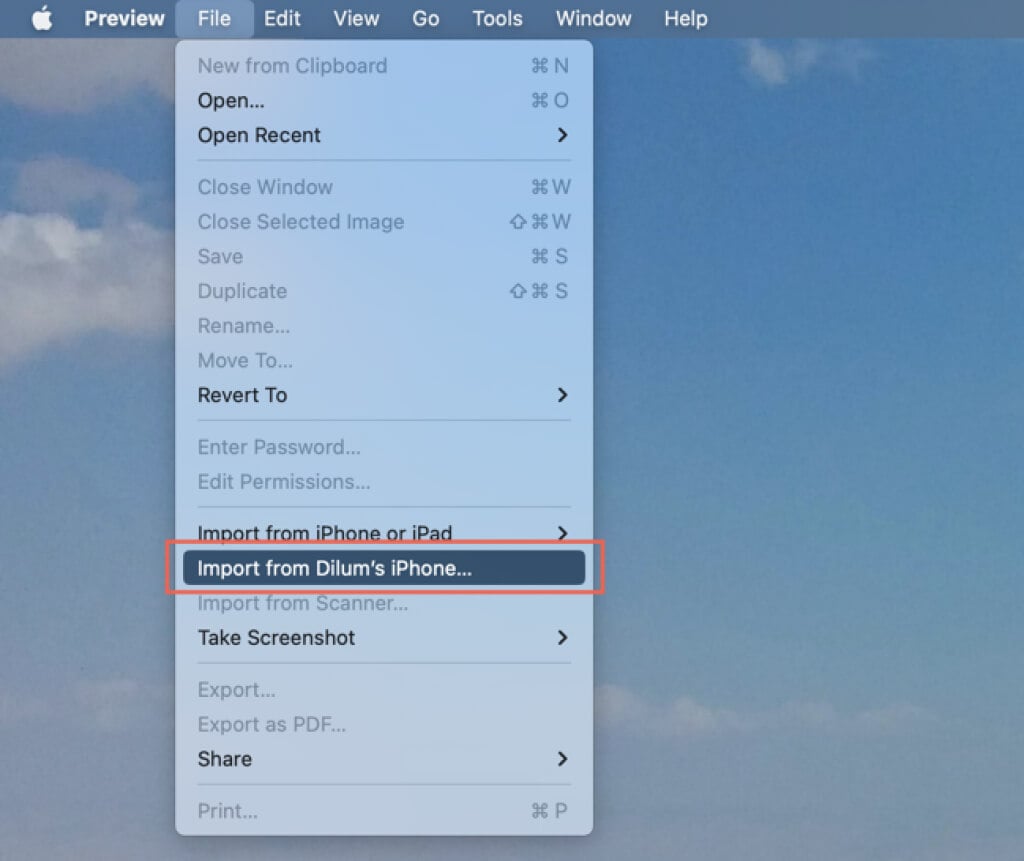
- Select File > Import From [Your Name] iPhone.
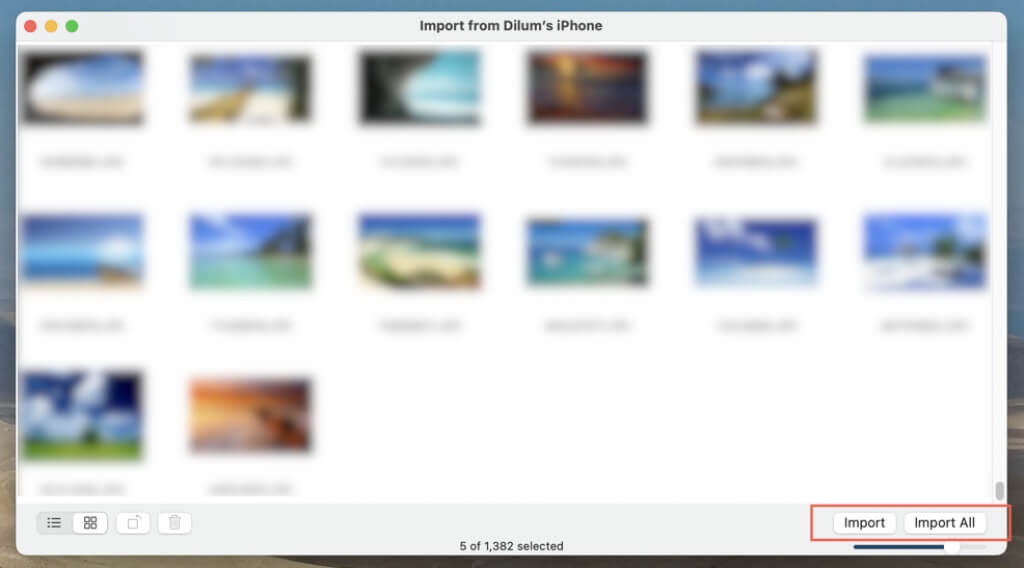
- Select the images you want to import.
- Select Import, pick a directory on your Mac, and select Choose Destination.
Or, select Import All to import all iPhone photos to the Mac.
How to Do a Photo Transfer From Mac to iPhone via Finder or iTunes
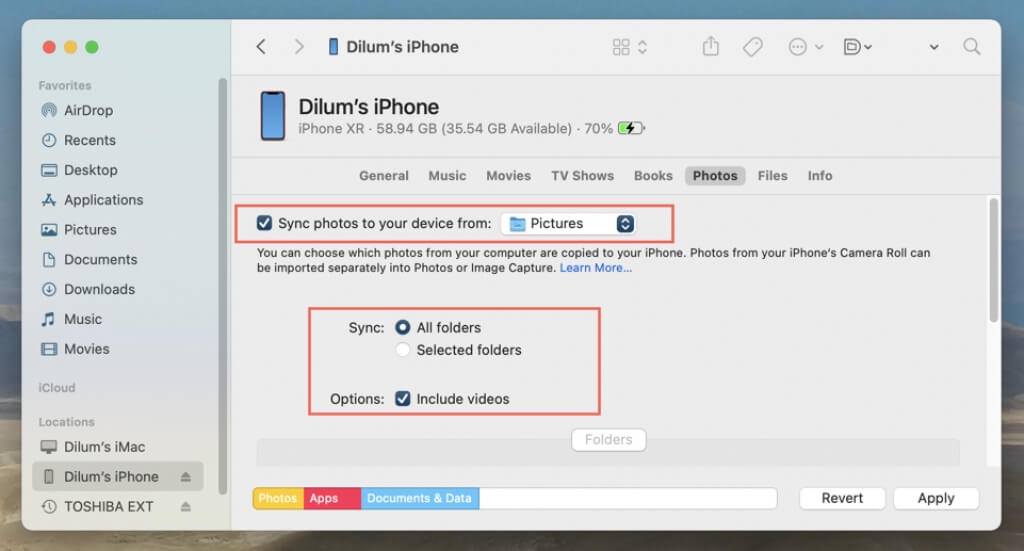
If iCloud Photos isn’t active on any of your devices, you can sync photos from the Mac to iPhone through the Finder or iTunes app in macOS.
- Connect your iPhone to your Mac via USB and unlock the iOS device.
- Open Finder (macOS Catalina and later) or iTunes.
- Select your iPhone on the Finder sidebar or the top left corner of the iTunes window.
- Switch to the Photos tab.
- Open the Sync photos to your device from the drop-down and pick the image folder or your Mac’s photo library (select Photos) to sync to your iPhone.
- Choose between Selected folders and All folders, or All photos or albums and Selected albums if Photos is the sync source. Also, check the box next to Include videos to sync videos from the image folder or Photos app.
- If you choose Selected folders/albums in the previous step, scroll down and pick the folders or albums you want to sync.
- Select Sync or Apply.
- Wait until the photo syncing process completes. You’ll find imported photos within an album labeled On My Mac on the Photos app of your iPhone.
How to Upload and Download Photos on iPhone and Mac via iCloud.com
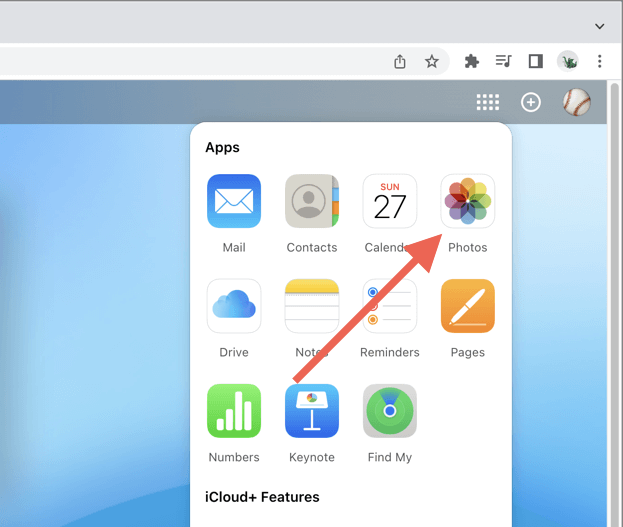
Apple provides a web version of iCloud Photos that you can use to perform photo uploads and downloads on the iPhone or Mac. It’s perfect if you use iCloud Photos but don’t have it activated on one or both devices or when you want to transfer photos to a device with a different Apple ID.
- Visit iCloud.com via Safari or another web browser on your iPhone or Mac and sign in with your Apple ID credentials.
- Select the Menu icon (stack of dots) on the top right and choose Photos.
- Pick the photos you want to download and select Download. Or, choose Upload to upload images to the cloud.
If iCloud Photos is active on any of your devices, you can use the Photos app to view iCloud.com uploads from other devices or make uploads that you can then download through the web on the other device. You can also use iCloud.com to view, upload, and download images on a Windows PC or Android mobile.
How to Transfer via Photos Between iPhone and Mac With AirDrop
Another convenient way to transfer photos between your iPhone and Mac—or to a device you do not own—is to use AirDrop. Make sure to configure your AirDrop settings correctly and activate Wi-Fi and Bluetooth on both devices before you go ahead.
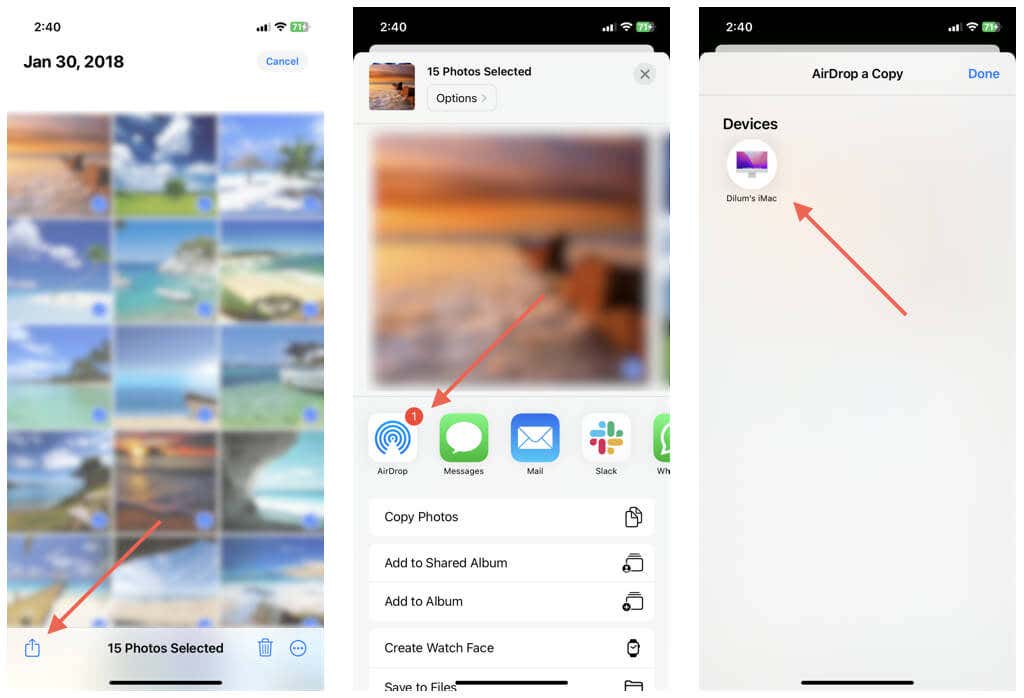
Transfer Photos From iPhone to Mac With AirDrop
- Open the Photos app and select the photos you want to send to your Mac.
- Tap the Share icon at the bottom right of the screen.
- Tap AirDrop and select the Mac from the Devices list.
The images will appear within the Downloads folder on your macOS device.
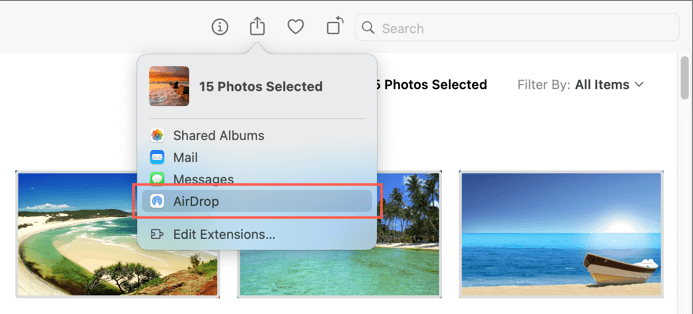
Transfer Photos From Mac to iPhone With AirDrop
- Open the Photos app and select the photos you want to send to your iPhone.
- Select the Share button on the top right of the window and select AirDrop.
- Select your iPhone on the AirDrop pop-up.
Your images will appear within the Photos app on your iOS device.
Alternatively, you can send image files from the Mac’s Finder app to your iPhone through AirDrop. Select the items, and then Control-click and choose Share > AirDrop.
iCloud Photos Is the Most Convenient
iCloud Photos is the best way to import photos from the iPhone to Mac and vice versa with minimal effort. If you don’t want to pay for iCloud storage, you should be able to do just fine with the other methods, albeit without the extra convenience.
[related_posts_by_tax posts_per_page="5"]