Before raindrops start falling on your head
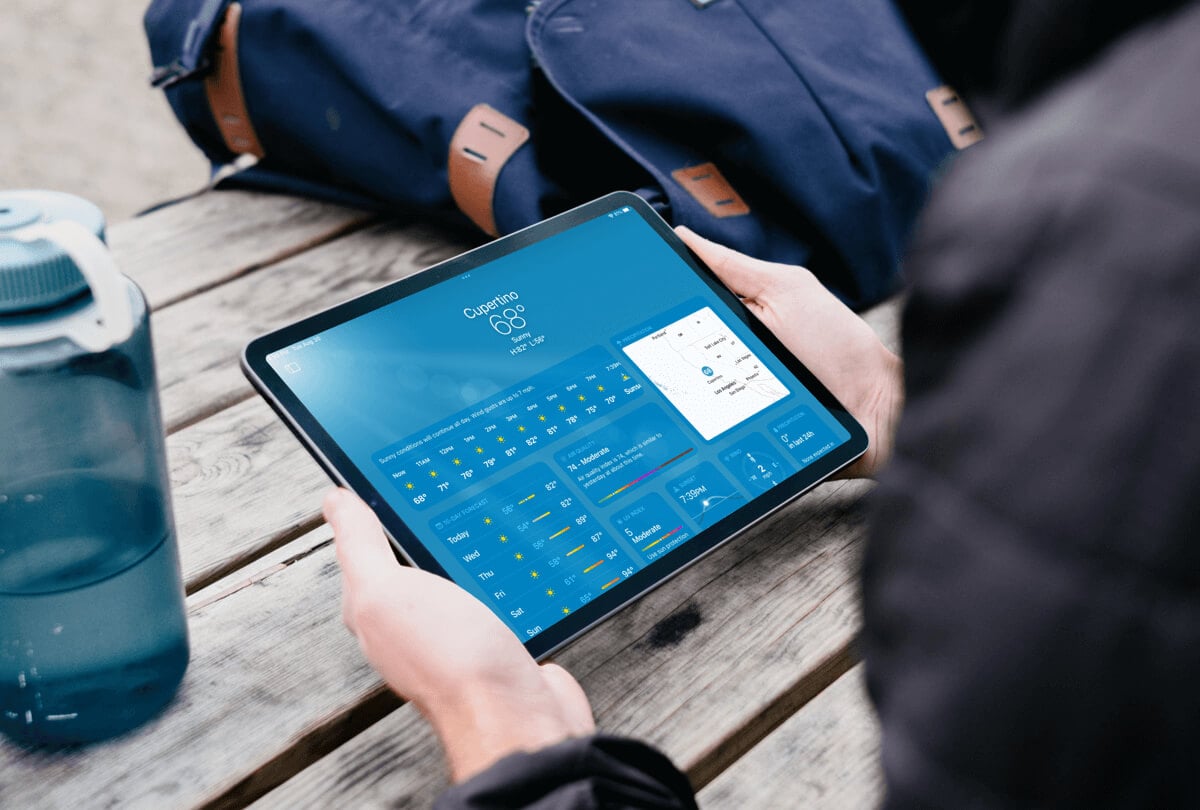
After years of using third-party options, iPad users can rejoice as a new Weather app has been added with iPadOS 16. This is the same Weather app available on iPhone and Apple Watch.
Apple’s Weather app on iPad has some terrific features. You can add multiple locations and switch between them, use the radar map and view layers for temperature and precipitation, enable notifications for severe weather, and more.
Open the iPad Weather App
As with any other update to iPadOS that brings new features like apps, you’ll see Weather in an open spot on your screen when you install iPadOS 16.
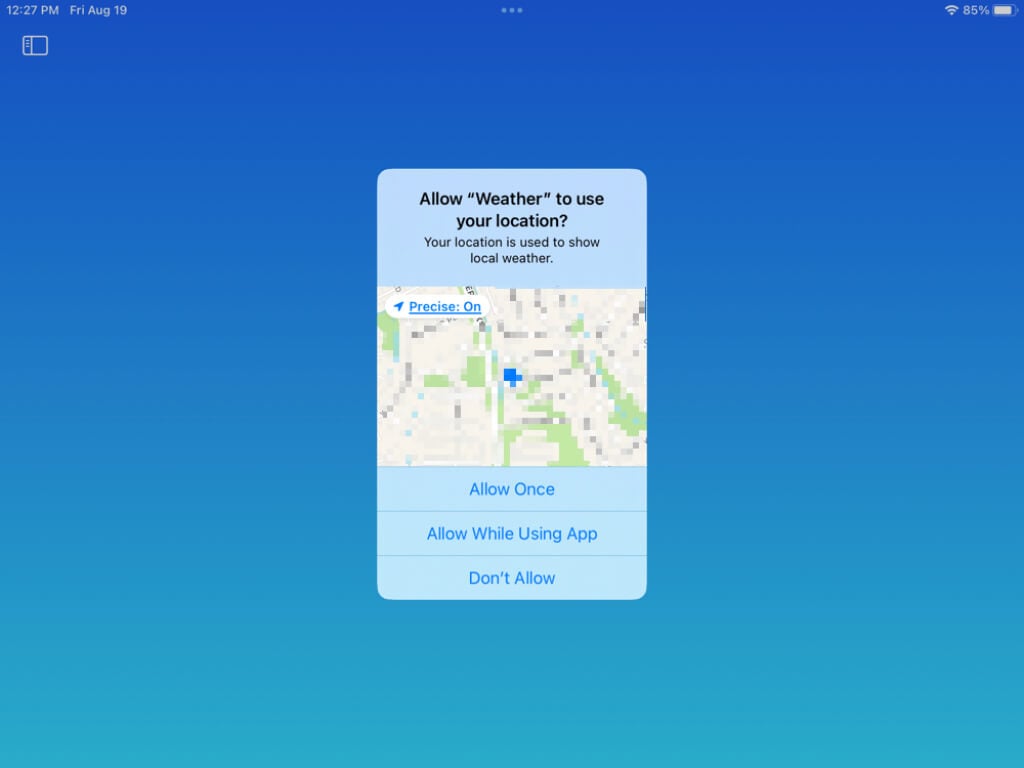
You’ll likely be prompted to use your current location when you first open the app. Choose Allow Once, Allow While Using App, or Don’t Allow per your preference.
If you pick Don’t Allow, you can still add your current spot along with any others, as we’ll describe next.
Add Locations to Weather
Maybe you want to see the weather where your parents live, where you travel often, or your current spot if you didn’t allow location access above.
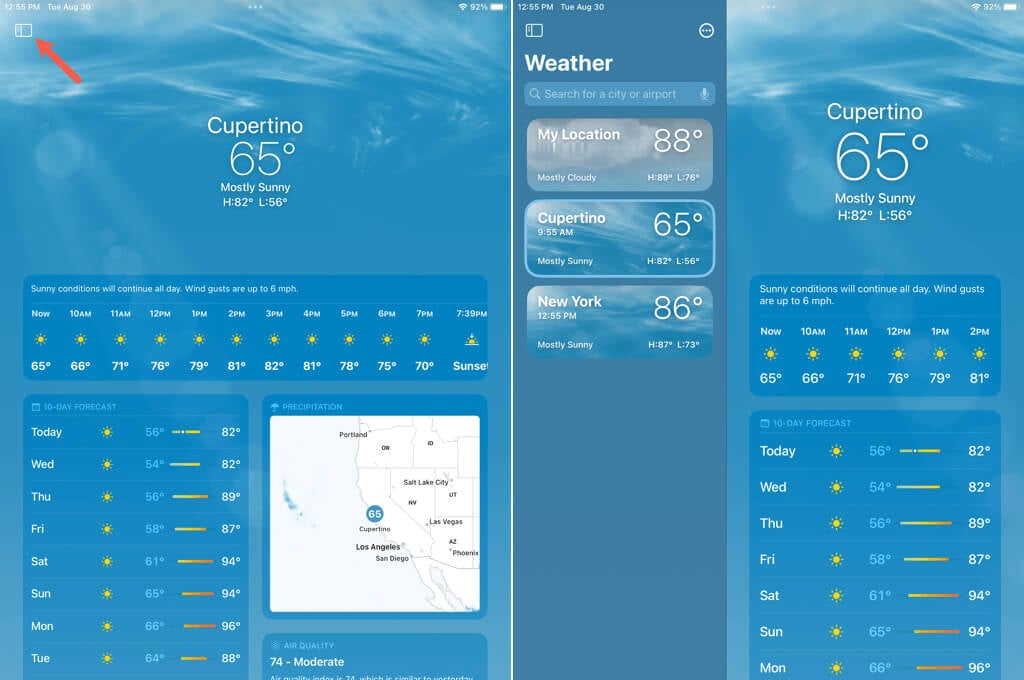
- Tap the Sidebar icon on the top left of the Weather app to open the sidebar if necessary.
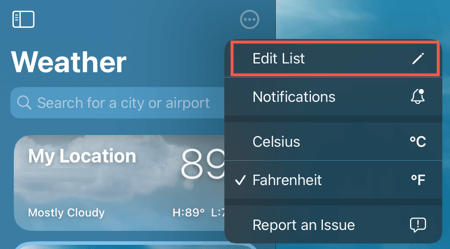
- Select the three dots on the top right of the sidebar and pick Edit List.
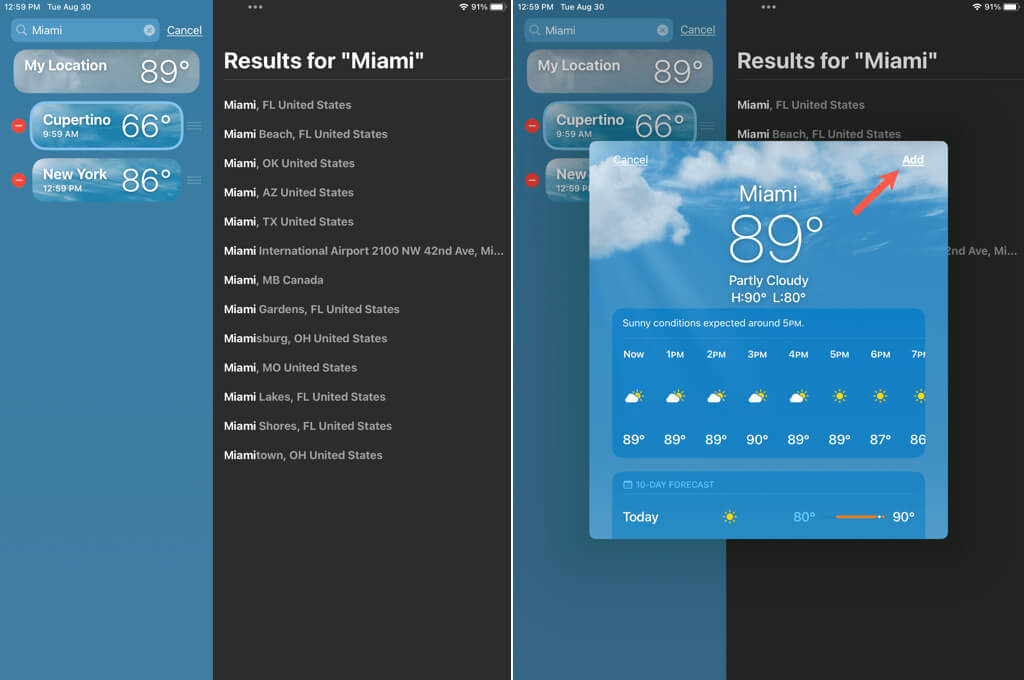
- Enter a location in the Search box at the top or use the Microphone button to dictate the spot.
- You’ll see the results display on the right. Select the one you want to add.
- Confirm the location in the pop-up window and tap Add.
You can then use the sidebar or swipe right on the main Weather app screen to switch between your locations.
Rearrange or Remove Locations
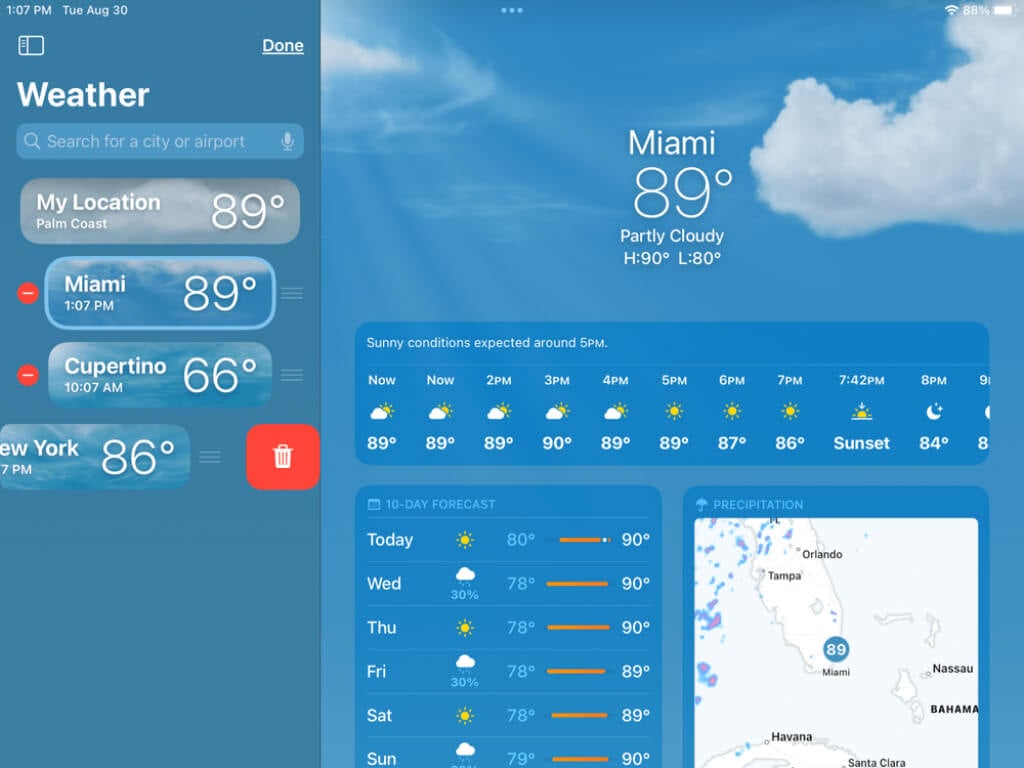
You can put the locations you add to the Weather app in whatever order you like. This is especially useful if you plan to swipe through them on the main app screen.
- With the Weather app sidebar open, select Edit List.
- Use the three lines to the right of a location to drag it up or down where you want it.
- To remove a location, tap the minus sign in red on the left and then tap the Delete icon (trash can) that appears.
When you finish, tap Done on the top right of the sidebar.
Use the Weather Modules
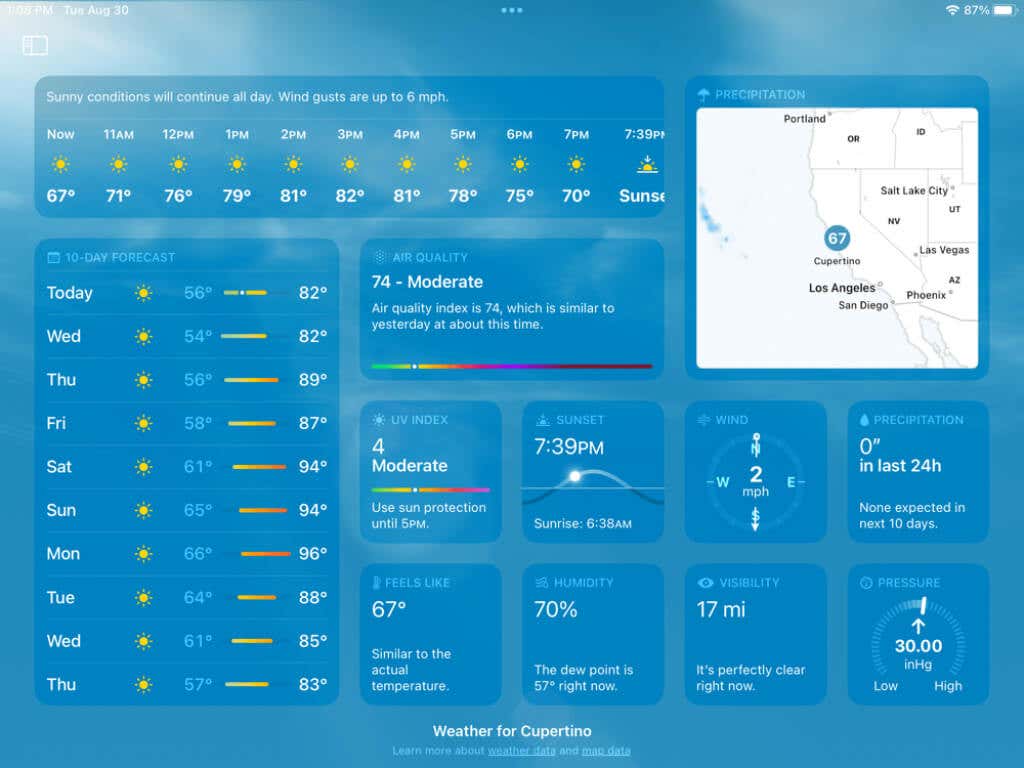
The main screen of the Weather app has your current weather conditions at the top. It’s also packed with modules for all sorts of weather data and details.
Each module you see gives you the essential details you need. These include an hourly forecast, a ten-day forecast, a radar map, air quality, UV index, sunset, wind, precipitation, feels like (temperature), humidity, visibility, and pressure.
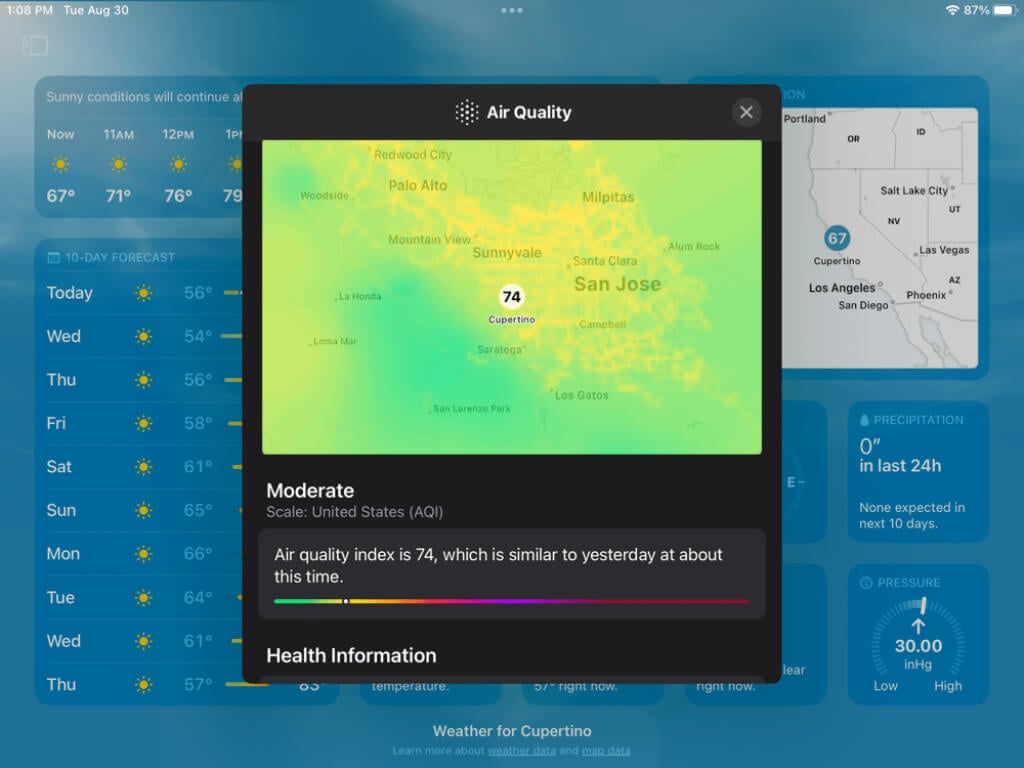
If you select a module, you’ll see a pop-up window that includes even more details. For instance, if you open the air quality module, you’ll see the air quality map, a brief description of the current AQI (Air Quality Index), health information, and the primary pollutant.
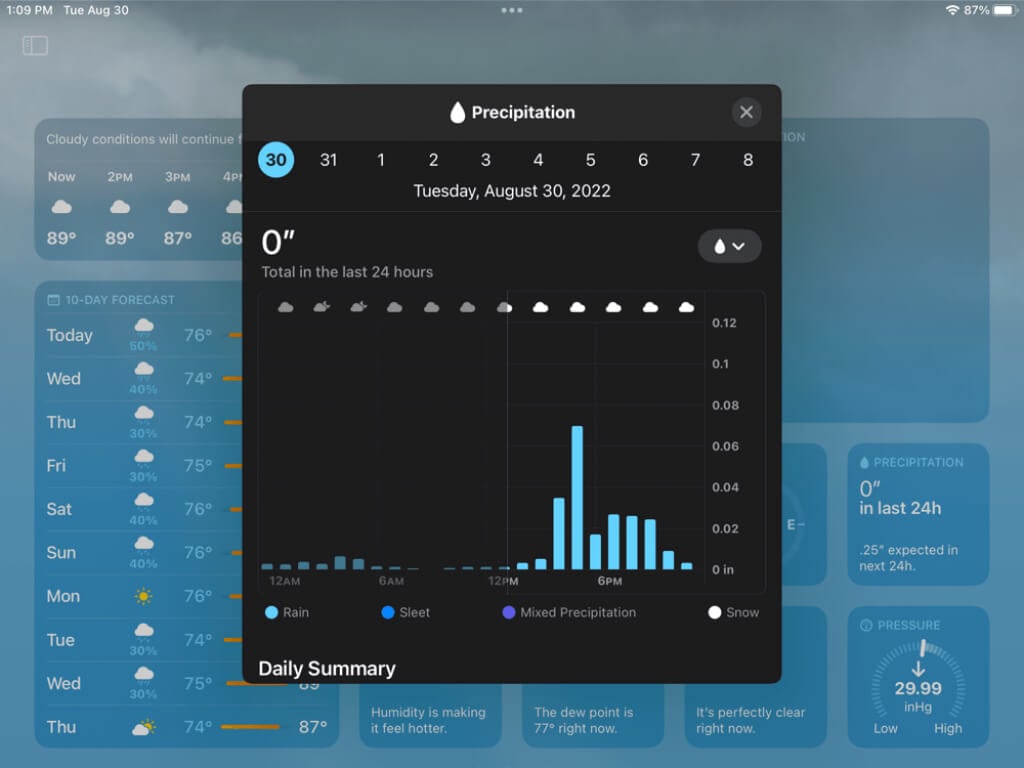
As another example, you can open the precipitation module and view a color-coded graph showing rain, sleet, mixed, and snow over the past 24 with the amounts. You can also select a specific date at the top and view a daily summary at the bottom.
Tap the X on the top right to close the module’s pop-up window and return to the main Weather screen.
View the Radar Map and Layers
Radar maps are helpful for seeing what’s coming and in which nearby areas. Tap the radar map module to view a full-screen weather map.
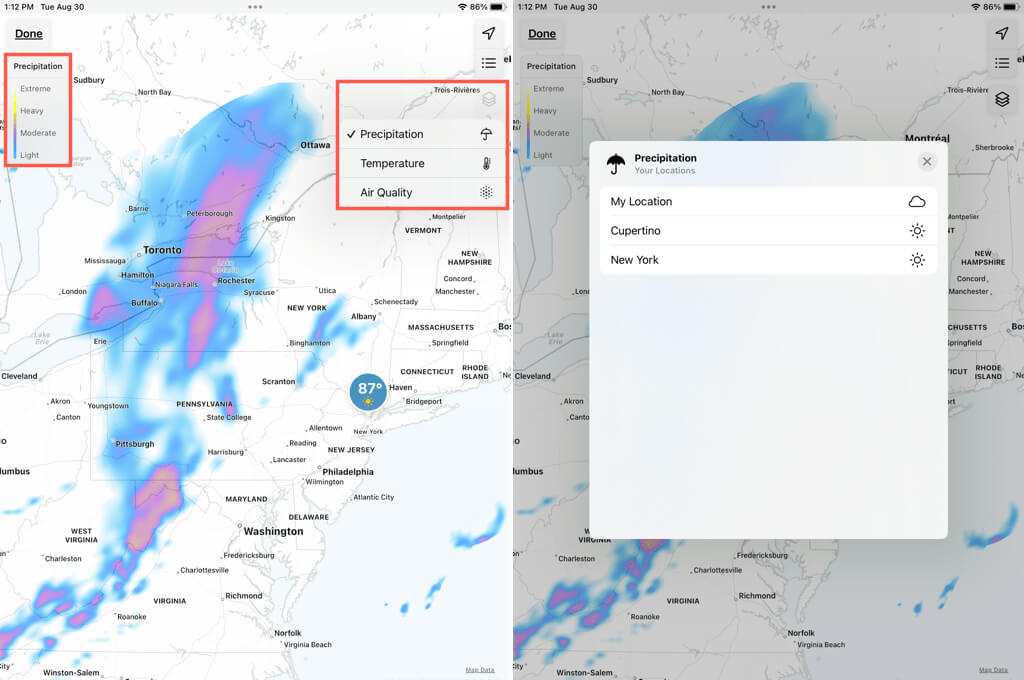
On the top right, you have controls for your current location, selecting a new location from your list and choosing a map layer. The layers include precipitation, temperature, and air quality.
After you choose the layer you want to see, you’ll notice a legend on the top left that matches that layer. For instance, if you pick precipitation, you’ll see the legend display the color meanings.
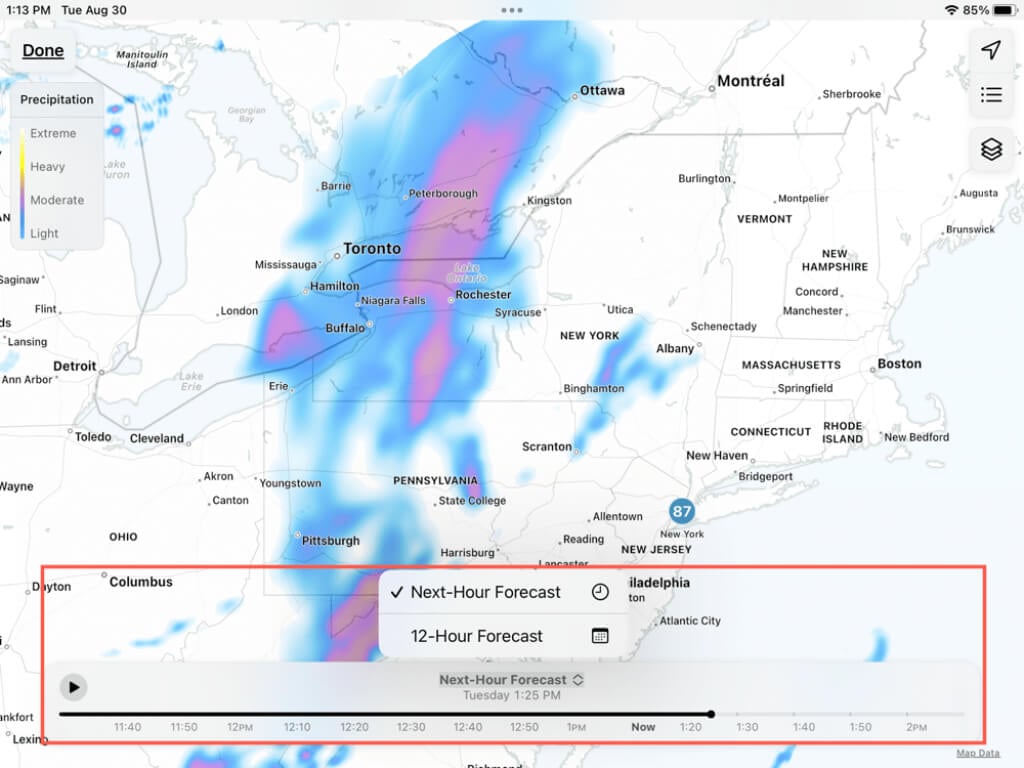
At the bottom, you have a control for the movement of the radar map for the next hour’s forecast. Tap the drop-down box in the center to change it from Next-Hour Forecast to 12-Hour Forecast if you wish.
You can use the Pause button to stop it at a certain point and pick Play to resume.
The bottom control disappears after a brief time. To display again, simply tap anywhere on the map screen. When you finish viewing the map, tap Done on the top left to return to the main Weather app screen.
Enable Weather Notifications
If you want to know when severe weather is approaching, you can enable the notifications for the Weather app.
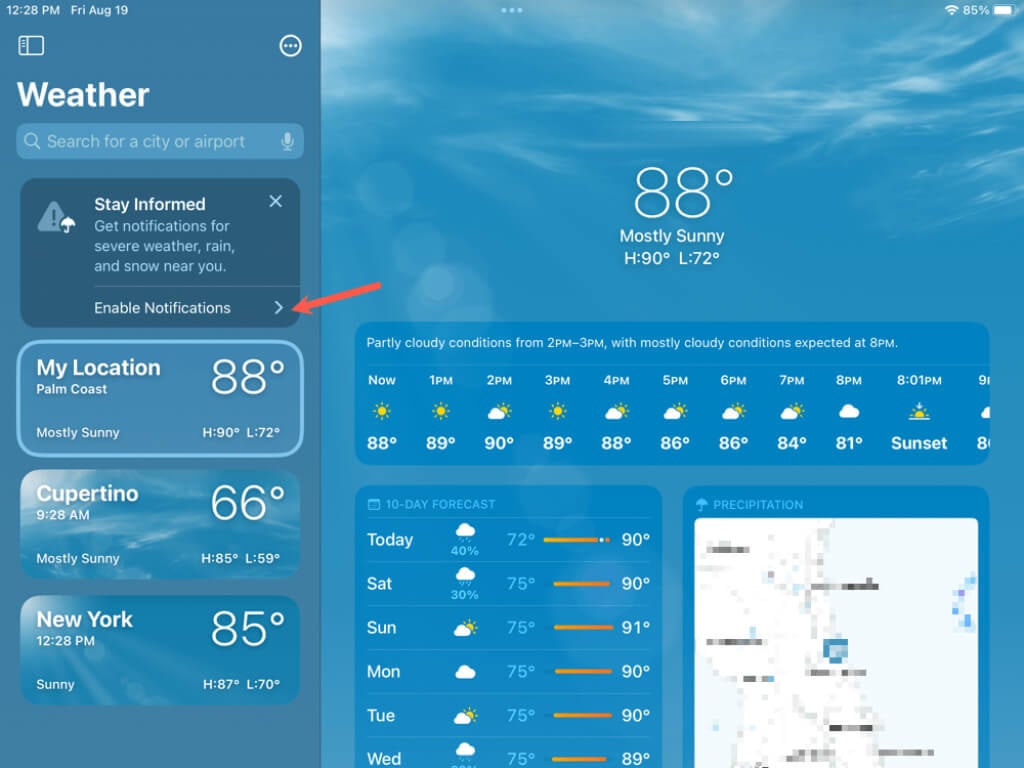
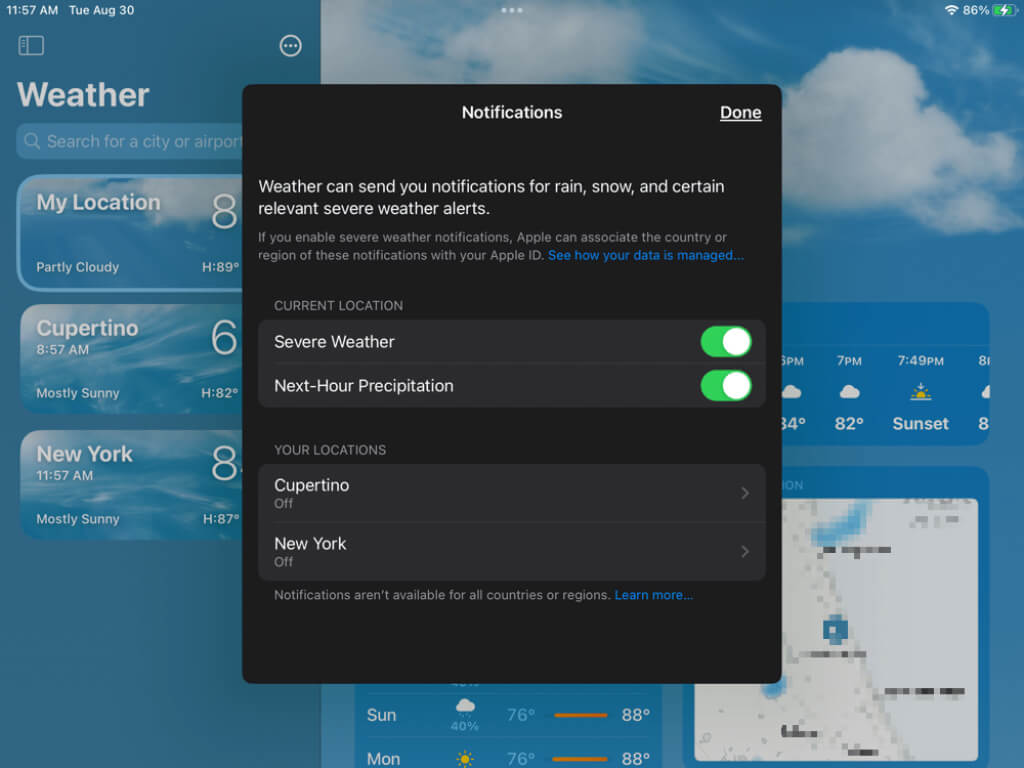
- When you first open the Weather app and sidebar, you’ll see an option to Enable Notifications. Alternatively, you can select the three dots on the top right of the sidebar and pick Notifications.
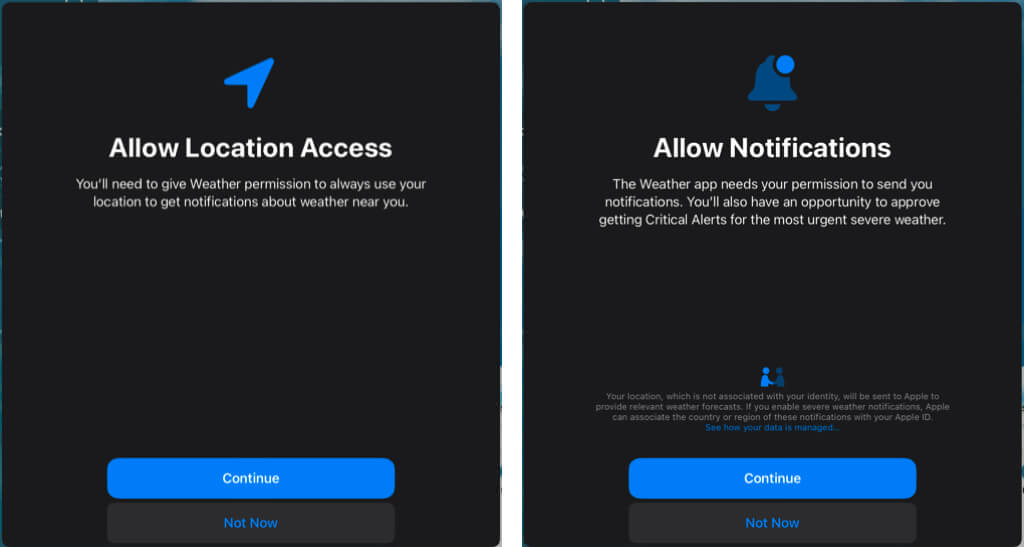
- You’ll be asked to share your location to receive weather alerts for your area. Follow the prompts to allow access to your location and for notifications to continue.
- You can then choose which notifications to receive and for which locations. Open the sidebar, select the three dots at the top, and pick Notifications.
- Enable or disable the toggles for Severe Weather and Next-Hour Precipitation for your location. Then, select a city at the bottom to enable those same notifications for other locations in your list.
- Tap Done when you finish.
Note: Severe weather information is provided by The Weather Channel.
Add a Weather Widget to the Home Screen
One great way to keep up with the weather in your area is with a widget on your Home screen. You can add a widget for Weather like any other on iPad. Here’s a refresher if you’re new to adding widgets.
- Tap and hold any blank spot on your Home screen and select the plus sign on the top left.
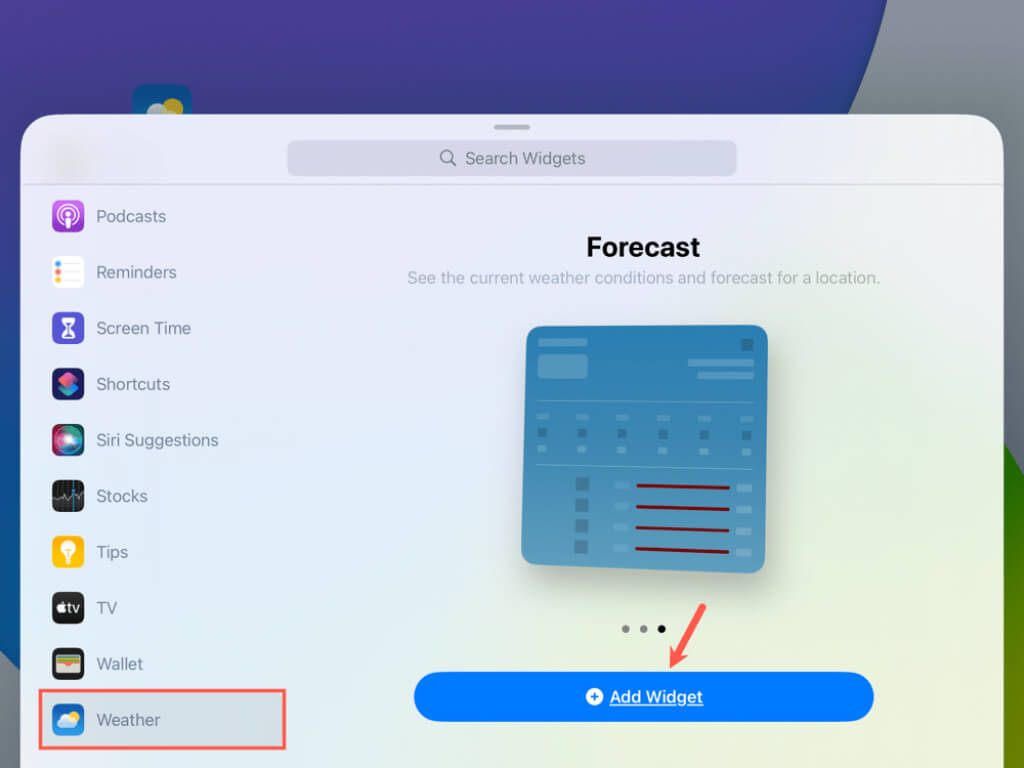
- Scroll through the widget list to Weather. Alternatively, enter “weather” into the Search box and choose Weather in the results.
- Swipe through the available widgets for the size you want and tap Add Widget.
You’ll then see the Weather widget on your Home screen. You can tap, hold, and drag it where you like. For more weather details, tap the widget to open the Weather app.
Tips for Using Weather on iPad
Here are a few tips for using the Weather app you may find helpful.
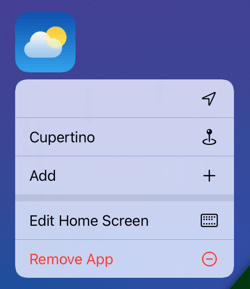
Locations: Tap and hold the Weather app icon on your Home screen and choose a location to view or add a new one.
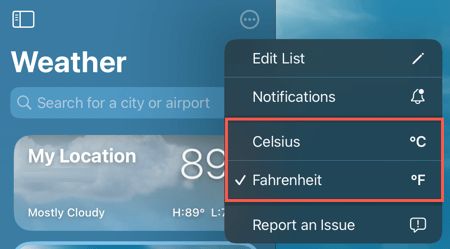
Temperature units: To change between Fahrenheit and Celsius, tap the three dots on the top right of the Weather app’s sidebar or go to Settings > Weather.
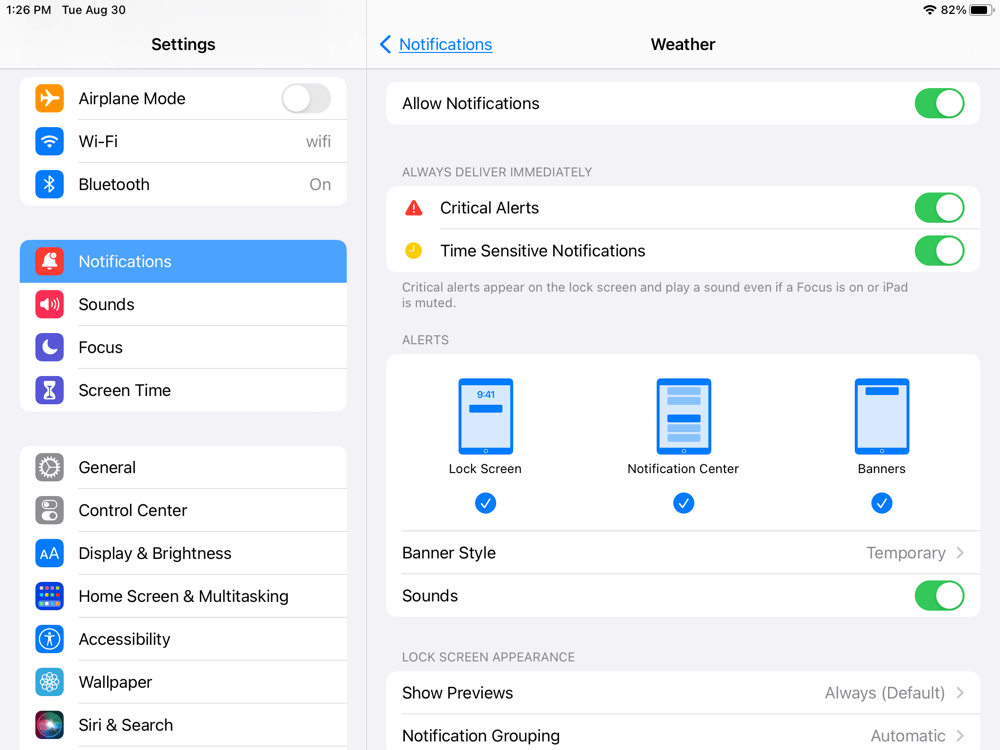
Notifications: To select the alert type and banner style, and turn on or off the sounds, go to Settings > Notifications > Weather.
Most of us appreciate the ability to quickly see the current conditions, weather forecasts, and severe alerts. It’s nice that Apple has brought the iOS Weather app to the iPad.

