For troubleshooting any problems or resale
As you keep using macOS 12 Monterey on your Mac, you may encounter instances that warrant resetting the system software to factory default. Whether that’s to sell the macOS device, troubleshoot a persistent issue, or just start with a fresh slate, this tutorial will help you get the job done.
However, before you begin, we recommend backing up your data using Time Machine. That helps you quickly restore your data to the same or a different Mac later. If you use any other cloud-based or local backup, double-check that everything’s up to scratch to avoid data loss.

Use macOS Monterey’s Erase Assistant
macOS Monterey comes with an Erase Assistant—for the first time in any macOS release—that lets you reset all settings to factory defaults right from within the operating system itself. It closely resembles the Erase Assistant on iOS and iPadOS.
However, the feature is only available if your Mac runs on an Apple Silicon chip (such as the M1) or contains an Apple T2 Security Chip. If you use an Intel Mac without a T2 chip, skip to the next section.
1. Open the System Preferences app on your Mac. If it’s not present on the Dock, open the Apple menu and select System Preferences.

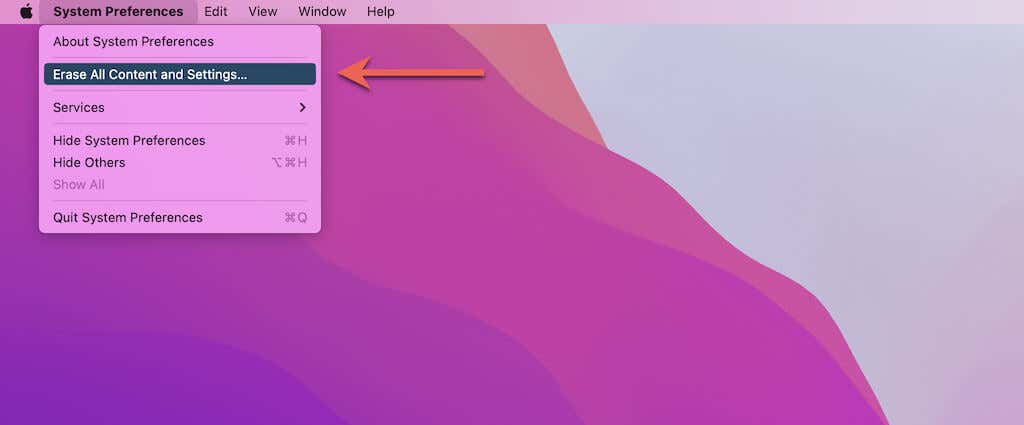
2. Select System Preferences > Erase All Content and Settings on the menu bar.
3. Type your administrator password and select OK.
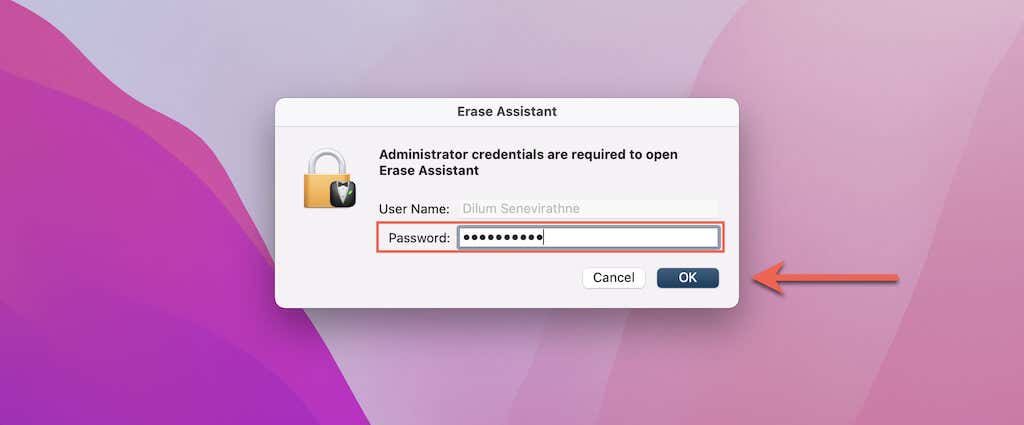
Note: If you have a non-administrator account, you can’t use the Erase Assistant to reset macOS Monterey to factory default settings. You should probably seek help from an administrator instead.
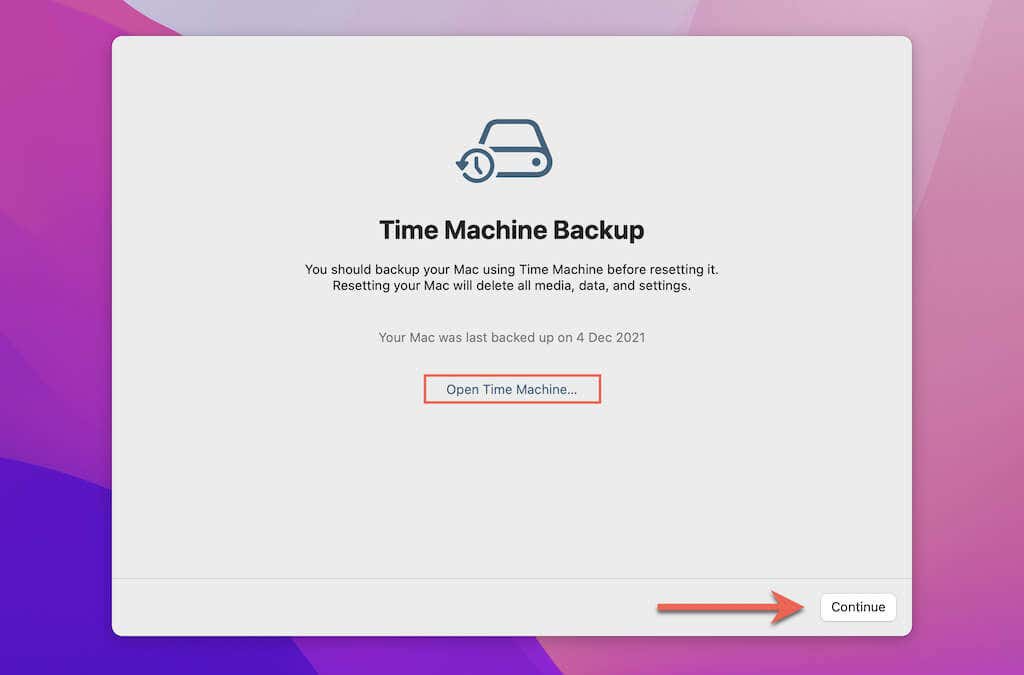
4. If you’ve set up Time Machine on your Mac, you’ll be prompted to take a fresh backup. Select Open Time Machine and initiate the Time Machine backup. Then, select Continue.
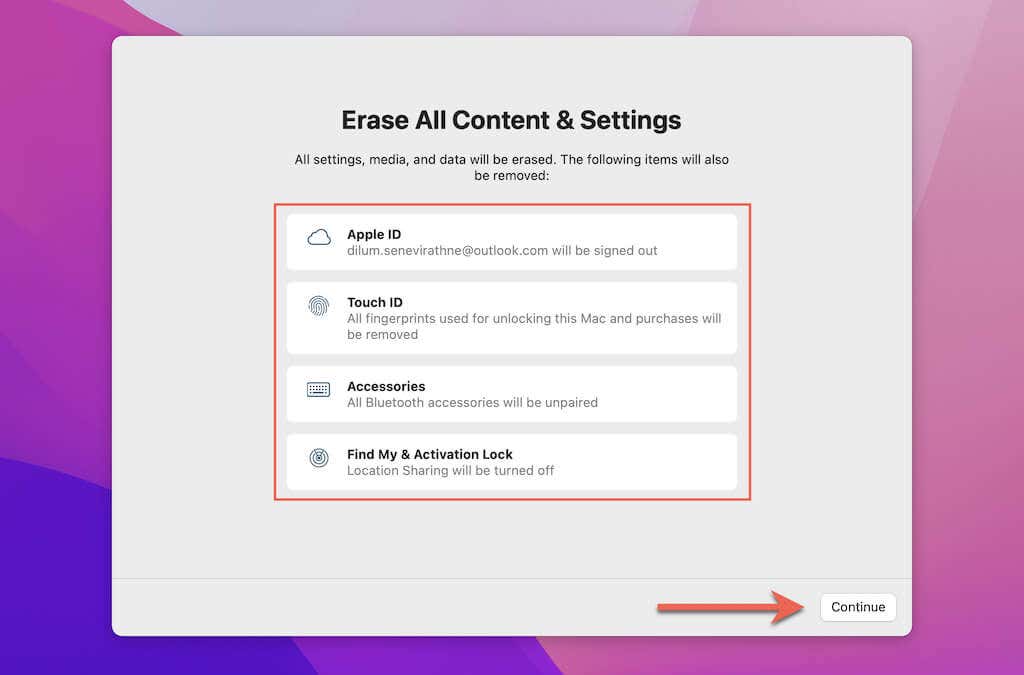
5. Review the settings that your Mac will remove. This includes your Apple ID, Touch ID fingerprints, Bluetooth accessories, Find My Mac, etc. If your Mac has multiple user accounts, you will find them listed on the screen as well. Once you’re done, select Continue.
6. If you’ve signed into your Mac with an Apple ID, enter its password to deactivate Activation Lock. Then, select Continue.
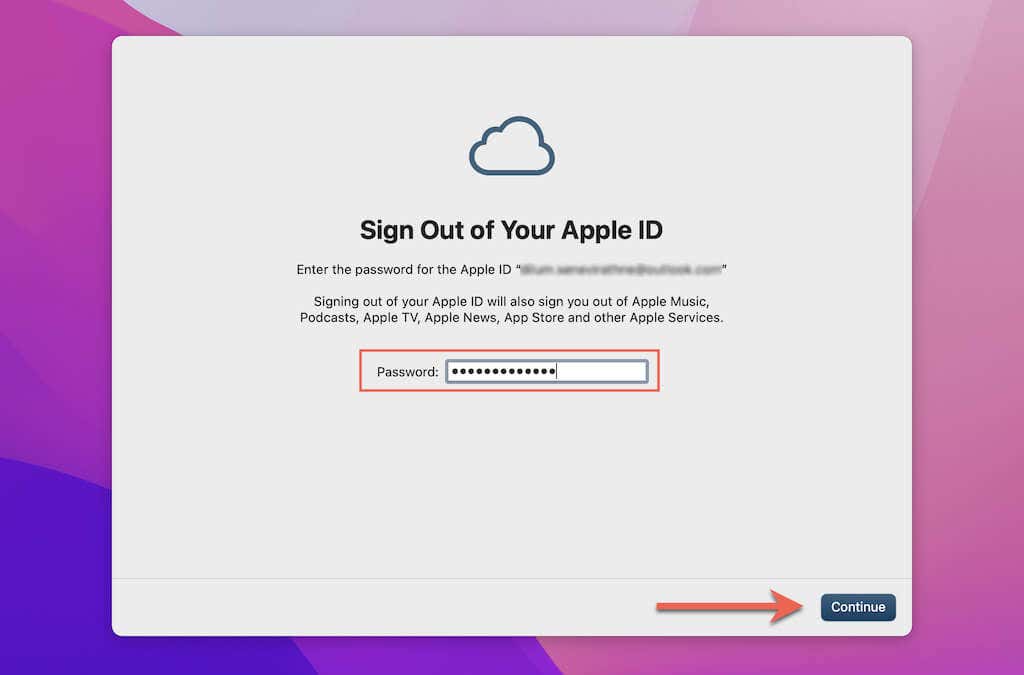
7. Select Erase All Content and Settings. If you’ve changed your mind, this is the last opportunity to cancel and quit the Erase Assistant!
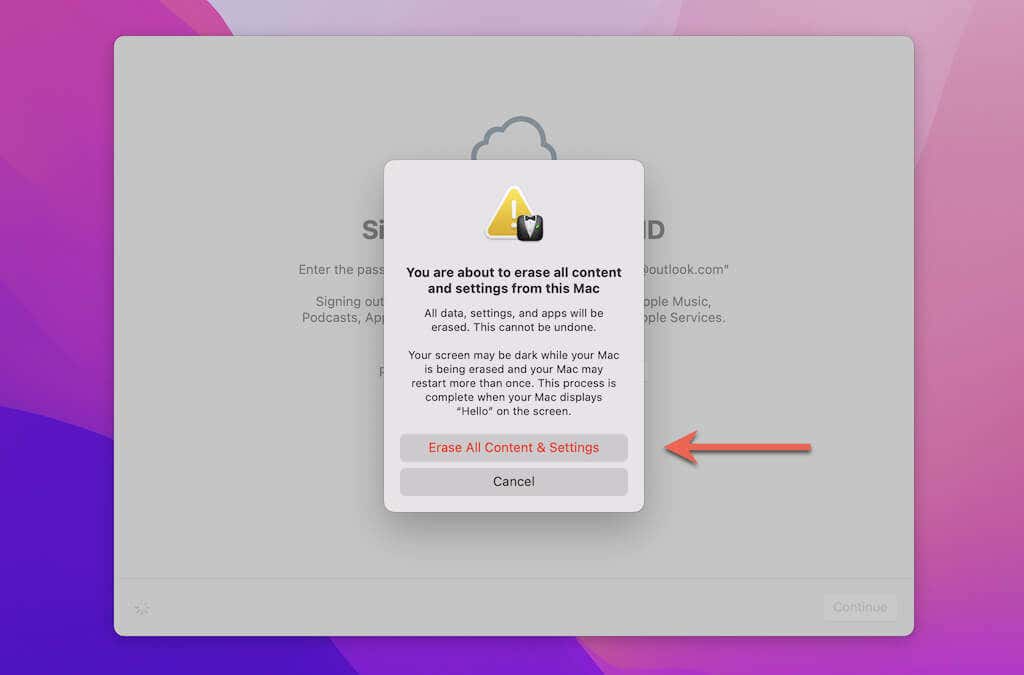
8. Wait until the Erase Assistant finishes restoring your Mac to factory settings. Your Mac will restart in the meantime, and you’ll see an Apple logo with a progress bar underneath it.

9. After the reset procedure, Erase Assistant will prompt you to reactivate your Mac. To do that, connect your device to an Ethernet connection. Or, select the Wi-Fi icon at the top-right corner of the screen and join an available Wi-Fi network. Once you see the Your Mac is activated message flash up on the screen, select Restart.
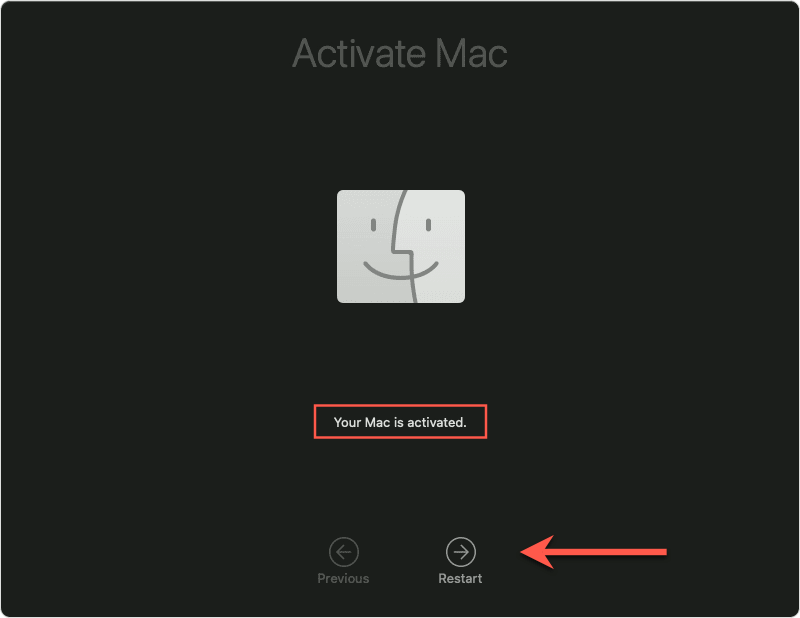
10. Select Get Started on the Hello screen. That will launch the Setup Assistant. If you plan on selling your Mac, press Command + Q and turn off your Mac. Or, work your way through the Setup Assistant to set up your Mac from scratch.
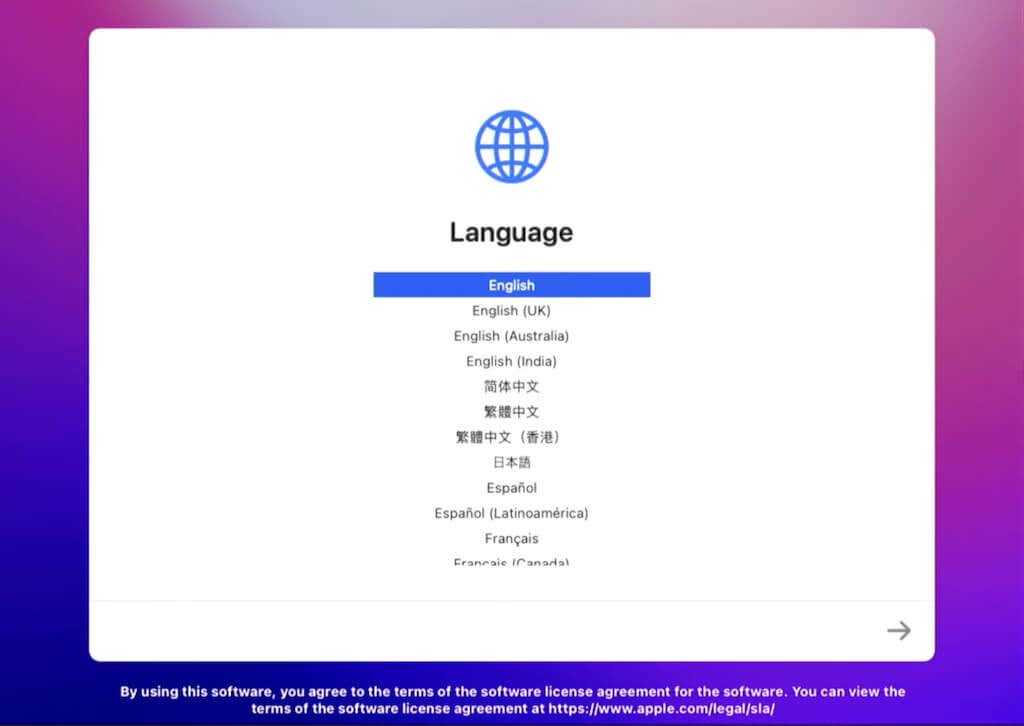
If you choose to set up your Mac, you’ll be given the option of restoring your Mac’s data via a Time Machine backup. You can skip that if you want and use the Migration Assistant to restore everything later. For comprehensive step-by-step instructions, check our guide to restoring a Mac using Time Machine.
Erase and Reinstall via macOS Recovery
If you use an Intel Mac without an Apple T2 Security Chip, you must enter and use macOS Recovery to reset your Mac to factory defaults. The procedure involves wiping the startup disk and reinstalling the system software. Don’t worry—you won’t need any external macOS installation media.
Sign Out of iMessage and iCloud
If you intend on selling or giving away your Mac, you may want to take a few minutes to sign out of both iMessage and iCloud. That minimizes the chances of running into account-related issues while using your Apple ID on other Apple devices you own.
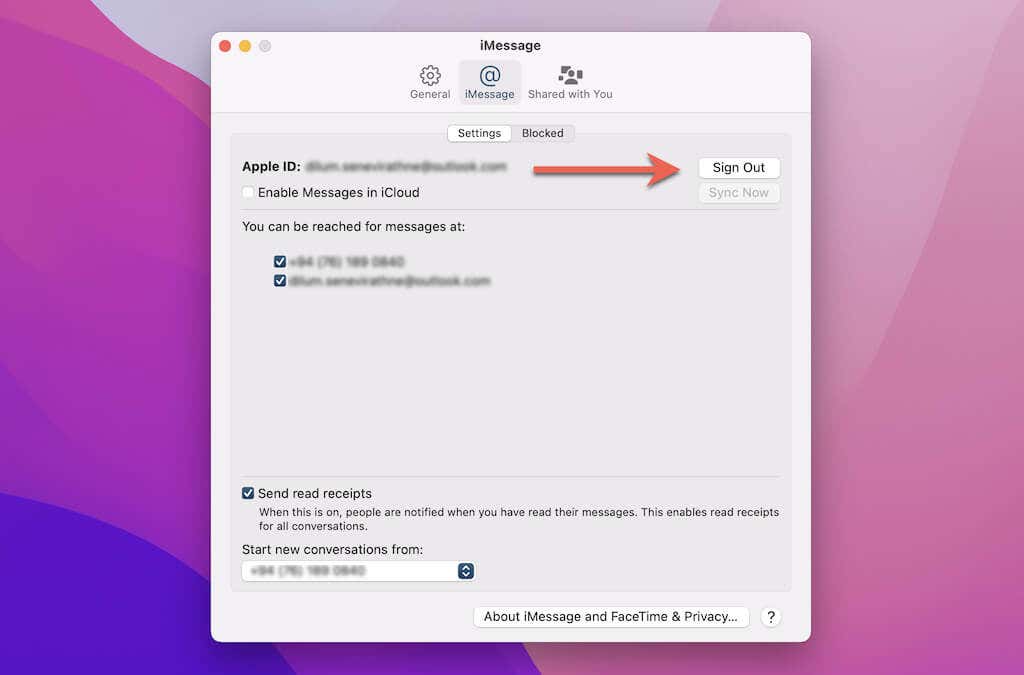
iMessage: Open the Messages app and select Messages > Preferences on the menu bar. Then, switch to the iMessage tab and select Sign Out.
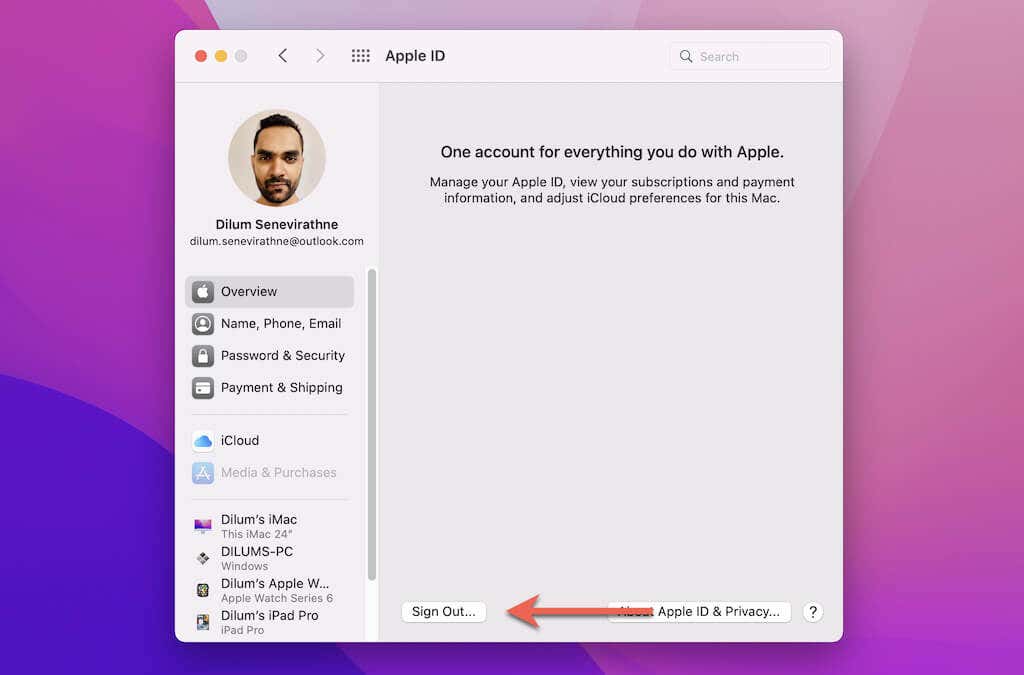
iCloud: Open the Apple menu and select System Preferences > Apple ID. Then, switch to the iCloud side tab and select Sign Out.
Enter macOS Recovery
macOS Recovery is a special recovery environment on your Mac. You can access it as you boot up your Mac with a specific key combo.
1. Shut down your Mac.
2. Hold down the Command + R keys and press the Power button to turn it back on.
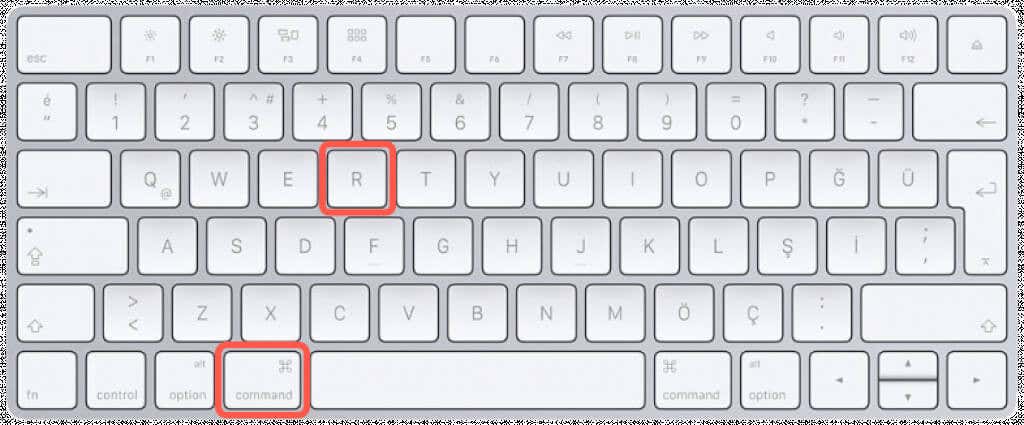
3. Release the keys once you see the Apple logo. Your Mac will enter macOS Recovery momentarily.
Erase Mac in macOS Recovery
You must use the Disk Utility app in macOS Recovery to erase your Mac.
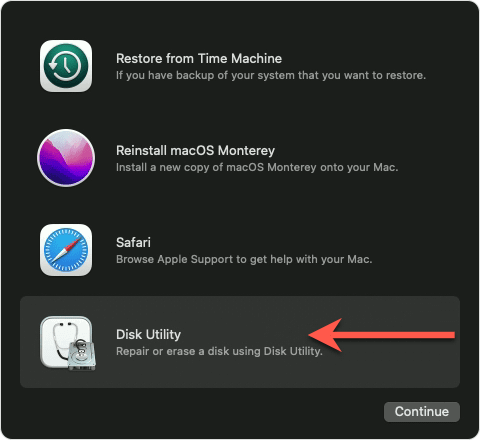
1. Select Disk Utility on the macOS Recovery menu. Then, select Continue.
2. Select Macintosh HD on the sidebar. Then, select the Erase button at the top-left of the screen.
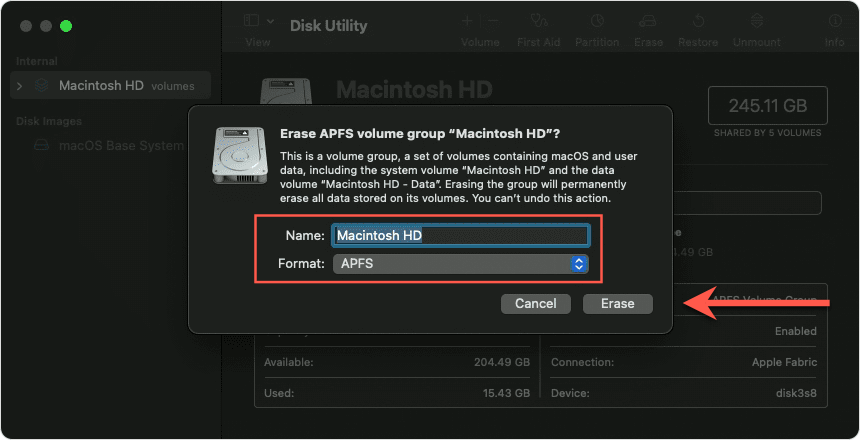
4. Set Name to Macintosh HD and Format to APFS. Next, select Erase to wipe your Mac. If you see an Erase Volume Group button, select it instead.
5. Select Done. You must then exit Disk Utility by selecting Disk Utility > Exit Disk Utility on the menu bar.
Reinstall macOS Monterey
Now that you’ve erased your Mac, it’s time to reinstall macOS Monterey.
1. Select Reinstall macOS Monterey on the macOS Recovery menu. Then, select Continue.
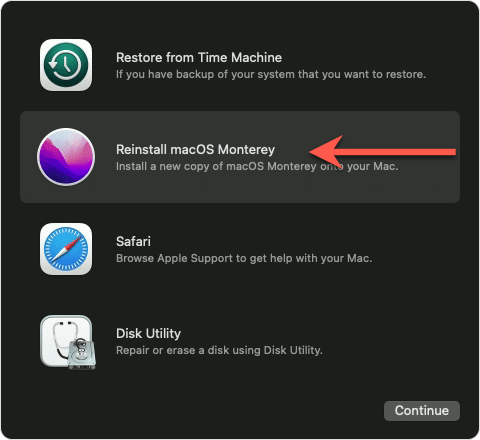
2. Select Continue and agree to the license terms. Then, choose Macintosh HD as the target disk.
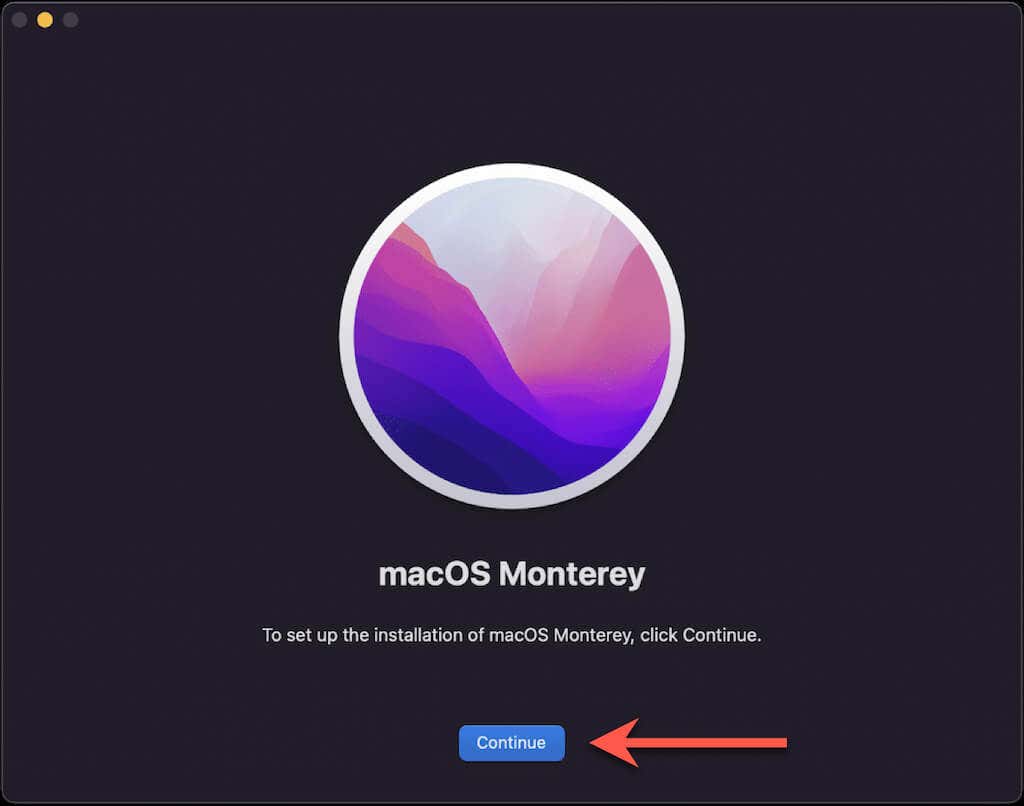
3. Wait until your Mac finishes installing macOS Monterey. That can take up to an hour or more.

4. Once the Setup Assistant shows up, press Command + Q and turn off your Mac if you plan on selling or giving it away.
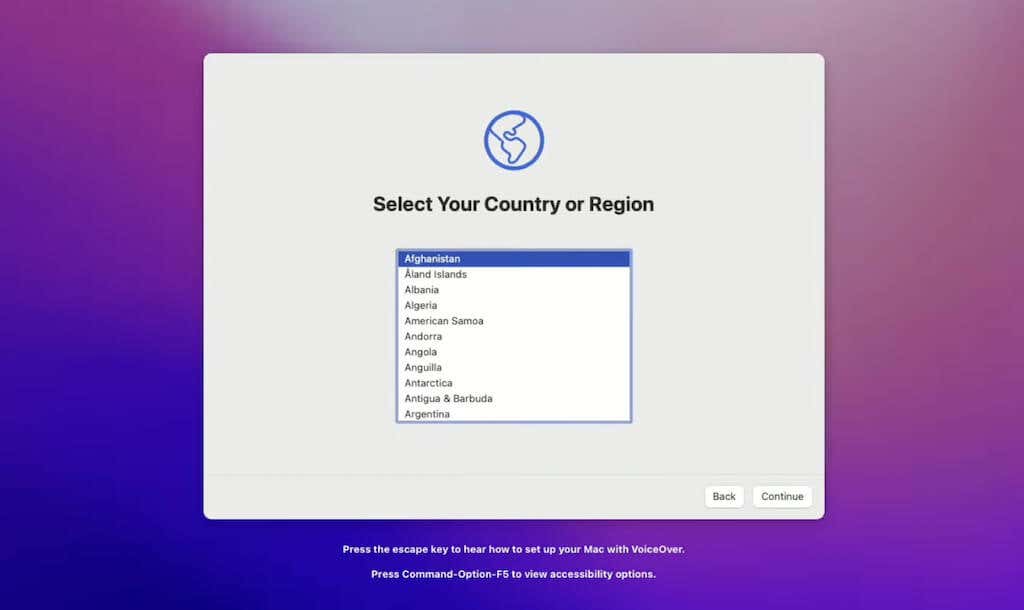
If not, work your way through the Setup Assistant to set up your Mac for personal use again. You can choose to restore your data with a Time Machine backup during the setup phase or after via the Migration Assistant.
Erase Mac Using Find My
Another method involves using the Find My app on another iPhone, iPad, or Mac that you own to reset macOS Monterey to factory defaults. This applies to any Monterey-compatible MacBook Pro, MacBook Air, iMac, or Mac mini. It’s best used if you aren’t physically close to your Mac.
1. Open the Find My app on your iPhone, iPad, or Mac. Or, sign in to iCloud.com on any web browser and select Find My.
2. Select Devices and pick your Mac.
3. Select Erase Device and select Continue to erase the Mac. If the Mac is offline, it will start erasing itself the next time it comes back online.
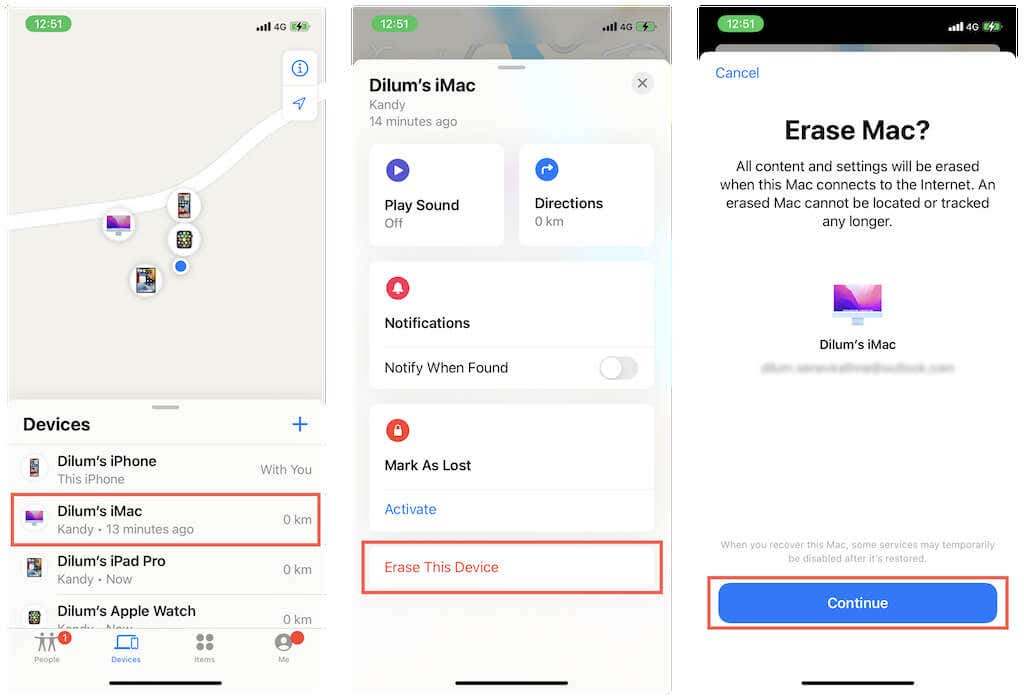
If you sold or gave away an Apple Silicon Mac or a Mac with an Apple T2 Security Chip inside, you must also select the Remove Device option to remove Activation Lock. That’s the only way to allow the new owner to set up and use the device.
macOS Monterey Reset to Factory Defaults
Thanks to the Erase Assistant, it’s pretty easy to reset your Mac to factory defaults, assuming that you use a newer Mac with an Apple Silicon or T2 chip inside. If not, you must resort to using macOS Recovery (which looks complicated but isn’t all that hard). You also have the option of using Find My if your Mac is not in your possession.


