Plus the reason why it's not working
You’ve got lots of reasons to capture what goes on within that tiny screen on your Apple Watch. Maybe it’s to brag about your latest activity streak on social media. Or perhaps it’s to take note of some weird software-related bug before asking your techie friend for advice.
But while the Apple Watch does allow you to take screenshots just as seamlessly as on an iPhone or iPad, the procedure can be complicated or confusing for first-time users. The same goes if you want to view or share them.
So if you’re just getting used to the Apple Watch (Amazon, Best Buy), you’ll figure out everything you need to know about taking, viewing, and sharing screenshots on your Apple Watch below.
How to Enable Screenshot Taking on Apple Watch
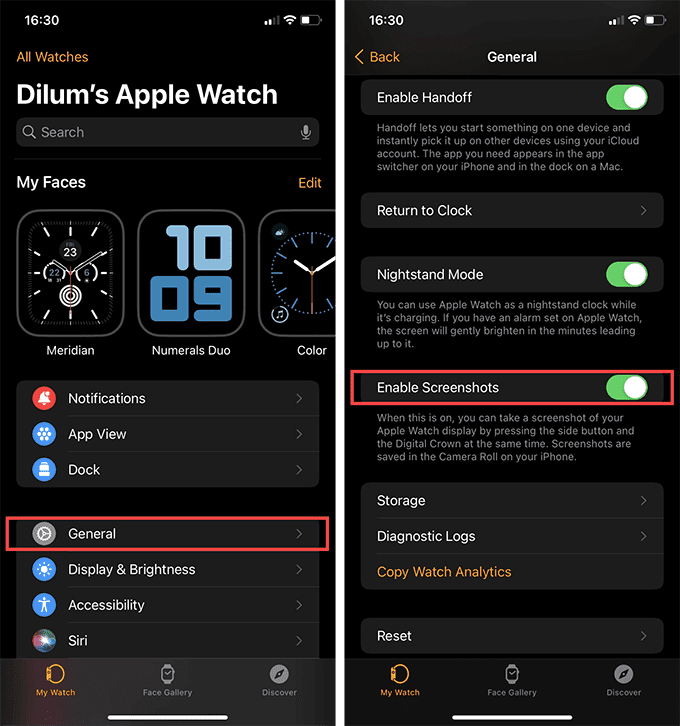
By default, the Apple Watch prevents you from taking screenshots because of how easy it is to press the screenshot button combo (more on that later) accidentally. But you can activate the function whenever you want by diving into the Watch app on your iPhone. Or, you can choose to do that via the Settings app on your Apple Watch itself.
Enable Apple Watch Screenshots Using iPhone
1. Open the Watch app on your iPhone.
2. Switch to the My Watch tab (if you aren’t already on it) and tap General.
Note: If you use more than a single Apple Watch, tap the All Watches option (located at the top-left of the My Watch tab) and pick the correct smartwatch.
3. Scroll down the screen and turn on the switch next to Enable Screenshots.
Enable Apple Watch Screenshots Using Apple Watch
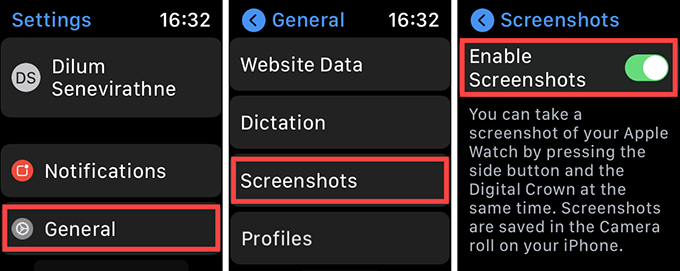
1. Press the Digital Crown on your Apple Watch to bring up your apps.
2. Open the Settings app by tapping the gear-shaped icon.
3. Tap General.
4. Scroll down the screen and tap Screenshots.
5. Turn on the switch next to Enable Screenshots.
How to Take Screenshots on Apple Watch
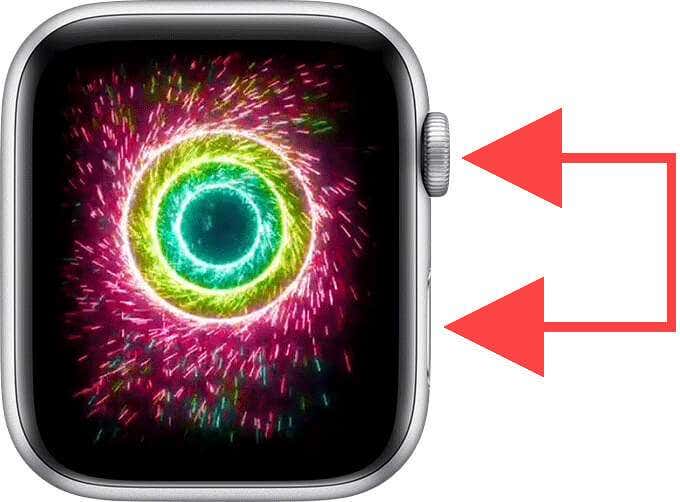
Once you’ve enabled screenshots on an Apple Watch, simply press the Digital Crown and Side buttons simultaneously to grab a screenshot. The screen should flash white, and you should hear an audible “click” as confirmation.
Just keep in mind that you don’t have to be precise about pressing both buttons simultaneously. You can hold down the Digital Crown first and immediately follow that by squeezing the Side button (or vice versa).
Note: If you take a screenshot using the button combination above on the Workout app, that shall also prompt the Apple Watch to pause your workout. You must press both buttons again (or manually swipe to the left of the app and tap Resume) to resume it.
How to View Apple Watch Screenshots
Once you’ve finished taking a screenshot, you must use the Photos app on your iPhone to view it. You’ll find it within All Photos under the Library tab, or inside Recents under the Albums tab. But the best way to locate them quickly is to tap Screenshots under Albums > Media Types.
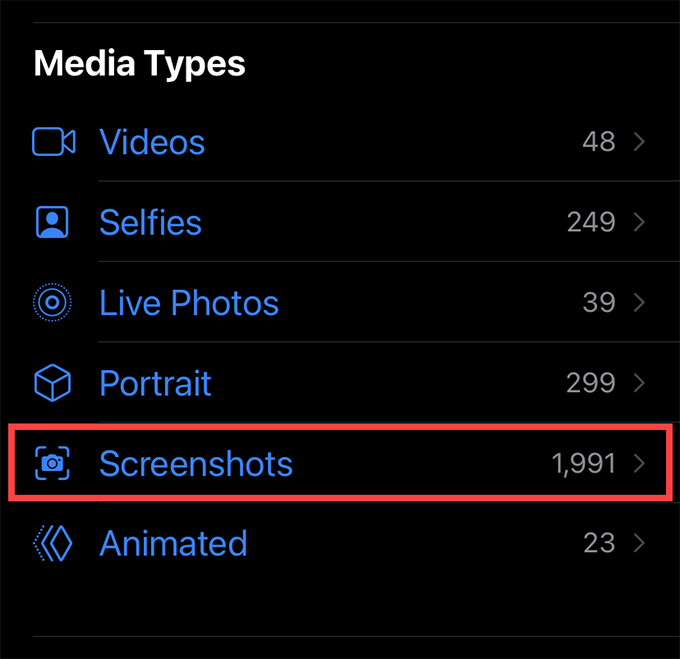
You can’t view your screenshots on the Apple Watch itself since the Photos app on your smartwatch only syncs the Favorites album from your iPhone. But if you want to, you can mark an image as a favorite (long-press the screenshot thumbnail and tap Favorites), and it should show up on your Apple Watch momentarily.
Alternatively, you can set Recents as the default album on your Apple Watch. That should prompt any screenshots to sync back from the iPhone to your Apple Watch automatically.
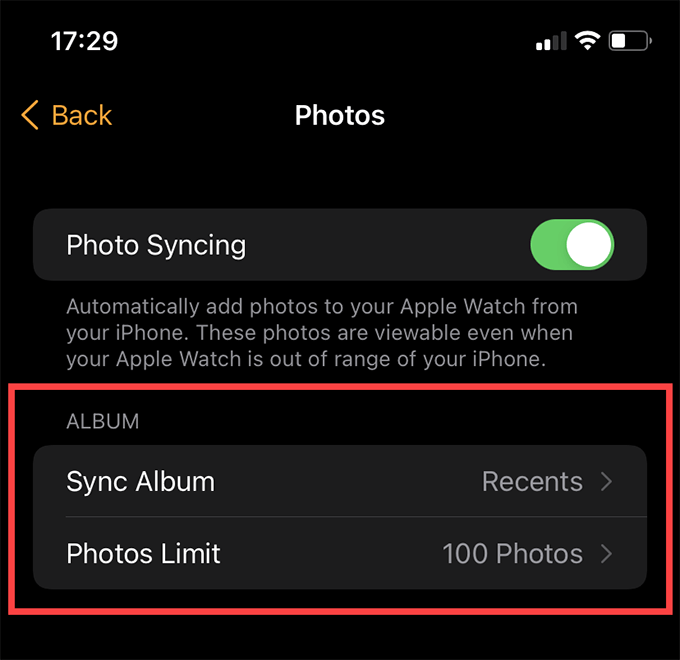
To do that, open the iPhone’s Watch app and select Photos within the My Watch tab. Follow by picking Recents next to Sync Album. You may want to set a lower photo limit under Photos Limit to prevent the internal storage on your Apple Watch from filling up faster.
How to Share and Edit Apple Watch Screenshots
You can share your screenshots just like any other image from your iPhone. Just long-press an image thumbnail and tap Share. You can then choose to share it over AirDrop or an app such as Messages, WhatsApp, or Mail via the Share Sheet.
Alternatively, you can long-press and select Copy and follow that by manually pasting it elsewhere (such as an attachment in an email or to a storage location within the Files app).
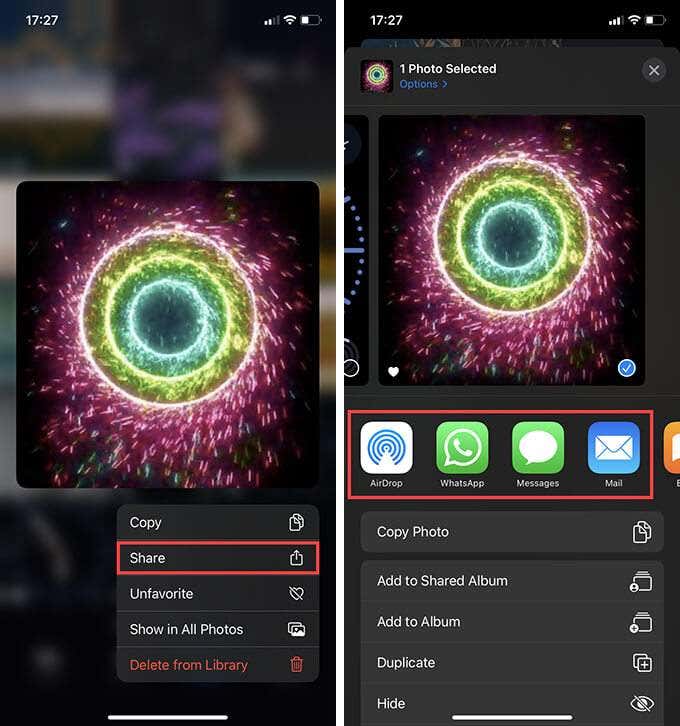
If you want to share multiple screenshots simultaneously, tap Select to the top-right of the Photos app screen. Then, select the items and tap the Share icon to the screen’s lower-left to invoke the Share Sheet.
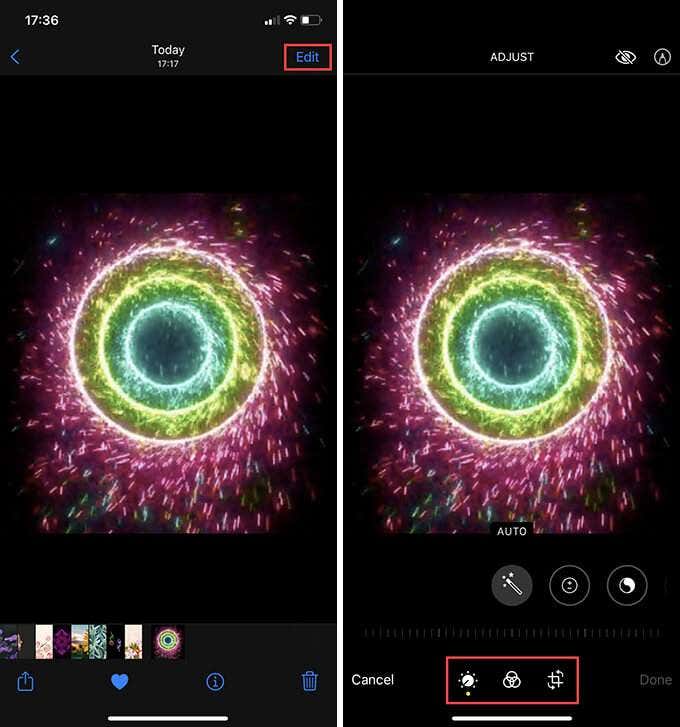
You can also edit your screenshots before sharing them. For example, you can zone in on a specific area that needs attention by cropping or marking the image. Just tap an image and select Edit to gain access to your photo editing tools.
However, you can’t share screenshots (or other images) via your Apple Watch, even if you’ve chosen to sync them to the device via your iPhone.
Can’t Take Screenshots on Apple Watch? Here’s Why
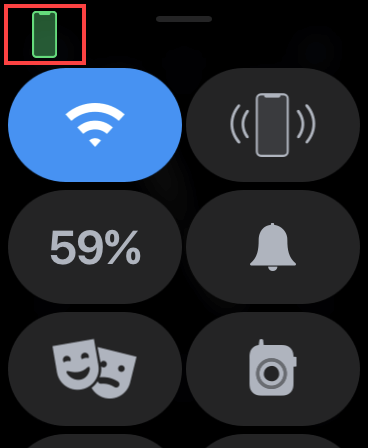
If your Apple Watch screenshots fail to appear on the iPhone, that’s likely due to communication issues between the devices. You can confirm that by bringing up the Control Center on your smartwatch (swipe up from the bottom of the screen). Also, if you see a red-colored iPhone symbol at the top of the screen, the device lacks a connection to your iPhone.
You can fix that by moving the Apple Watch and iPhone close to each other and ensuring that Bluetooth and Wi-Fi are active on both devices. Once everything’s okay, you’ll see a green-colored icon on the Apple Watch’s Control Center. Any screenshots that you’ve already taken should then show up within the iPhone’s Photos app.
Furthermore, your iPhone must have enough free space to store your Apple Watch’s screenshots. So if it’s running low on storage, go to Settings > General > iPhone Storage and use storage recommendations within the screen to increase available storage. You can also try reducing the “Other Storage” on your iPhone.
Finally, some apps or areas on the Apple Watch may stop you from capturing screenshots by design. That could be due to the presence of sensitive information or copyrighted content.
Start Capturing Your Apple Watch’s Screen
Capturing screenshots on the Apple Watch comes naturally after a few attempts. However, Apple needs to improve how the whole process works. Ideally, Apple should let us save our screenshots on our smartwatch itself without depending on an iPhone. But what are your thoughts? Sound off in the comments below.


