Don’t work harder; work smarter. That phrase was coined in the 1930s, but it’s still applicable today. Nobody wants to waste hours doing something the long way when a few keystrokes could help get it done in just a few seconds.
To help you increase your efficiency on your Mac, we’ve selected five tips that are easy to implement. You’ll get your work done faster, so you can have more time to play.

macOS Tip #1: Configure Spotlight Search
If you haven’t used Spotlight before, you should. Spotlight search can locate files, find information on the web, and even perform basic math calculations. Best of all, you can access it via a simple keyboard stroke.
Use the steps below to configure what items Spotlight will search for and how to use it.
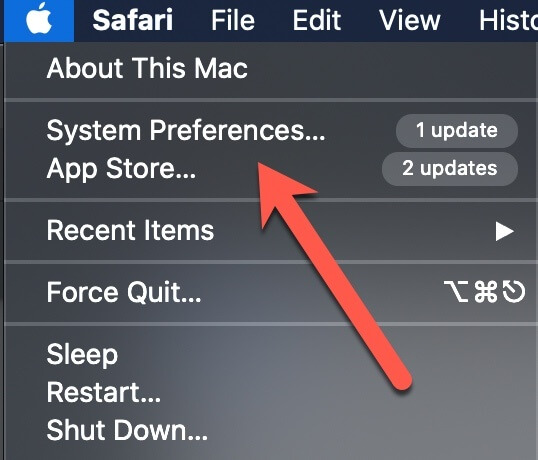
1. Open System Preferences from the Apple Menu in the upper left-hand corner.
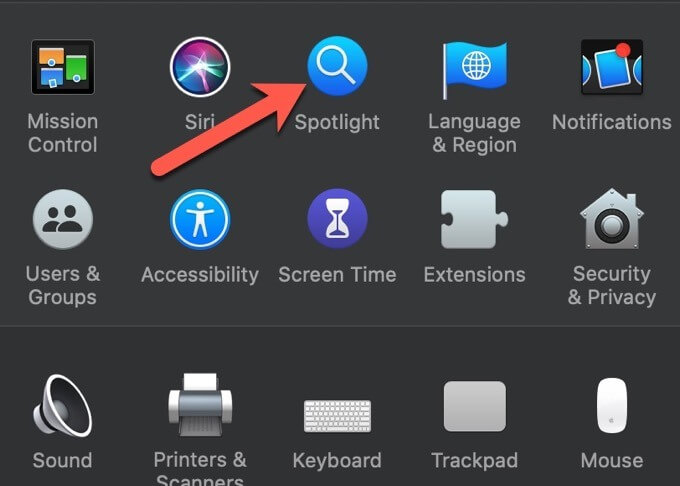
2. Select Spotlight in the preferences.
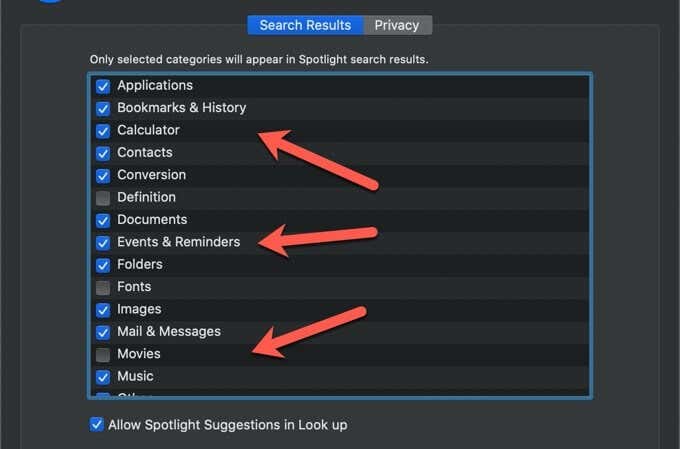
3. Use the checkbox to select the categories you want Spotlight to search. Uncheck the categories you don’t want Spotlight to search.
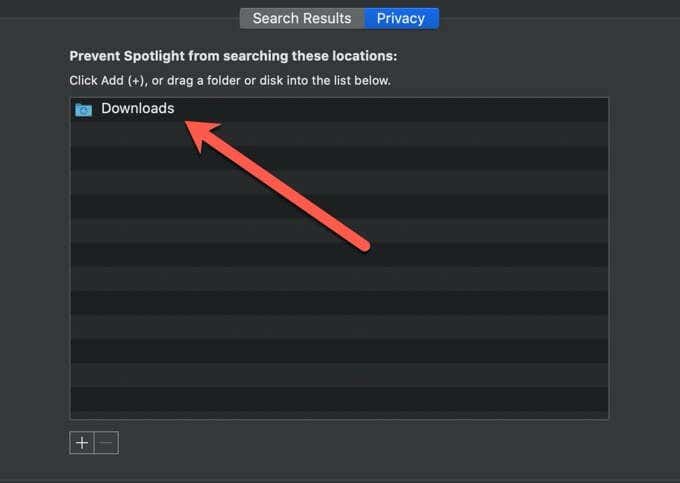
4. Select the Privacy tab. Add folders you don’t want Spotlight to search.
You can use Spotlight search by selecting the magnifying glass in the upper-right corner of your screen or by using the Command+Space bar keyboard shortcut. When Spotlight search opens, you can enter a word or phrase into the search bar and Spotlight will display the results.
macOS Tip #2: Create Text Shortcuts
macOS lets you create text shortcuts that automatically expand into longer text phrases. You can even add emojis to your text phrase.
For example, you could set up macOS to replace $rec with “I received your message and will respond soon.” These shortcuts can be a huge timesaver, and they’re super easy to set up.
1. Open System Preferences from the Apple Menu in the upper left-hand corner.
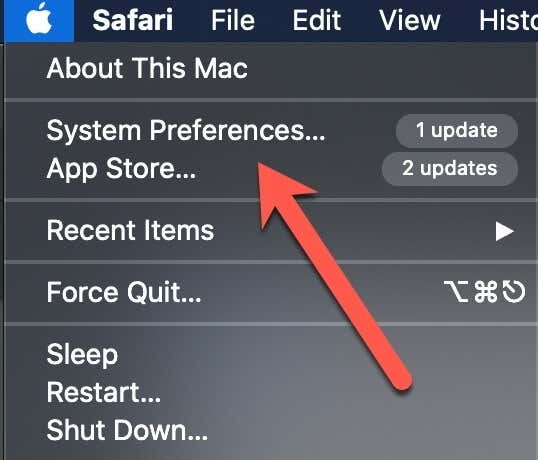
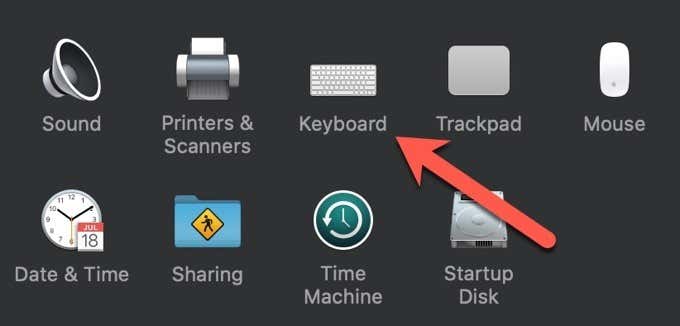
2. Select Keyboard in the preferences.
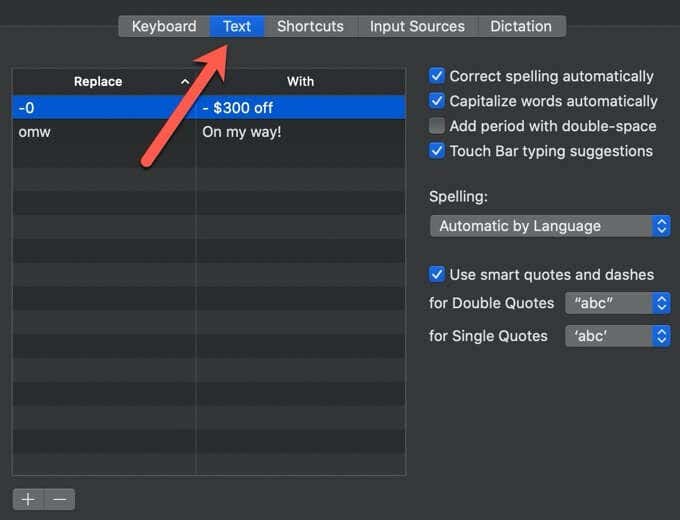
3. Select the Text tab.
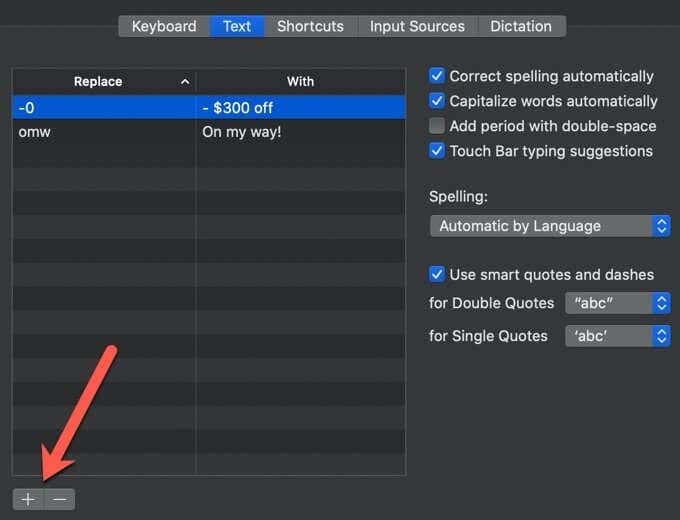
4. Find and select the + button in the bottom left corner.
5. Enter your shortcut in the Replace column. Choose a shortcut that is unique and not text that you would commonly type. Use a symbol like % or ~ if needed.
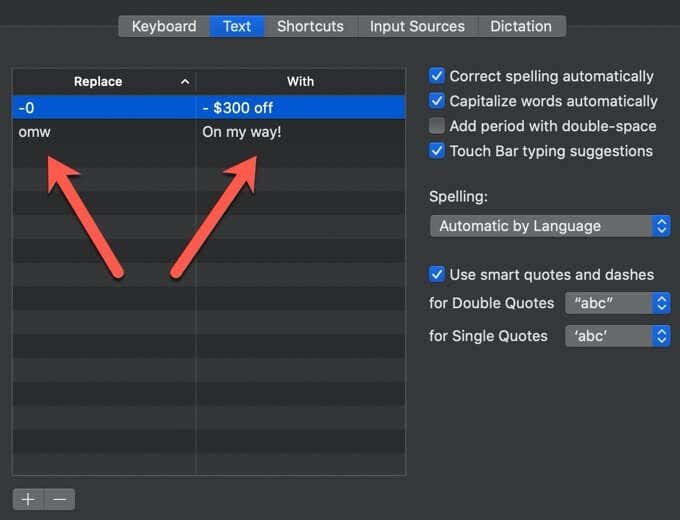
6. Enter the complete text string in the With column.
Once added, you can type your shortcut into any text field, and macOS will replace it automatically.
macOS Tip #3: Use Hot Corners
If you’ve never heard of Hot Corners you’re not alone.
This often-overlooked feature allows you to perform an action when you hover your mouse in one of the four corners of your display. You can choose to lock your screen, show the desktop, and more. You’re limited in what tasks you can perform, but the available ones are useful.
Setting up your hot corners takes just a few easy steps. Follow these steps below to get started.
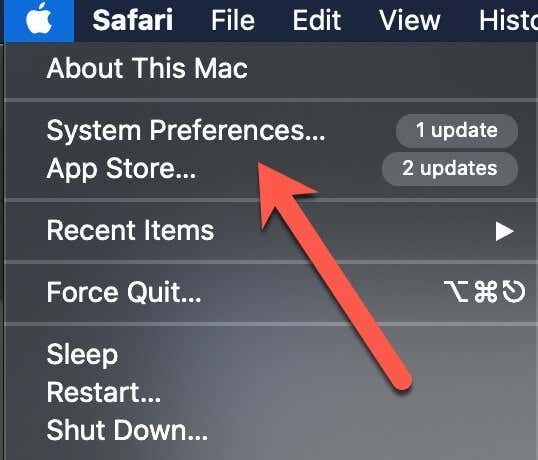
1. Open System Preferences from the Apple Menu in the upper left-hand corner.
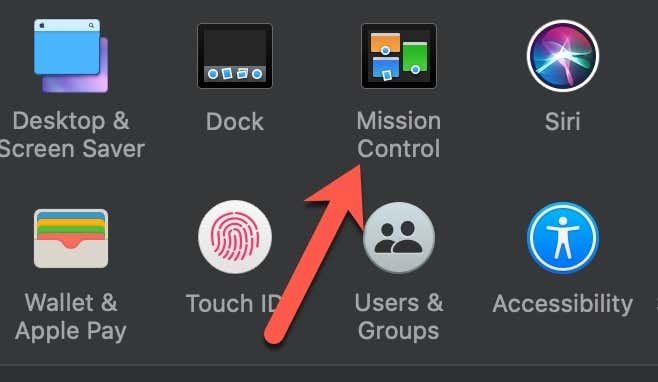
2. Select Mission Control in the preferences to open the Mission Control settings.
3. Select the Hot Corners button.
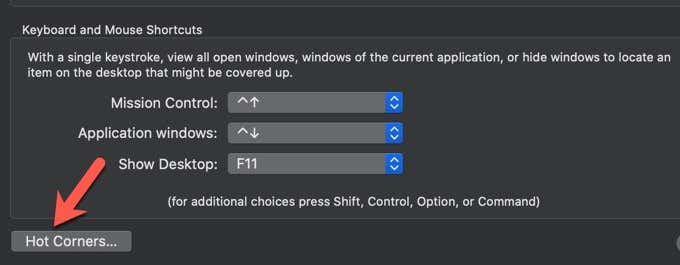
4. Use the drop-down menu to select the action for each corner.

Select OK when done.
To use your hot corners, you simply need to move your mouse to the edge of the display in that specific corner.
macOS Tip #4: Safari Picture-in-Picture
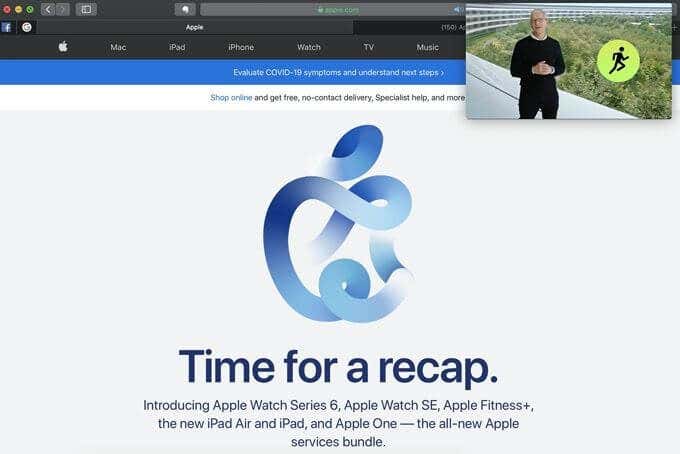
Do you often watch a video tutorial in one window and then work in another window? Are you tired of continually clicking between the two? If you use Safari, you can end this cycle of switching by using its picture-in-picture feature.
You need to use Safari, but it works with any video streaming service, including YouTube, Vimeo, and others.
1. Open Safari and select the + in the right corner to open a new tab.

2. Start playing a video on YouTube, Vimeo, or another video service in this tab.
3 Look for the audio icon in the tab and right-click on it to display a drop-down menu.

4. Select Enter Picture in Picture to open the video in a smaller window

5. The picture-in-picture video will now float on top of your browser window.

You can work in your browser and open other apps and the video will stay on top for you to view. You also can drag the video to any corner of the screen that you prefer. To exit picture in picture, simply click on the video and select the X in the upper left corner.
macOS Tip #5: Useful Keyboard shortcuts
There are many keyboard shortcuts inside macOS. It’s almost impossible to learn them all, so we made it easier for you by choosing ten of the most important ones to commit to memory.
- Screenshot tools: Use Command+Shift+3 to screenshot an entire window, Command+Shift+4 to screenshot a selected area, and Command+Shift+5 to open a suite of screenshot tools, including video (macOS Mojave). Usually, the screenshots are saved to your desktop, but you can quickly copy them to the clipboard. Just add the Control key when you are using the screenshot keyboard shortcuts. For example, Control+Command+Shift+3 will screenshot an entire window and copy it to the clipboard.
- Close an app: Use Command+Q to quickly hide an app from prying eyes by closing it with this simple keystroke.
- Forward Delete: By default, the delete key in macOS deletes backward by removing the characters to the left of the cursor. Press Function+delete to delete in the forward direction by removing characters to the right of the cursor.
- Move between apps: Hold the command key and tap the tab key to cycle between apps.

- Move between windows within an app: Use Command+Tilde (~) to cycle between windows.
- Minimize a window: Command+M will minimize the active window, while Command-Option-M will minimize all open windows.
- Force Quit: Use Command+Option+Esc when an app is frozen and you need to force it to shut down.
- Lock your Mac: Use Command+Control+Q to lock your Mac.
- Open Spotlight Search: use the Command+Space bar to launch Spotlight and search.
- Open Emojis and Special Characters viewer: Control+Command+Space bar in any text field will open the Emojis and Special Characters viewer.
These keyboard shortcuts are helpful, but these are only the tip of the iceberg. Check out our full-length article for a comprehensive list of keyboard shortcuts.
Using macOS Tips and Tricks to Be More Productive
These tips and tricks will help you work more efficiently, but you can do so much more with your macOS-powered computer. If you’re coming from Windows, we have a handful of tips that’ll make the transition easier. Once you master the basics, you can install power productivity apps like Alfred on your Mac or use these advanced tips that’ll teach you how to use boolean operators, currency converters, and more.
[related_posts_by_tax posts_per_page="5"]