Plus, what you should do first
Apple introduced APFS (Apple File System) in macOS 10.12.4 Sierra and fully implemented it as the default file system with macOS 10.13 High Sierra. Compared to the older HFS+ (or Mac OS Extended) file system, APFS provides critical advantages for solid-state drives in particular.
For example, APFS sports incredibly fast copy/write speeds manages storage efficiently, and is less susceptible to data corruption. If you want to know more, here’s our in-depth take on APFS versus Mac OS Extended.

If you want to format or convert a drive or partition with the APFS file system, the following instructions should help you.
Before You Start Converting
If you bought a Mac with macOS 10.13 High Sierra or later preinstalled, the internal storage uses the APFS file system by default. If you upgrade from macOS 10.12 Sierra to a newer version, the conversion will automatically take place.
But if you still have a drive or partition (internal or external) in HFS+ or a different format (such as exFAT), you can convert it to APFS using the Disk Utility app in macOS.
APFS is geared toward solid-state drives, but you can convert or format both fusion and mechanical hard drives without issues. However, if you plan on using an external drive with an older Mac running macOS 10.11 Capitan or earlier, converting or formatting the drive will make it unreadable.
Disk Utility supports the following APFS formatting options:
- APFS
- APFS (Encrypted)
- APFS (Case Sensitive)
- APFS (Case Sensitive, Encrypted)
While erasing a drive or partition, selecting APFS should suffice. Don’t get too caught up in the other options unless you prefer an encrypted or case-sensitive file system. Depending on the existing file system and partition scheme, you may also be able to convert a drive or partition to APFS without losing any formatting.
Important: Time Machine supports APFS starting macOS Big Sur. But if you have an older Time Machine drive in the HFS+ format, you can’t convert it to APFS without losing data. It’s a good idea to stick with the older file system unless you set up a new Time Machine drive.
Convert Drives and Partitions to APFS (Non-Destructive)
With the GUID Partition Map, you can non-destructively convert an HFS+ drive or partition (except for older Time Machine drives). That allows you to preserve any existing data.
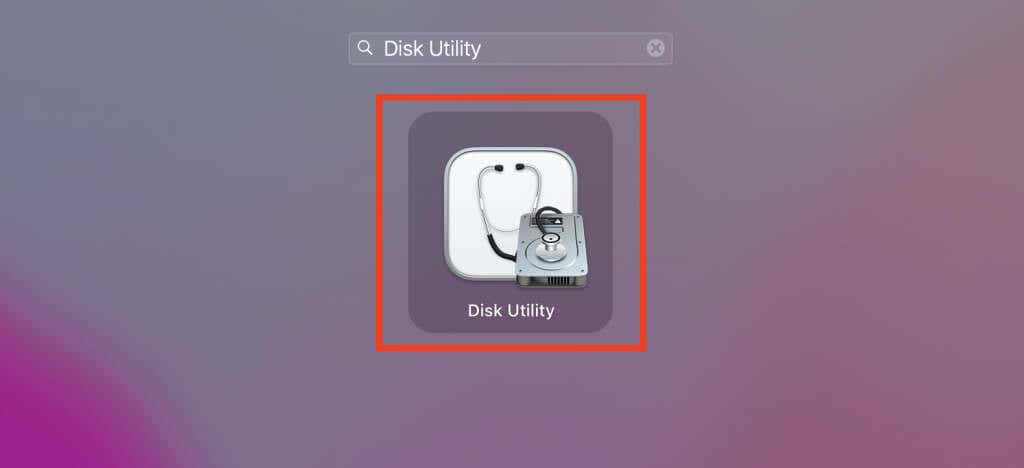
1. Open the Launchpad and select Other > Disk Utility to open Disk Utility.
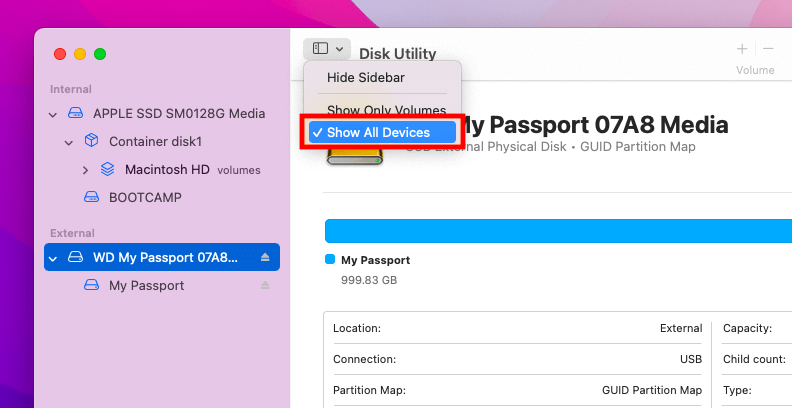
2. Set the Disk Utility’s sidebar to Show All Devices.
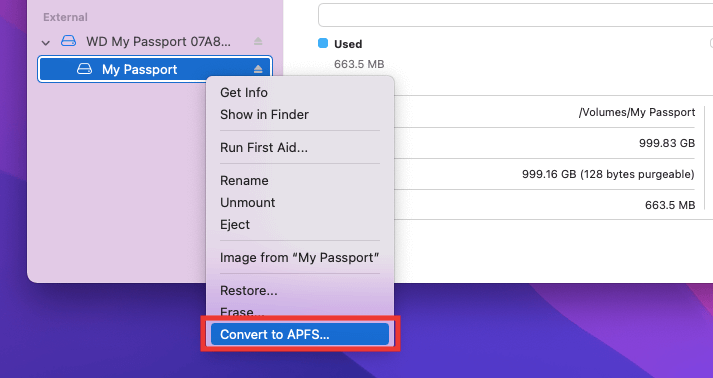
3. Control-click a partition within the drive and pick the Convert to APFS option.
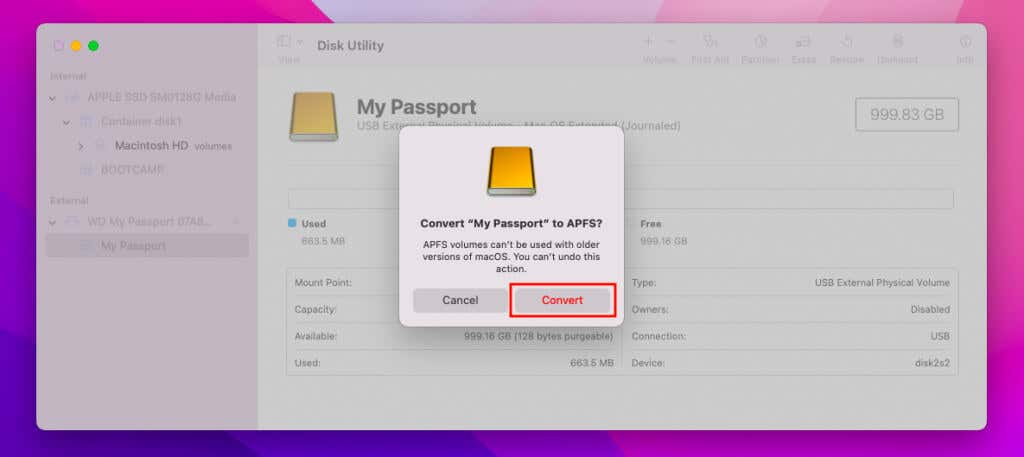
4. Select Convert.
5. Wait until Disk Utility finishes converting the partition. Then, select Done.
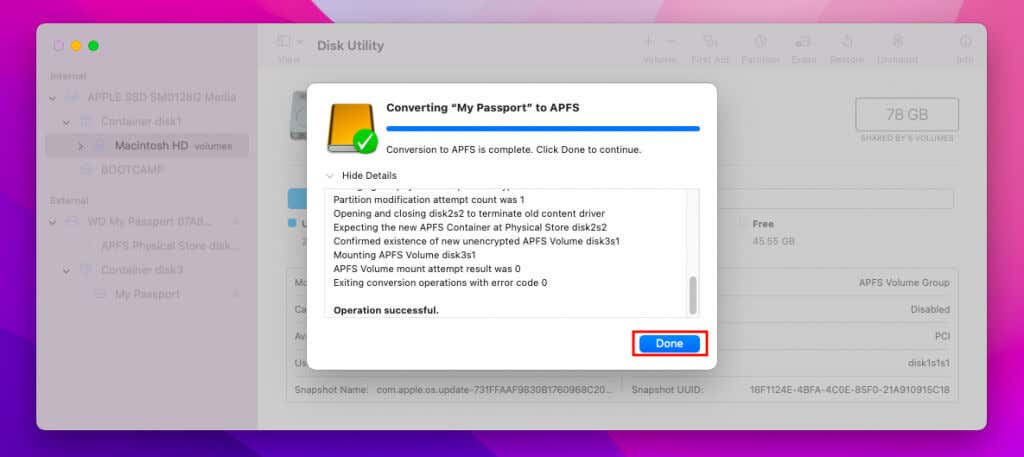
The partition will show up as a volume within an APFS container. You can add multiple volumes to the container (you’ll learn about that further below).
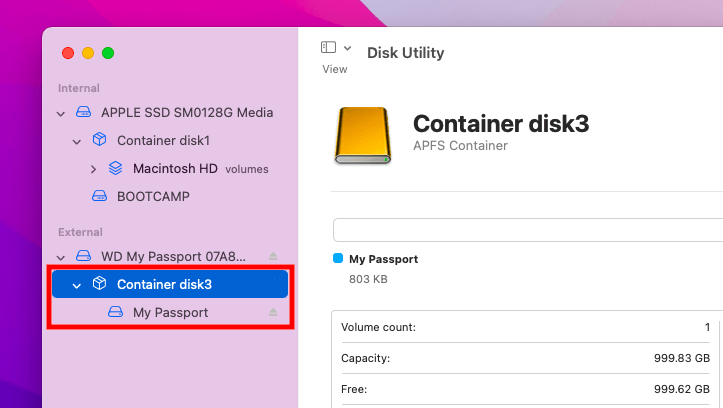
If the drive contains additional partitions you want to convert, repeat steps 3–5.
Format a Partition or Drive to APFS (Destructive)
You can also convert (or format) a partition or drive by erasing all data on it. That’s the only way to convert partitions and drives that don’t use HFS+ or feature a different partition scheme other than the GUID Partition Map.
1. Set the Disk Utility sidebar to Show All Devices and pick the partition or drive to format.
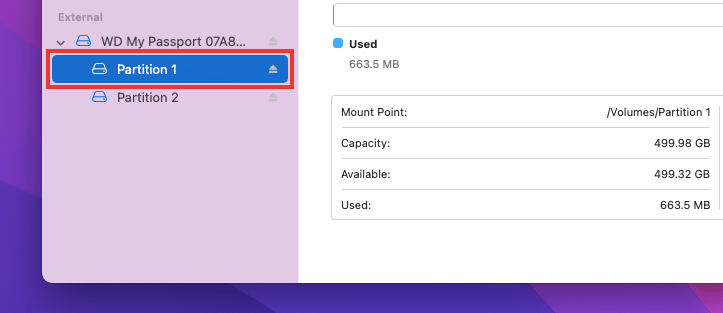
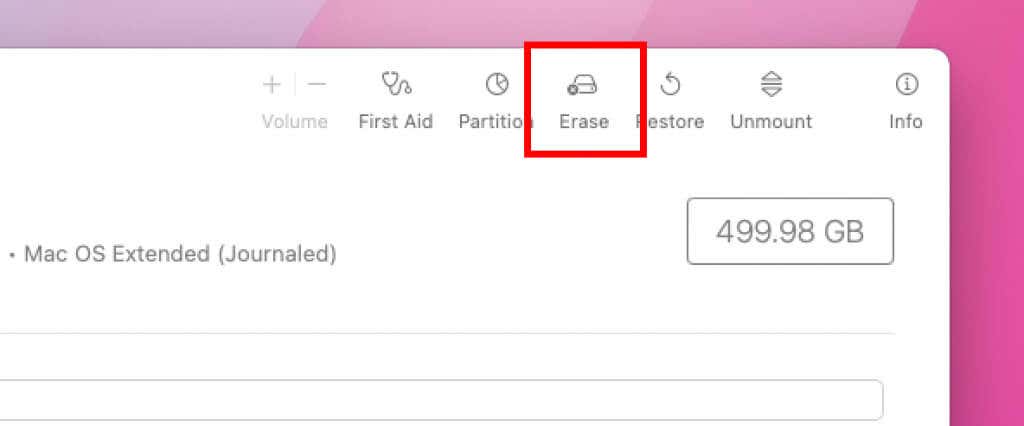
2. Select the button labeled Erase.
3. Specify a new name for the partition and select APFS. If you opted to format the entire drive, you must pick a partition scheme. Set it to GUID Partition Map. Then, select Erase.
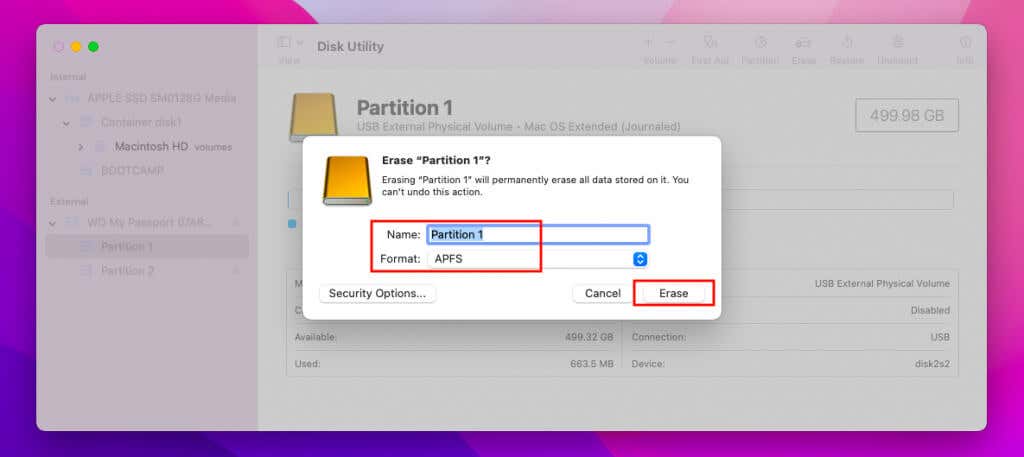
4. Wait for Disk Utility to finish formatting the partition or drive. Then, select Done.
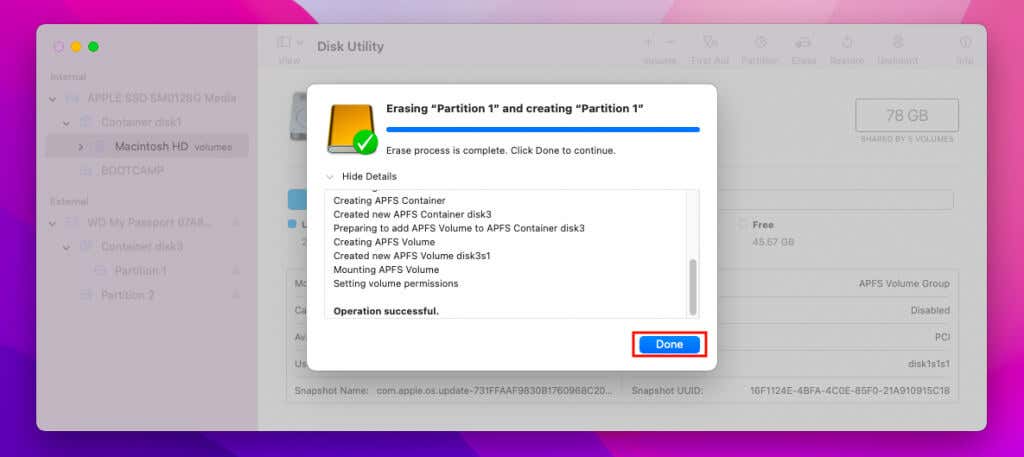
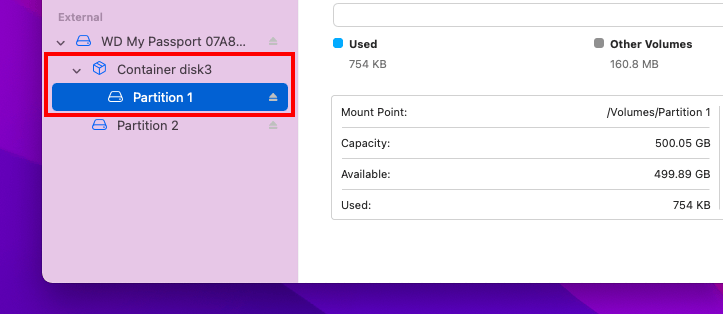
The partition will appear within a new APFS container. If you want to format any other partitions, repeat steps 2–5.
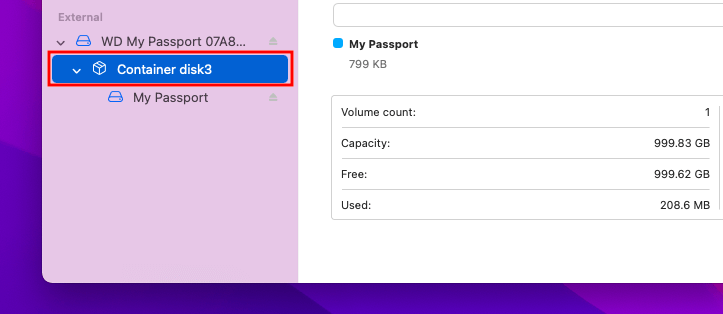
If you formatted the entire drive, you’ll see a single partition within an APFS container.
Create New Volumes in an APFS Container
After converting or formatting a partition or drive to APFS, you can easily create new volumes within the APFS container. These volumes can make use of free space dynamically without restricting themselves to a predefined size, which is one of the key advantages of the format.
1. Configure the Disk Utility sidebar to Show All Devices and pick an APFS container.

3. Select the Plus icon.
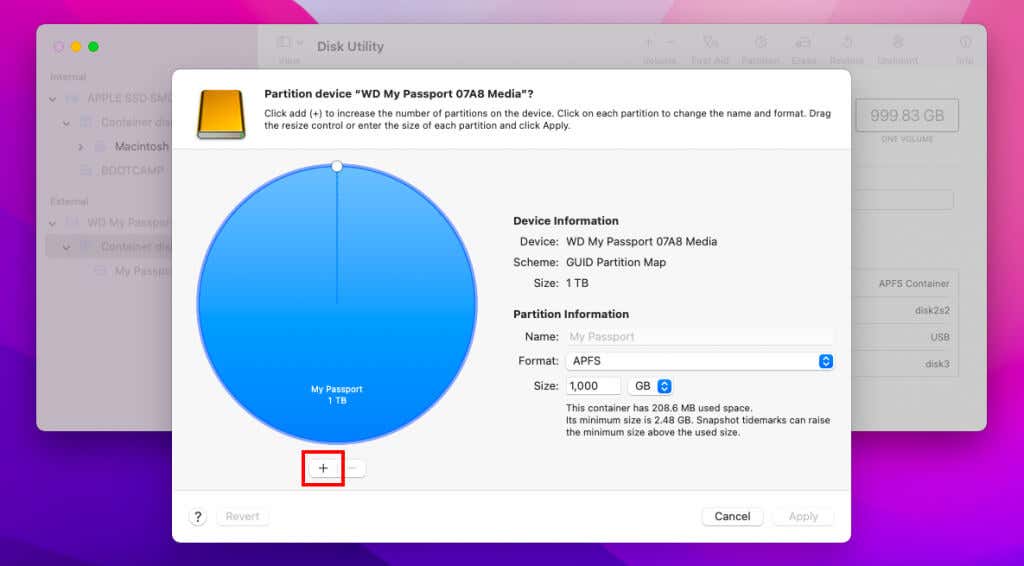
4. Select Add Volume.
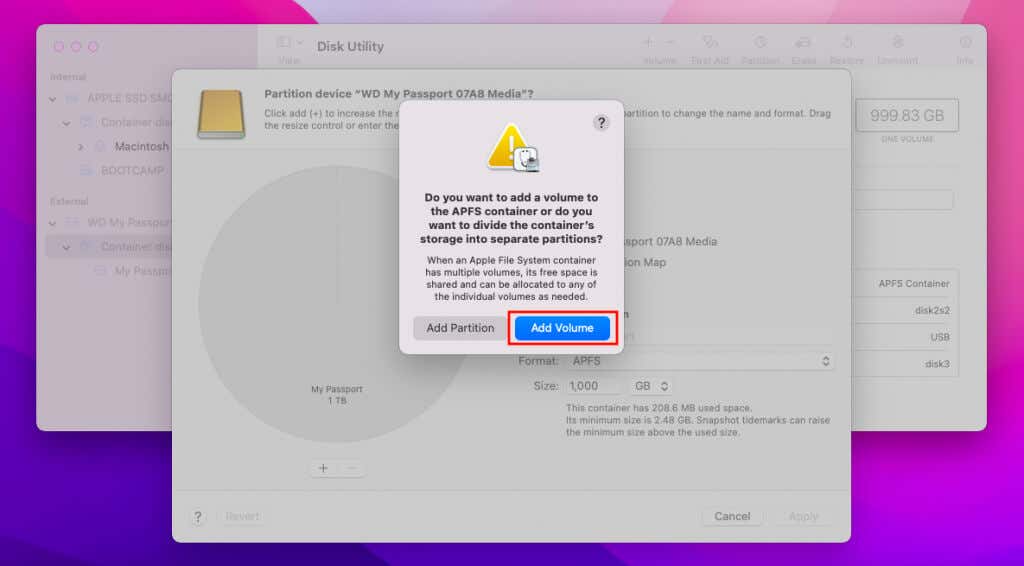
5. Select Size Options. Skip to step 7 if you don’t want to define a size for the volume.
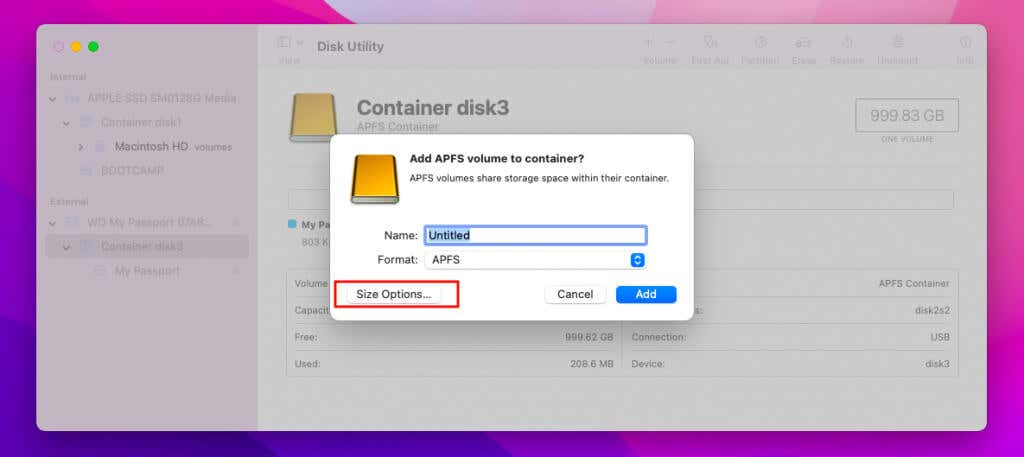
6. Specify the Quota Size (the size of the volume) and Reserve Size (the amount of additional space the volume can access) and select OK.
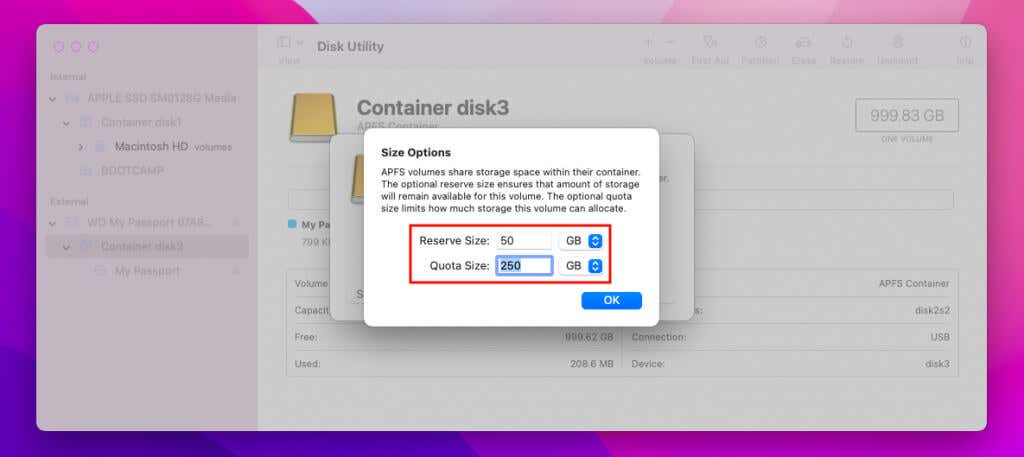
7. Add a label for the volume. Then, specify the format (APFS) and select Add.
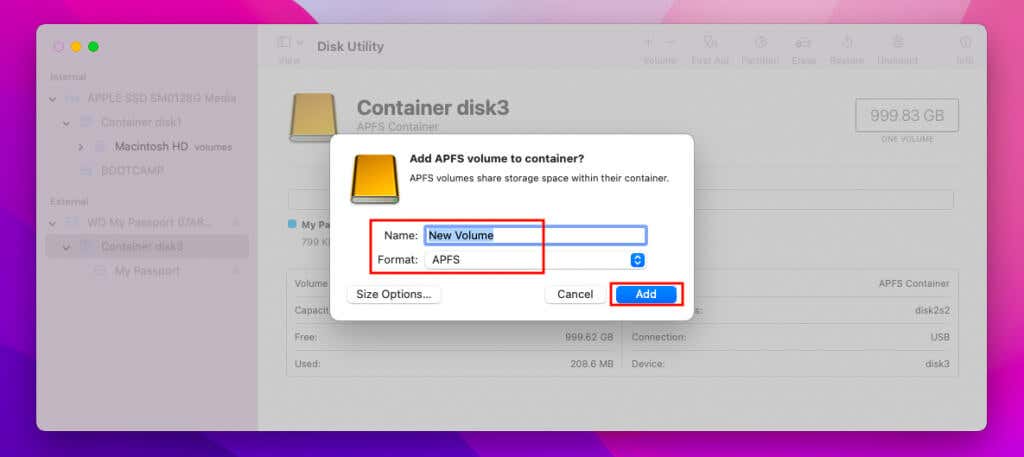
8. Wait until the Disk Utility finishes creating the volume. Then, select Done.
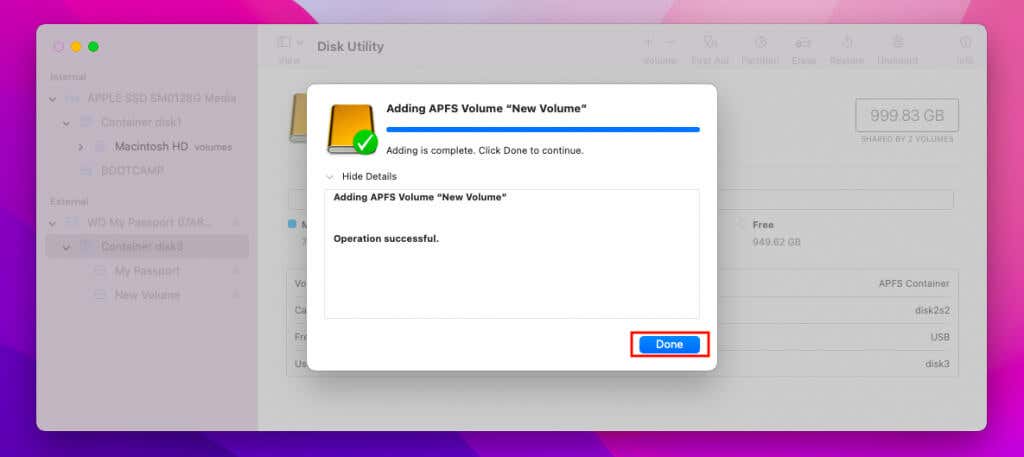
The volume should appear under the APFS container. You can create additional volumes whenever you want.
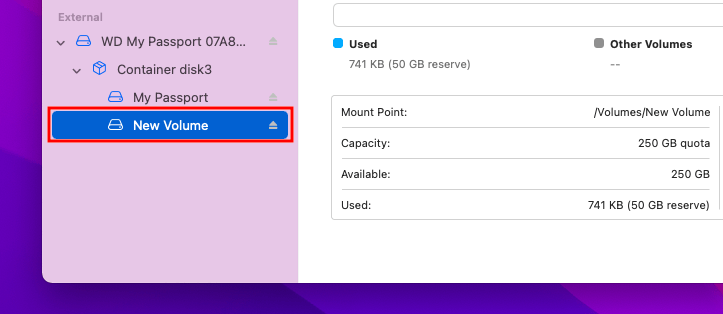
If you want to add a new APFS container, select Add Partition in step 4. You can do that by splitting a drive or an existing container.
Format in APFS While Creating a New Partition
If you have a drive in a different format (such as HFS+ or exFAT), you can create a new APFS container by partitioning the disk. You’ll lose data if you don’t have enough free disk space.
1. Select the drive within the sidebar in Disk Utility.
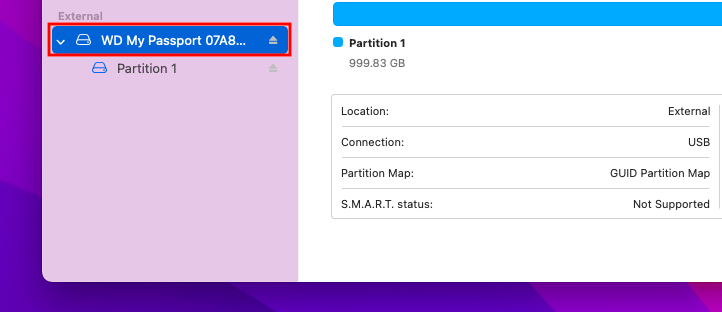
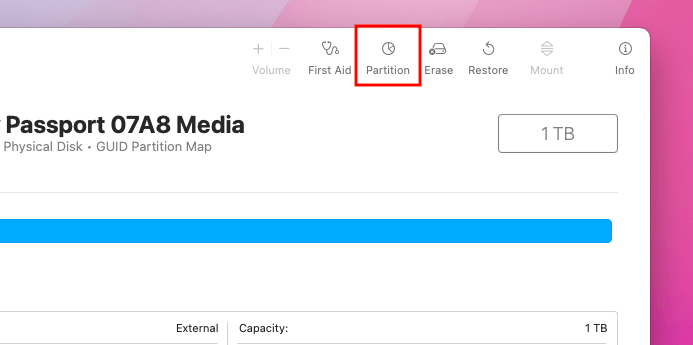
2. Select the Partition button.
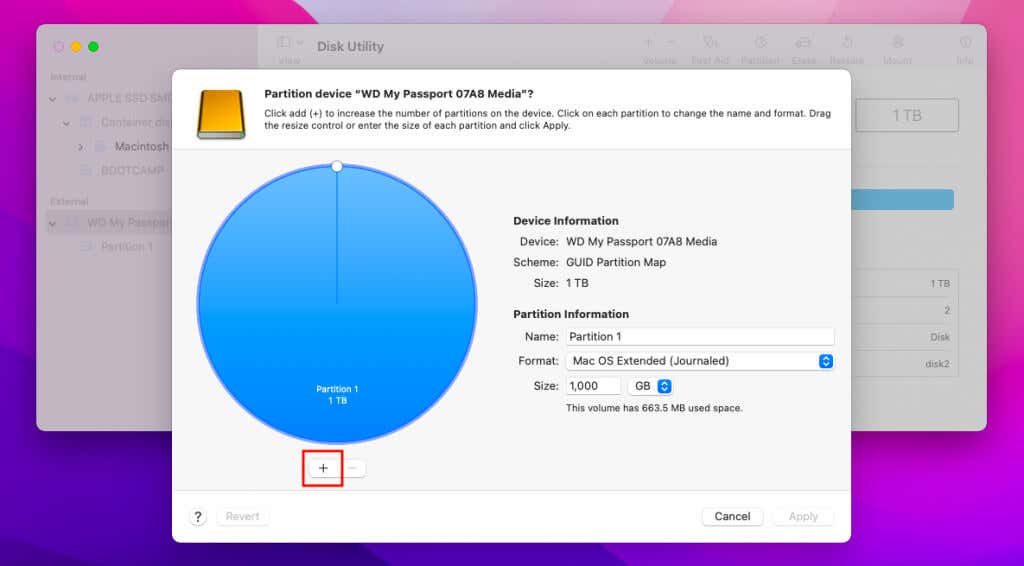
3. Select the Plus button.
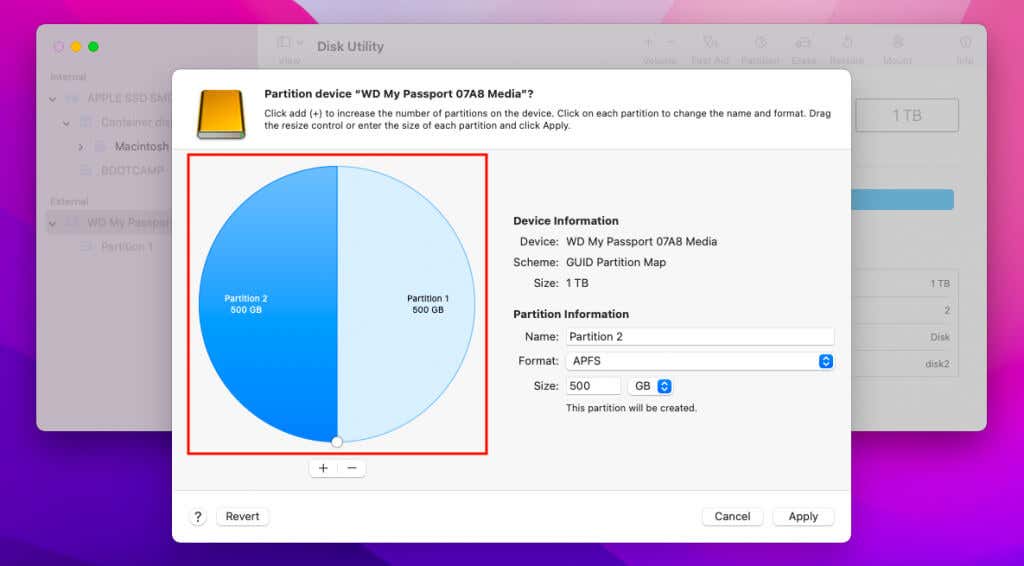
4. Use the disk graph to specify the size of the APFS container. Or, enter its size into the field next to Size.
5. Add a name for the partition and select APFS as the format. Then, select Apply.
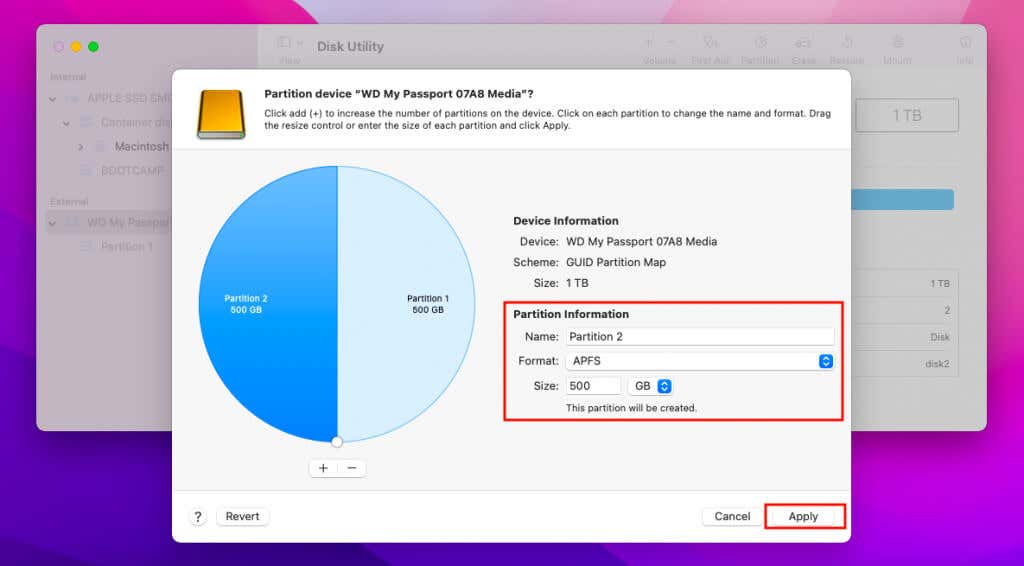
6. Select Partition.
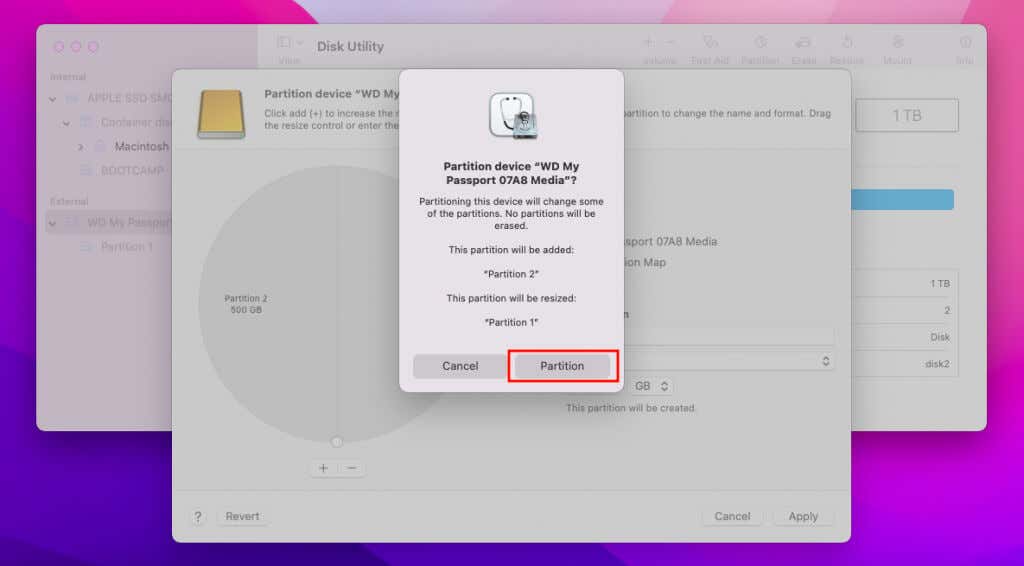
7. Wait until the Disk Utility finishes creating the APFS partition. Then, select Done. The APFS partition will show up as a container (with a volume inside).
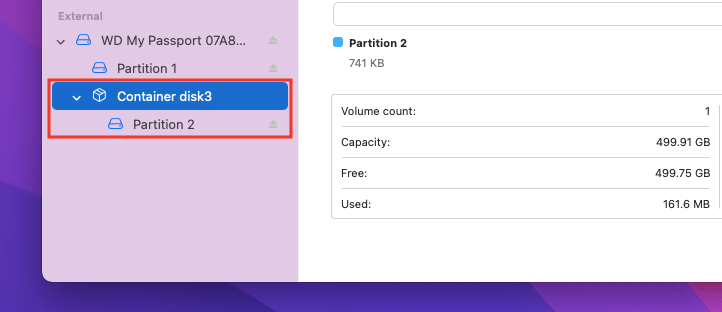
You can continue to add new volumes into the APFS container (see the section above). Or, you can create new containers by partitioning the drive or splitting the existing APFS container.
APFS Formatted Drives and Partitions
Whether it’s an SSD or a mechanical hard drive, the net benefit of converting or formatting partitions and drives in APFS can be significant. However, compatibility is an issue, so don’t format any external storage devices in APFS if you plan on using them on older Macs.


